Egon's Pompadour wrote:Awesome work, man! I've been wanting to get into this hobby myself. If you don't mind me asking, can you suggest any resources for learning this craft? Keep up the good work!
Okie Doke, sorry for my delay, yesterday ended up getting a crack on with scoring the bricks on the huge back wall exterior, today I'll be starting to weather them ready for its prime coat of paint, will post pics of how it's looking so far.
OK as for the tips and tricks on some dio building for you

The first few dios I made were standard L shaped ones which basically were the back wall and the floor, heres a couple of examples
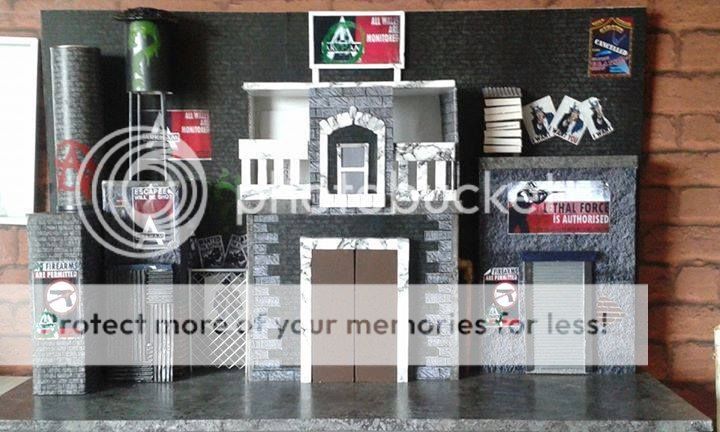
This one was my first ever for my arkham city figures, I had never even heard of foam core/foam board at this point so it's mainly built up from cardboard boxes, fablon and the bricks I just printed out and glued on.
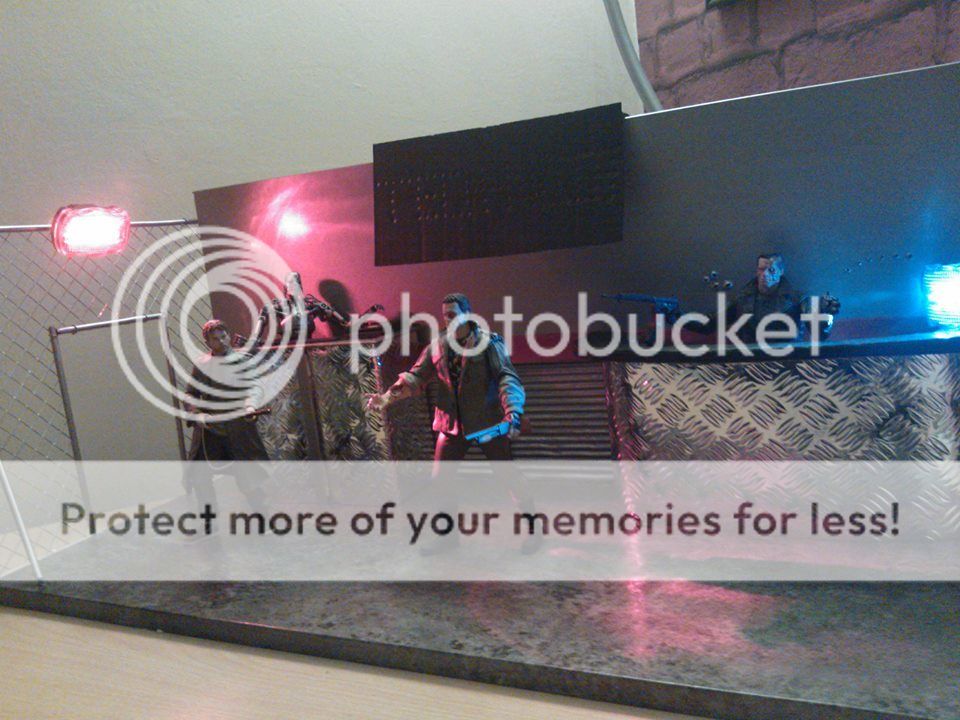
This one for my neca terminator figures, wanted to make the tech noir battle scene, 2 pieces of wood, one for the back and one for the floor, the left hand side was just some mesh fencing I got from wilkos (like a hardware store in uk) and decorated with fablon, corrugated cardboard and a few small cardboard boxes covered in more fablon
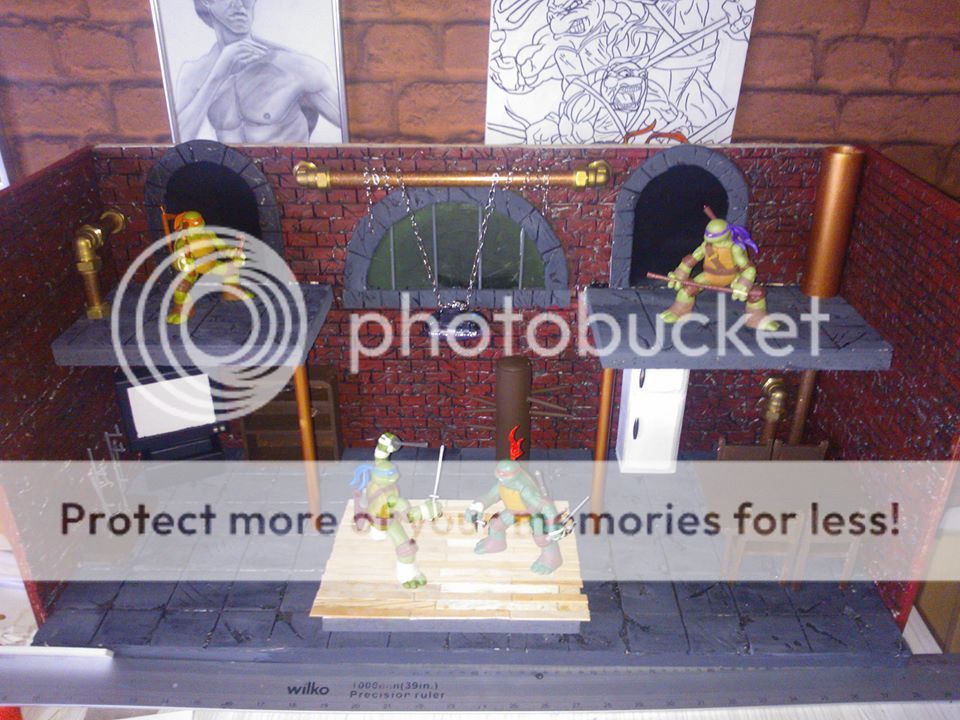
This was my first ever foray into foam board carving, I think you guys in the states call it foam core. I built this for my stepsons ninja turtle figures as you can see, up to making the ghostbusters firehouse this one was the most ambitious and I had a lot of trial and error in making it, one type of glue I tried using totally melted the foam board do to its chemical reaction and I nearly cried as it was all at the point where I was fixing it all together lol, luckily managed to save it!
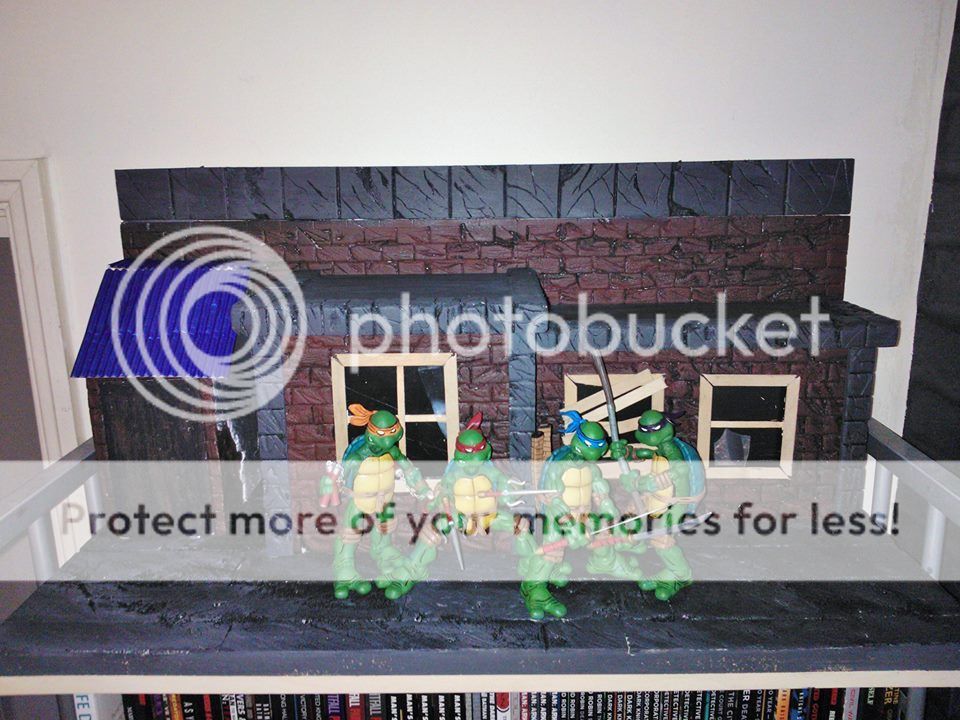
This was my second go at foam core/board for my own neca collection of turtles, again made from 2 pieces of wood, 1 for the back wall, one for the flooring, attempted making this look like the rooftop scene from one of the comics. used more bits of wood to make the top parts of the buildings and lolly sticks to make the knackered looking windows.
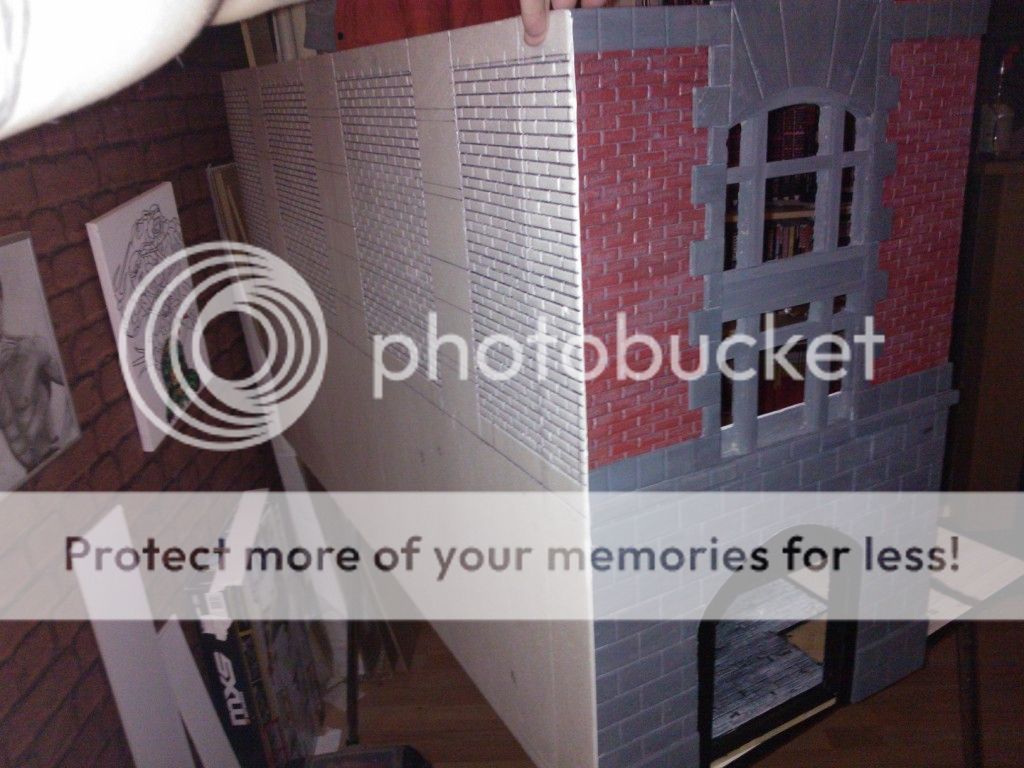
Here is a pic of the work in progress on the big back wall of this firehouse pre paint to give you an ide on process before painting

OK the foamboard you can see here basically comes in packs of 10 and I usually get mine from amazon in A3 size but because this fire house is so damn huge I bought a pack of 10 A1 boards off ebay. They basically come with a paper cover on both sides which you need to peel off so you can get to the foam underneath. Some brands of foam board (my A3 boards) need soaking in hot soapy water for about 20-30 mins and then it just peels right off, the A1 foam board just peeled off easily without messing about.
To do bricks is simple, just figure out your pattern e.g 10mm high x 30mm wide, mark out your horizontal lines first with a bog standard biro, sometimes I score it as I go on small walls but for bigger stuff I tend to draw on the markings first and go over them afterwards. Once you've marked out your horizontal lines you can do the vertical ones and then using the same biro you can start to score them so the bricks become 3d.
I recommend sharp craft knives, scalpel or stanley knife to cut the boards to desired size, a remotely blunt one will hack and chip the foam etc and for the most part you don't want that happening. Patience too! You will need it in abundance and know when to take a break rather than rushing to get it finished as you will almost certainly make a rougher job of thing. For heavily cracked ond weathered walls like dilapidated buildings or sewer walls this can look good and quite fitting but for my gb firehouse I wanted the building to look pretty well maintained for the most part so I've been taking my time and slowly scoring the bricks so as not to chip them too much.
Weathering the bricks to give them a certain level of character I use a carving tool out of a set I bought when attempting to have a go at clay modelling. Most clay carving tools are pretty blunt, I just skim one of em over each brick to ruffle it up a bit, I would suggest maybe taking the first piece of foam board out of the pack and just experimenting on it with any tools you have already, maybe cut into a few pieces and use each as a test swab so you can figure out what works and what doesn't etc
As for all the stuff like wood for the base and walls, most of what I've built have been from old units I wanted rid off like an old bedroom work top, a computer unit that housed my printer, pc tower all that sort of stuff, the front and back of my firehouse are actually the doors off that unit but the rest of it like the floor and the big wall are mdf I bought from B&Q which is basically our version of the US home depot. Ha sorry if I assume too much, I'm assuming you're from across the pond to make double sure you know what I'm talking about etc
I only use the most basic hand tools really, Hand saw for the wood mainly as I get a straighter line, I do own a jigsaw cutter but I end up just going all over the place with that lol. Round and flat files, diff sized drill bits and for the most part PVA glue will stick the foam to the walls really well. Also get yourself a few mini G clamps, they will come in handy for a number of things. If you have no old units around your house that you are happy to demolish, I would go with buying either chip board or mdf, now I'm out of units to destroy I will probably roll with mdf in the future.
Always prime paint your brickwork, I either prime with black acrylic paint or mix my own grey depending on how light a tone I want the main colour to be e.g the firehouse floor was primed in black, given a moderate dry brush of grey over the top and then a really light dry brush of white to give it diff tones and look a bit more worn and torn. Well that was at least my aim anyway lol.
OK I hope I haven't frazzled your brain, am happy to help in any way that I can and hope some of this info has been useful, if you need anything explaining in more detail please feel free to PM me and I will gladly reply first chance I get and good luck for all your future builds and projects!
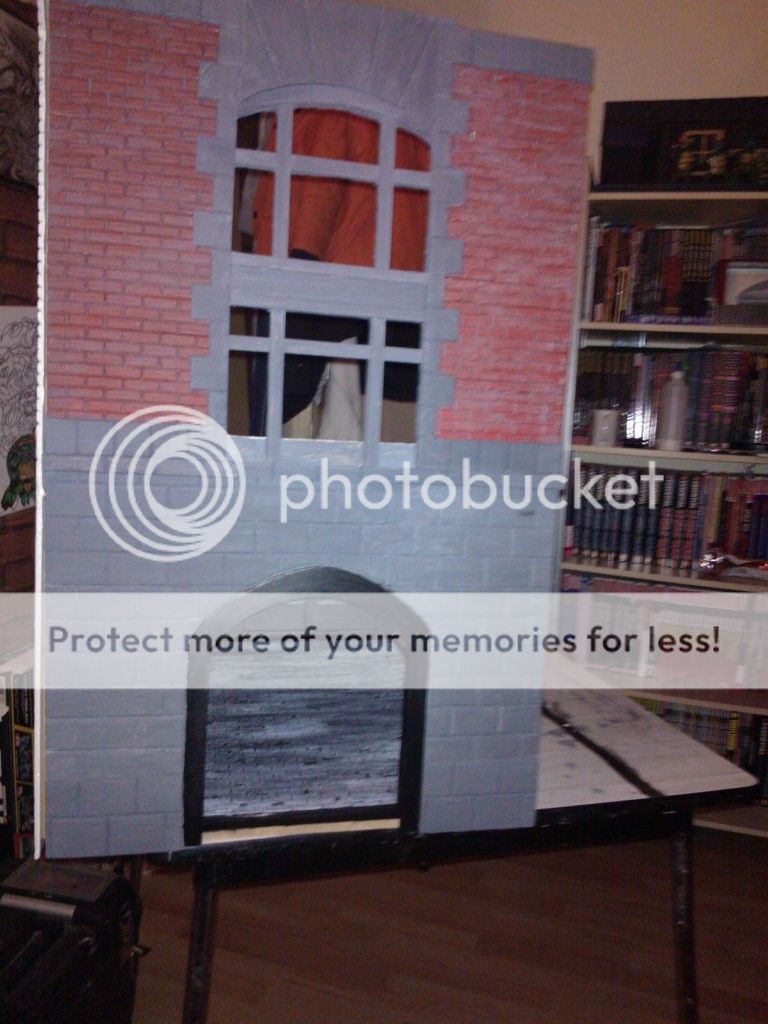
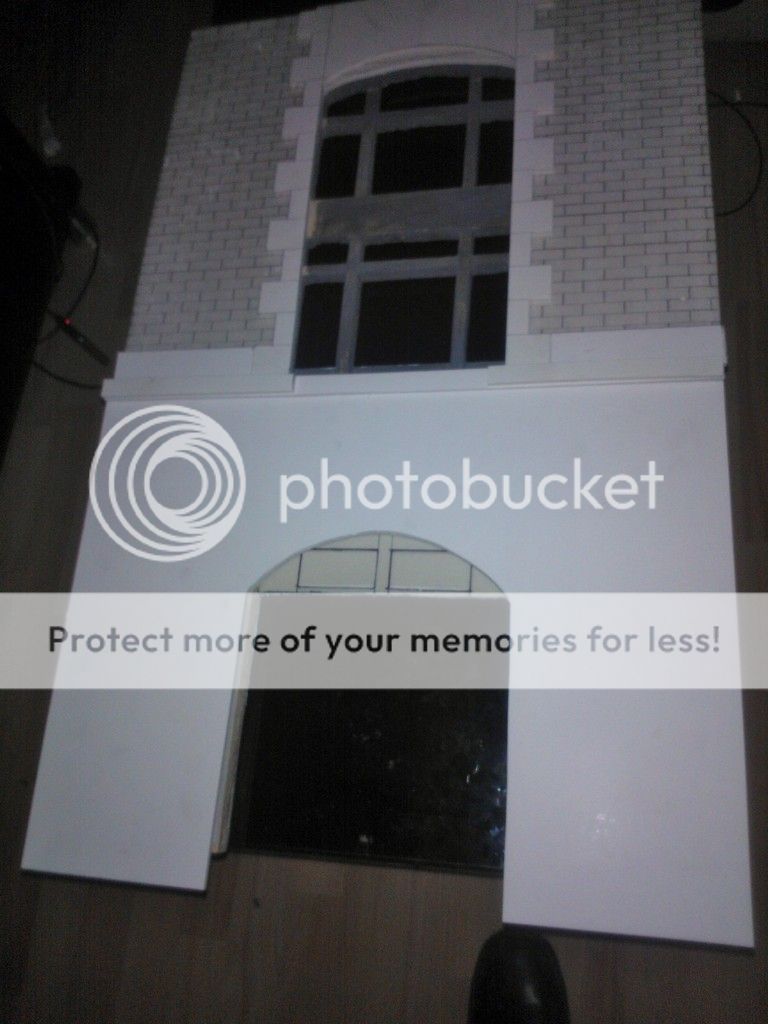
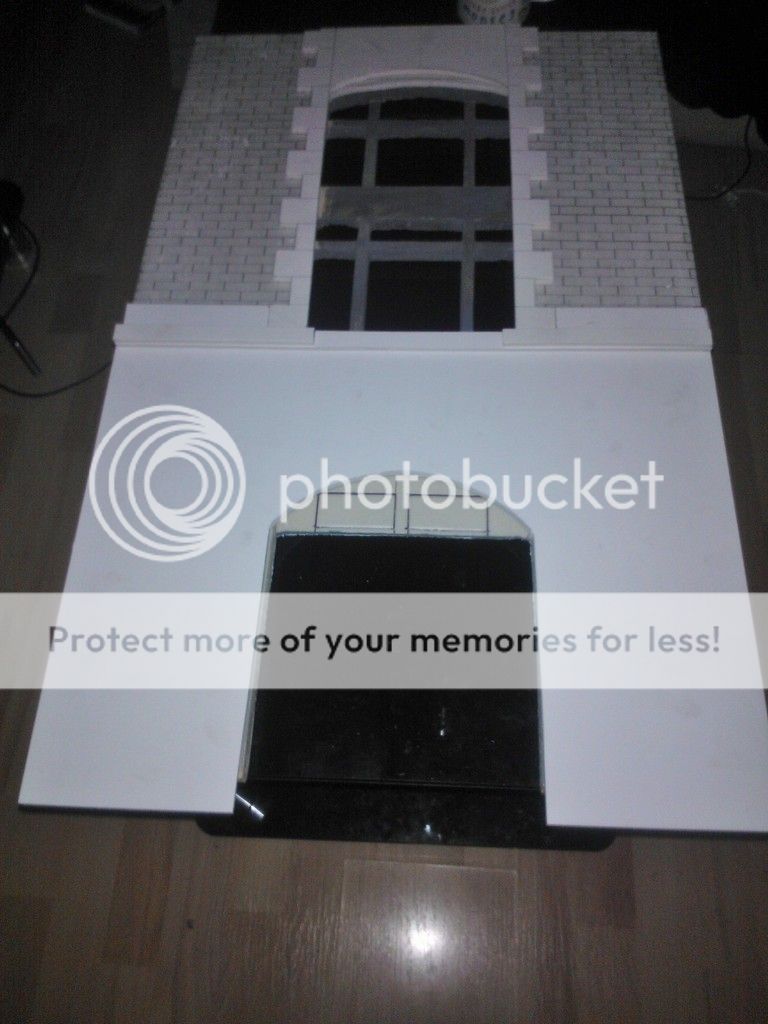
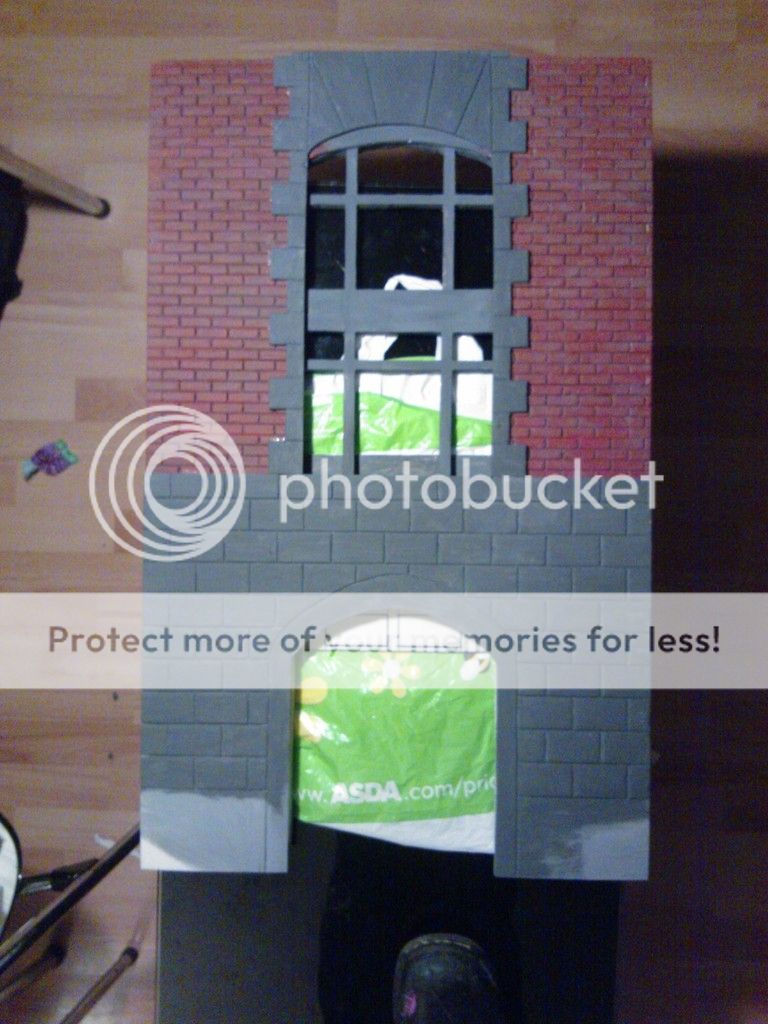
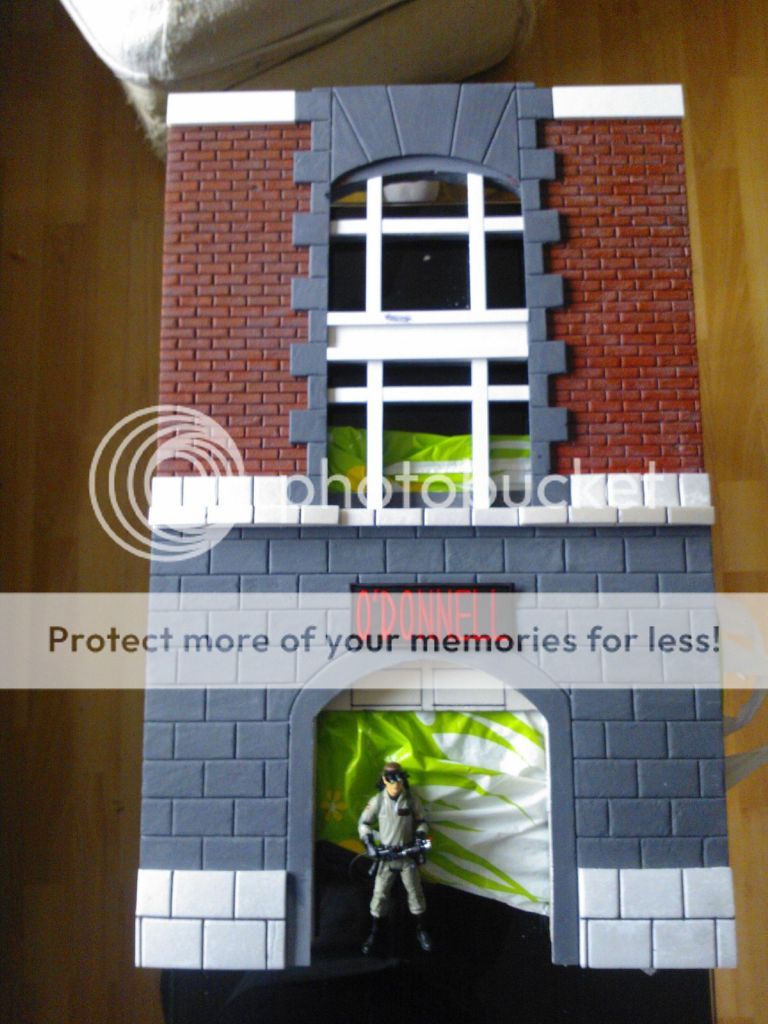
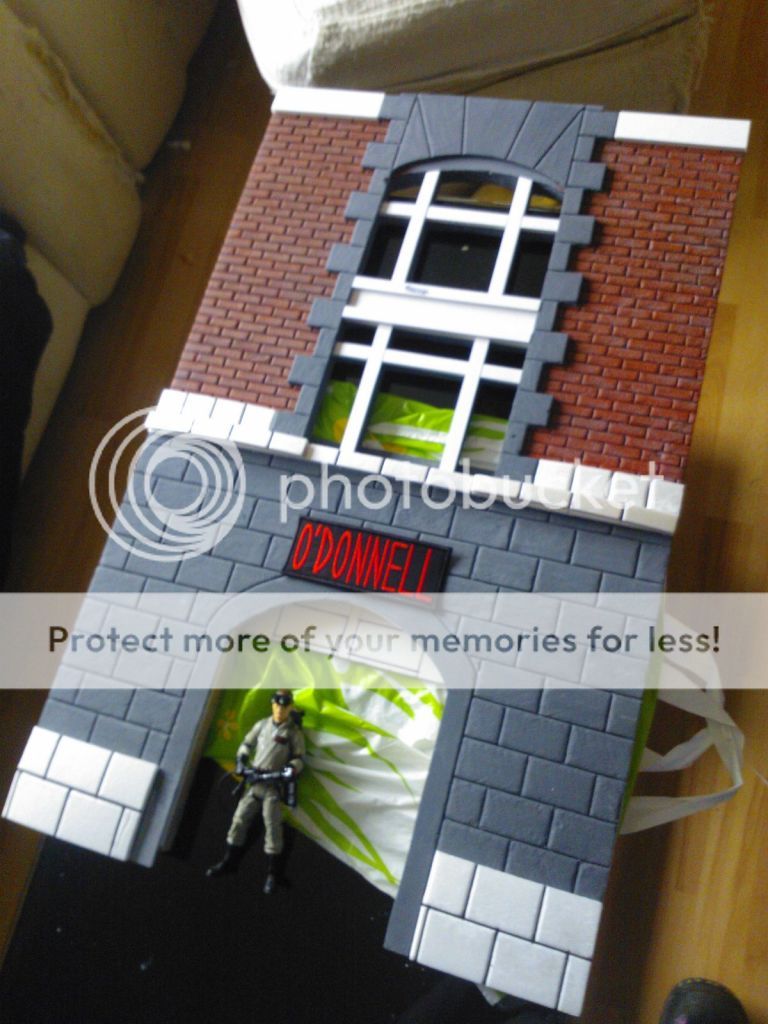
Here are a couple of pics of fire house progress, apologies for the crappy angles, hopefully you will get a good idea of how it will look when its screwed together. Am going to be weathering the bricks today for the red area, will see where I get up to and see If I can start cutting the grey brick area, I am almost certain I will be screwing all this together this next coming week


 - By pchrisbosh1
 - By tylergfoster