Page 16 of 18
Re: GohstTarp's Proton Pack Build
Posted: May 15th, 2017, 8:41 pm
by GohstTarp
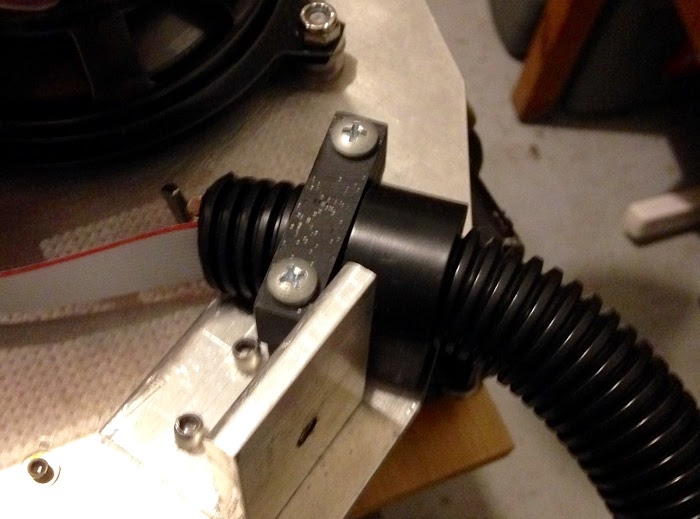
Finally got some time to add some updates! I had good luck with using some 13mm x 13mm self-adhesive tie mounts to control the WandTip Expansion ribbon cable. Here are some shots...
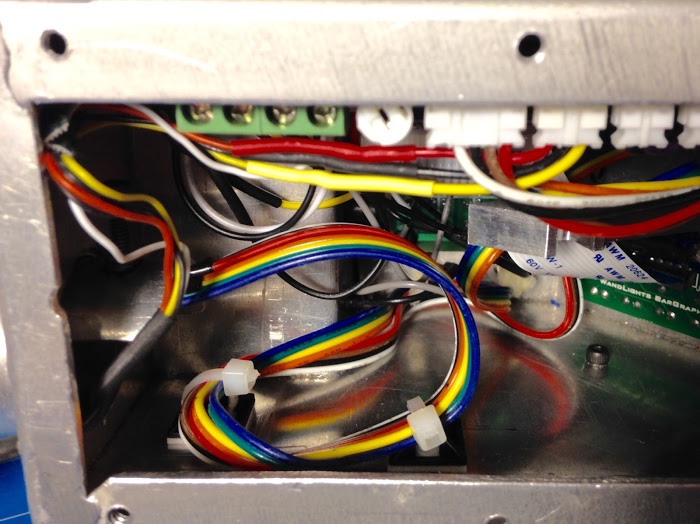
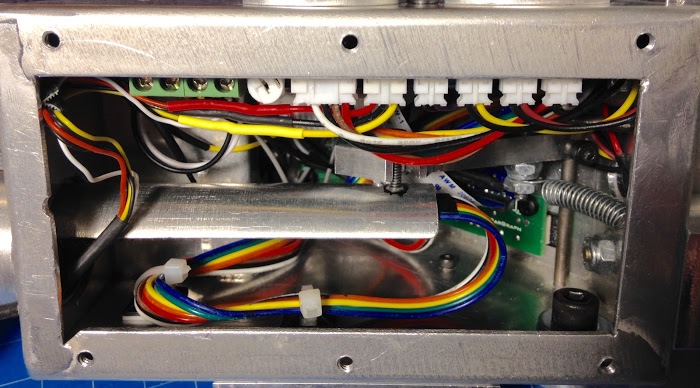
It works really well, but the cable causing a little resistance, so I might tighten the spring to get a little more "snap".
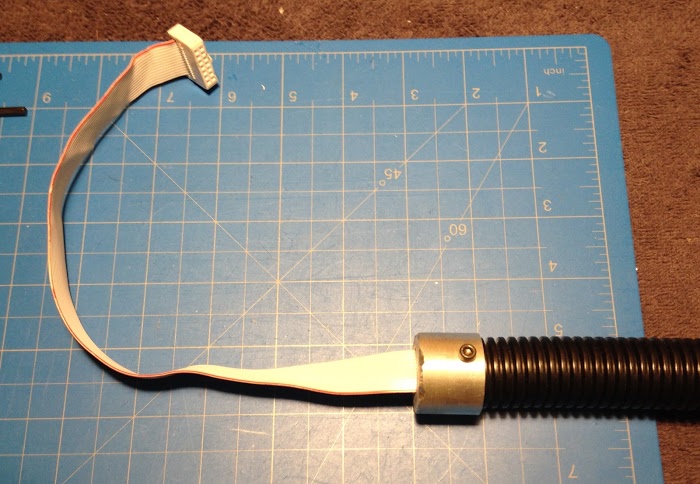
Moving along, it was really satisfying to install the split-less wire loom into Wiz's Thrower Tube Clamp...
Here is the other end attached to RJ's loom attachment part and the wand ribbon cable in place. I just drilled a hole in the loom using a #36 drill bit (the one that comes with a #6 drill and tap set) and attached...
Some wire taped to the end to pull it into the main body...
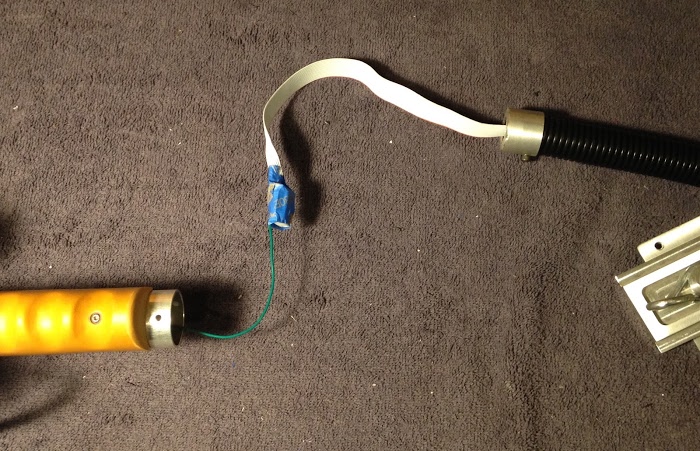
Wire loom installed/attached at the wand end..
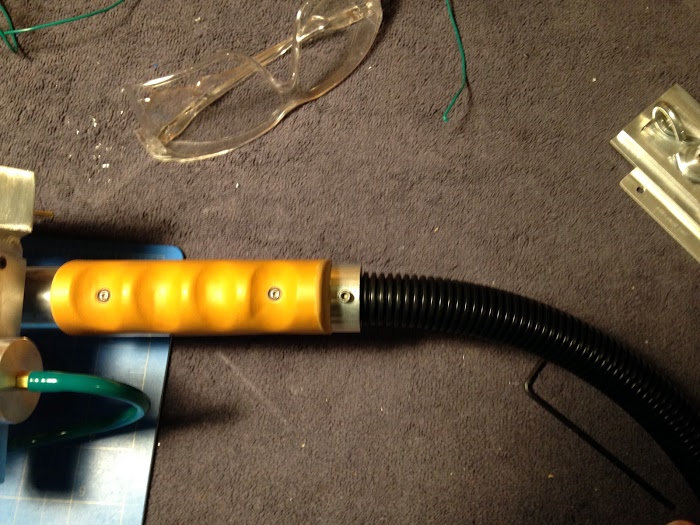
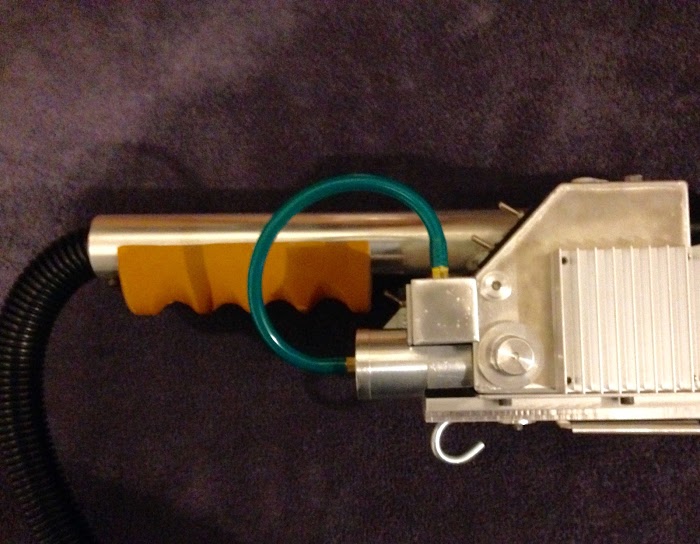
Finally, here is the green tubing installed. I ended up using a 7 inch piece...
Next, I'll be working on Spongeface's bezel instructions with the window tint and decal stuff. Should be interesting.
Re: GohstTarp's Proton Pack Build
Posted: May 16th, 2017, 4:10 am
by barison82
pyhasanon wrote:I'm sure he can, but if he has any questions, he and I are friends on Facebook, just let him know that he can shoot me a message anytime... It's been a while, but I can always dig through my notes for answers...
Hi Phil, thanks a lot for your help - that's much appreciated. I got a message back from Ben this morning and he says it should be an easy fix, as it's similar to how he runs his, but I've let him know that just in case

P.S sorry GohstTarp if I've appeared to have hijacked your thread a little bit here. Back to your awesome build!
Re: GohstTarp's Proton Pack Build
Posted: May 16th, 2017, 4:14 am
by barison82
GohstTarp, just seen your latest update - only 1 photo is showing up for some reason, which is a shame! Your wiring looks so tidy with those tie mounts. Good idea
Re: GohstTarp's Proton Pack Build
Posted: May 16th, 2017, 6:26 am
by pyhasanon
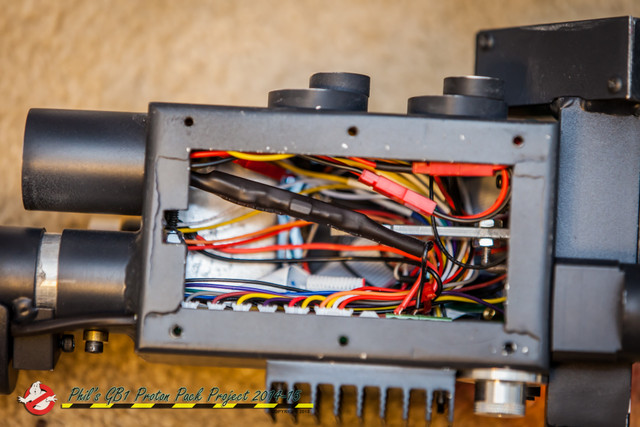
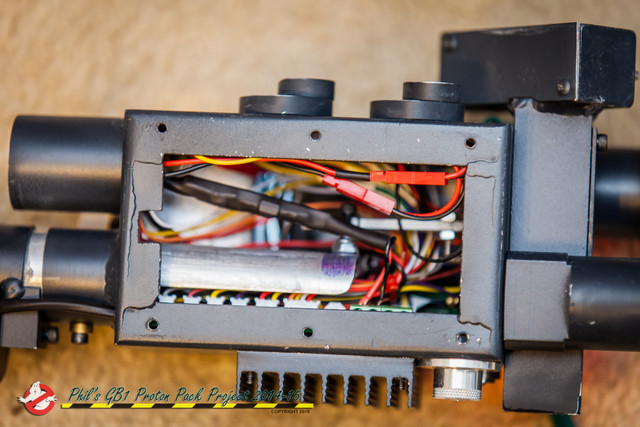
Oh, yeah, my wiring is a complete mess... LOL! It's amazing that the pop mech has yet to snag any of my wires...
Re: GohstTarp's Proton Pack Build
Posted: May 16th, 2017, 11:54 am
by GohstTarp
barison82 wrote:GohstTarp, just seen you're latest update - only 1 photo is showing up for some reason, which is a shame! Your wiring looks so tidy with those tie mounts. Good idea
Thanks for letting me know, Barison. I decided to ditch photobucket and tried using google photo and it didn't work very well. I moved the photos over to postimage.io and edited my broken post, so it should all be fixed. Please let me know if there are still issues. Thanks again.
Re: GohstTarp's Proton Pack Build
Posted: May 16th, 2017, 5:55 pm
by GohstTarp
One thing I forgot to mention in my last update was that I made a new "flash bulb" setup using one of Spongeface's Strobe LEDs, a piece of 5/8" acrylic rod, a clear bulb and some silicone wire. Part of me always felt that my current bulb setup was a bit too "bold", so I made a more subtle one...

Everything but the wire and diode are transparent, so it should blend in nicely with the clear acrylic tip. Will probably wait until final assembly to install.
Re: GohstTarp's Proton Pack Build
Posted: May 17th, 2017, 3:19 am
by pyhasanon
Re: GohstTarp's Proton Pack Build
Posted: May 17th, 2017, 3:49 am
by barison82
No worries - all good now, I can see all the pics, another great update, and mega-packed with electronics. Phil, yours looks pretty well done also
Re: GohstTarp's Proton Pack Build
Posted: May 28th, 2017, 3:08 pm
by GohstTarp
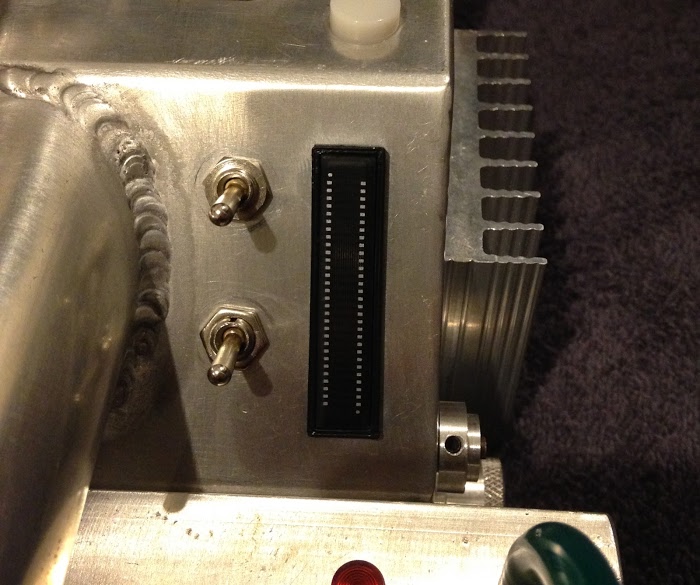
My adventure with the window tint and decal for the bar graph bezel could have gone a little smoother, but it all worked out in the end. At one point I had the decal floating freely in the bowl of water, but was able to coax it onto the plexiglas almost perfectly, just slightly off center. I also scratched up the top of the lenticular piece while trimming the window tint. Luckily, it was an edge area that is covered up by the decal/plexiglas. Anyway, here is how it looks all assembled...
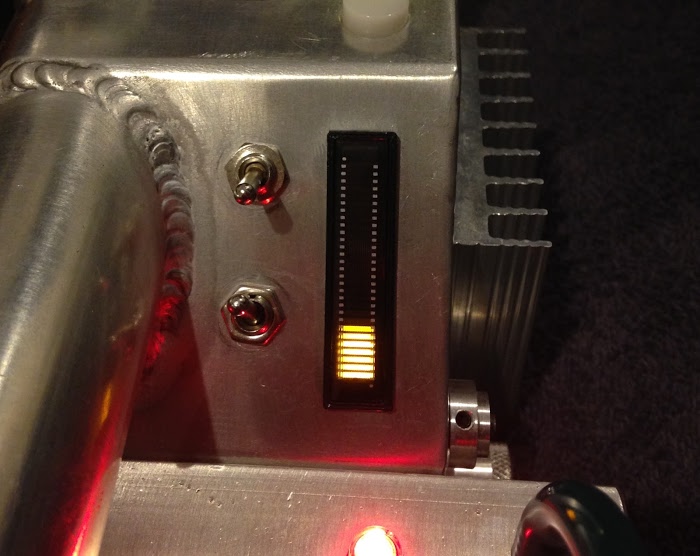
The bar graph lighting up...
I have some extra materials to do the window tint and decal again, so I might give it a try. This was my first experience with decals, so I should be able to do ever better next time.
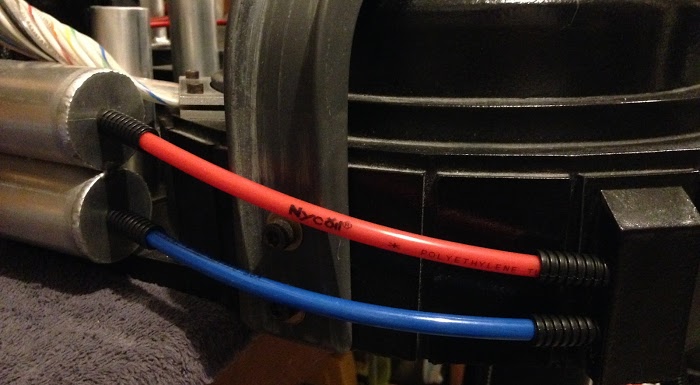
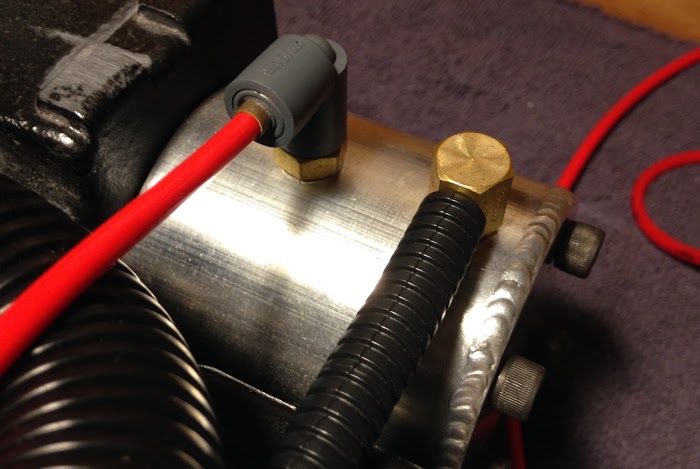
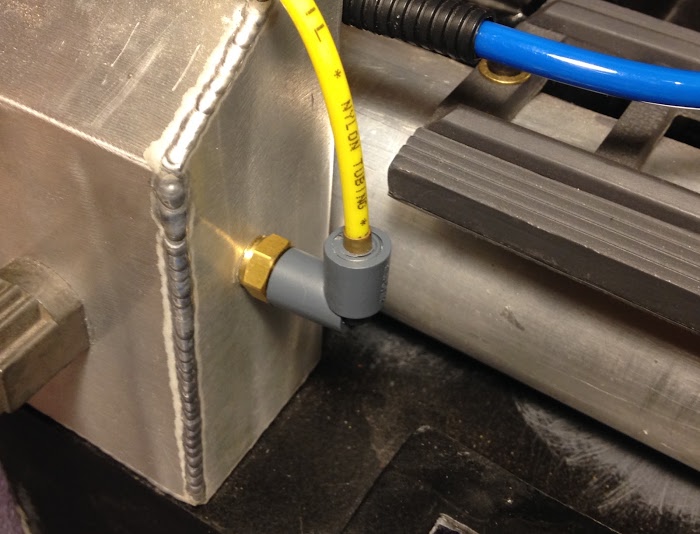
Next, I took the opportunity to install Highjacker's Nycoil tubing. I was sure to have the Nycoil text/logos visible to show the ghosts that I mean business...
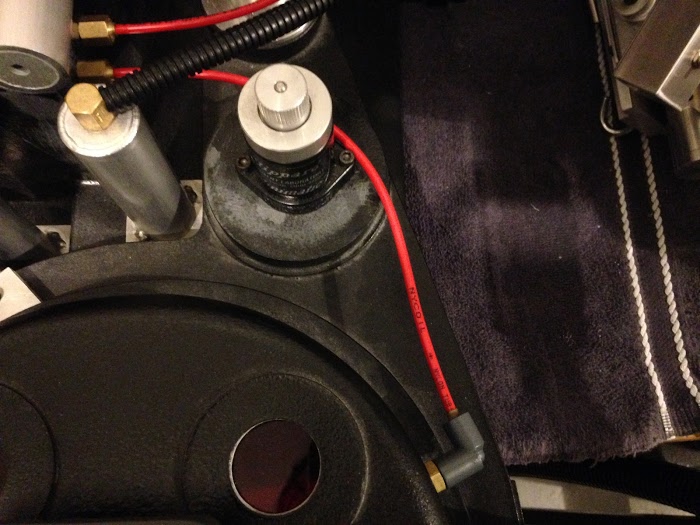
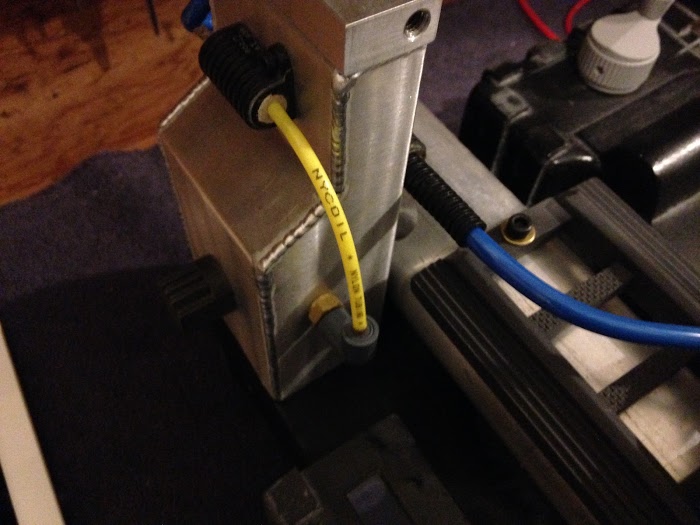
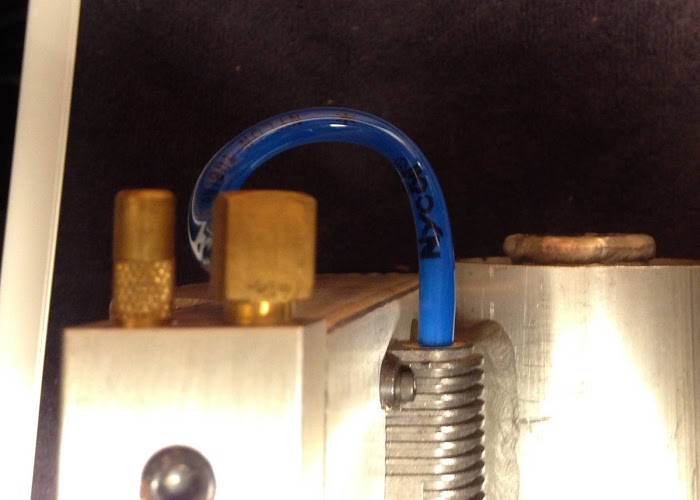
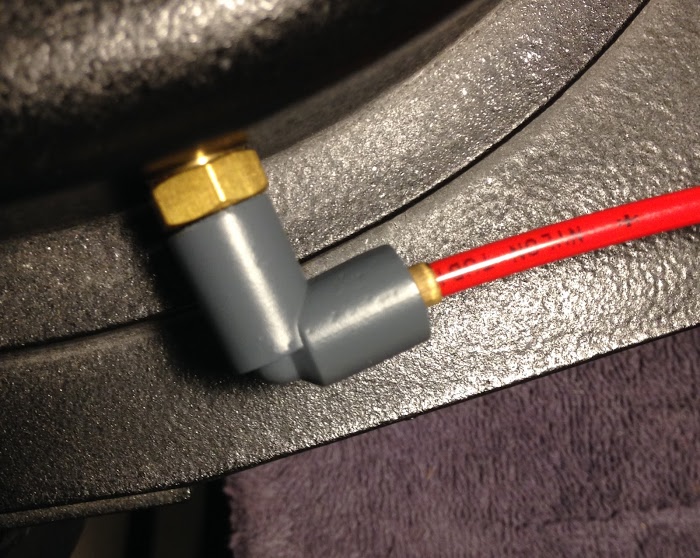
I also installed Mr_Stay_Puft's 5/32 Legris elbow replicas (darn! just noticed he now offers 4mm elbows

), which I'm MUCH happier with than the SMC elbows that I tried to customize. Here are some shots of the replicas installed...
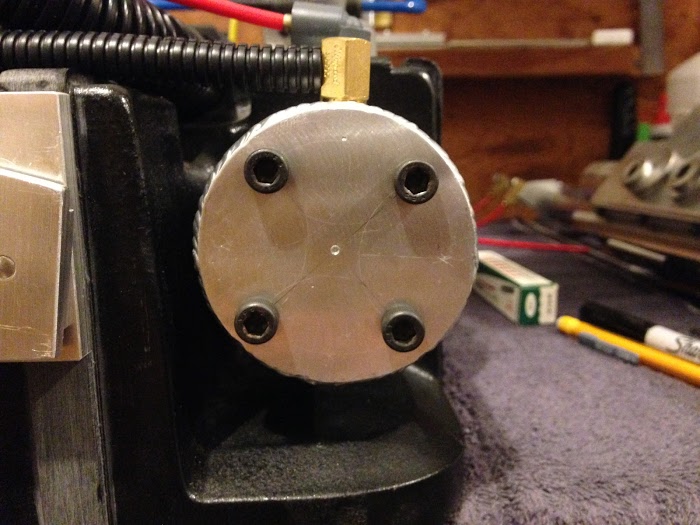
Finally, I drilled a dimple in the center of my HGA. Since it didn't come with one, it was a detail that I wanted to add...
Next, I'm going to continue with getting everything squared away before I start prepping to paint by straightening out my injector tubes. They currently angle toward the ribbon cable, which you can see here...
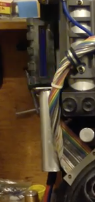
Looking forward to seeing those injectors straight
Edit 1 - Screwed up the photos again. When will I learn?!?!? Fixing them now.
Edit 2 - Picture links fixed.
Re: GohstTarp's Proton Pack Build
Posted: May 28th, 2017, 3:13 pm
by barison82
The images for the bargraph/nycoil tubing/legris elbow/HGA are not showing up unfortunately...interesting to read on your experience with the bezel insert, a tricky detail with which I hope Ben can manage ok with as well! I bought a second kit just in case...
Re: GohstTarp's Proton Pack Build
Posted: May 28th, 2017, 3:22 pm
by GohstTarp
barison82 wrote:The images for the bargraph/nycoil tubing/legris elbow/HGA are not showing up unfortunately...interesting to read on your experience with the bezel insert, a tricky detail with which I hope Ben can manage ok with as well! I bought a second kit just in case...
Thanks for confirming they are broken. Should be fixed now
Very smart getting a second kit... it might come in handy!
Re: GohstTarp's Proton Pack Build
Posted: May 28th, 2017, 3:24 pm
by GohstTarp
pyhasanon wrote: Our internals look very similar, I just mounted my circuit board on the opposite wall...
Totally agreed! Good to know that mounting on the opposite wall is an viable option

Re: GohstTarp's Proton Pack Build
Posted: May 28th, 2017, 3:55 pm
by barison82
No worries GohstTarp, all fixed now and another awesome update, the bargraph looks amazing and just fine to me, you've done a great job! It's handy to have spares for fidgety detail areas such as this...got a spare set of the dry-rub transfers as well. Hopefully Ben can do it all ok - then I can use the spares on the trap build
As for the rest of your progress, it's really coming together now! Tubing looks great, love the details, and a nice touch on the HGA. Those injectors are only out by a fraction by the looks of it. Keep up the awesome work!
Re: GohstTarp's Proton Pack Build
Posted: May 30th, 2017, 2:31 pm
by GohstTarp
barison82 wrote:No worries GohstTarp, all fixed now and another awesome update, the bargraph looks amazing and just fine to me, you've done a great job! It's handy to have spares for fidgety detail areas such as this...got a spare set of the dry-rub transfers as well. Hopefully Ben can do it all ok - then I can use the spares on the trap build
Thanks, Barison. I also picked up two of the dry-rubs! I noticed that some of the "rubs" already have duplicates, so we will have 4 chances to get some of them right. Enough to take away some of the stress
barison82 wrote:As for the rest of your progress, it's really coming together now! Tubing looks great, love the details, and a nice touch on the HGA. Those injectors are only out by a fraction by the looks of it. Keep up the awesome work!
Thanks again! I should have some injector updates soon.
Re: GohstTarp's Proton Pack Build
Posted: May 30th, 2017, 4:00 pm
by barison82
Very welcome
Awesome. That's good to know that there are duplicates, I haven't opened them up yet
Re: GohstTarp's Proton Pack Build
Posted: May 31st, 2017, 2:15 am
by Venkman's Swagger
Awesome updates matey. I'm not around often anymore but always check for your updates!!! Love it
Re: GohstTarp's Proton Pack Build
Posted: May 31st, 2017, 7:07 pm
by GohstTarp
Venkman's Swagger wrote:Awesome updates matey. I'm not around often anymore but always check for your updates!!! Love it
Very much appreciated, Sir. Sorry to hear you aren't around much anymore, but I hope you will have more time for gbfans in the future.
Re: GohstTarp's Proton Pack Build
Posted: June 10th, 2017, 12:42 pm
by GohstTarp
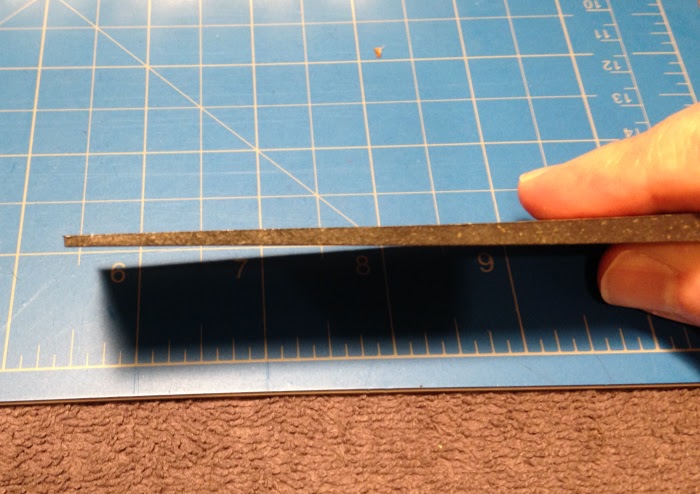
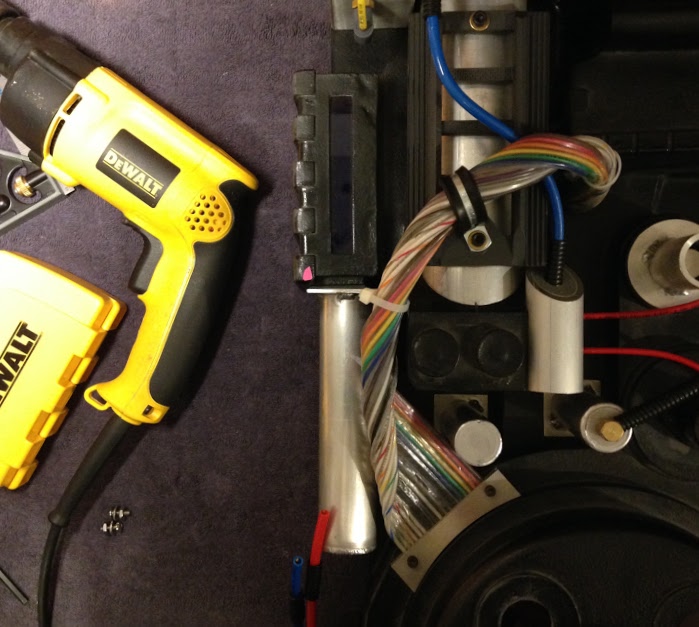
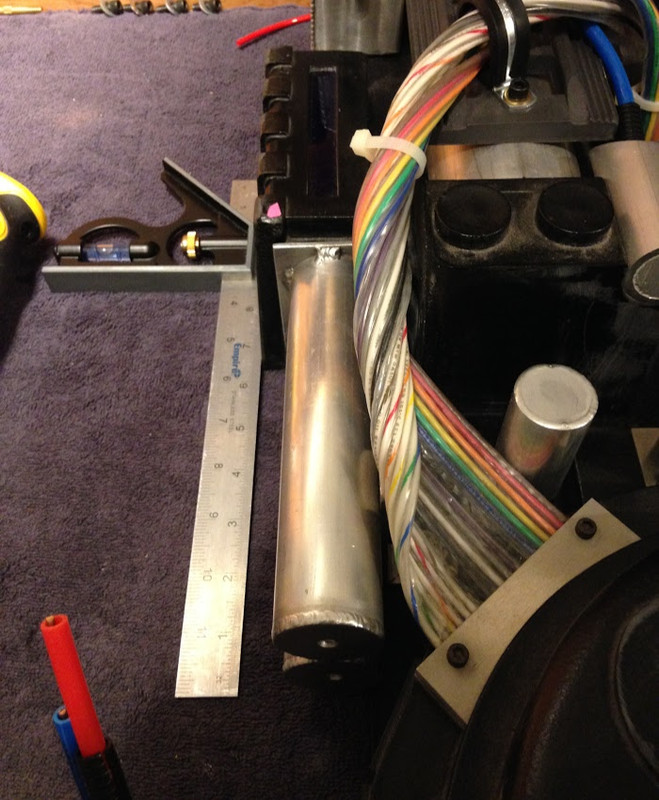
Getting the injector tubes straightened ended up being easier than I thought. I had consulted the venerable bishopdonmiguel on his milliput technique, but felt I lacked the skill to get the same great results. So, I thought I would try finding or making a shim. I started out by using a t-bevel level finder get an idea of the injector tubes angle and it was very close to 2 degrees. Next, I measured out the built-in plate on the shell to get an idea for the length and width of the shim. After I visit to the hardware store, I had something promising...
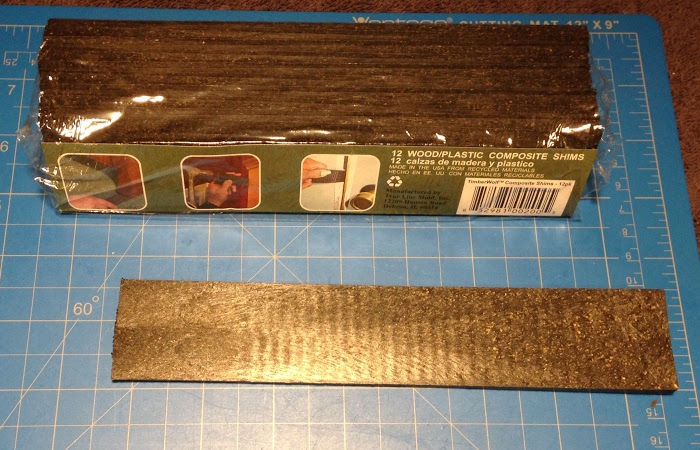
They seem to have just the right angle I need...
My custom shim needed to be 3 inches in length and luckily they were each 1.5 inches wide. Easy!
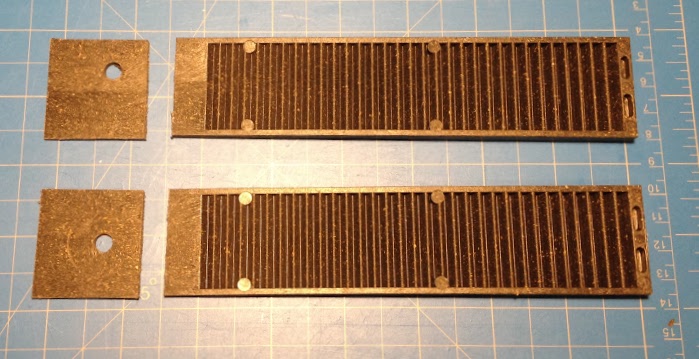
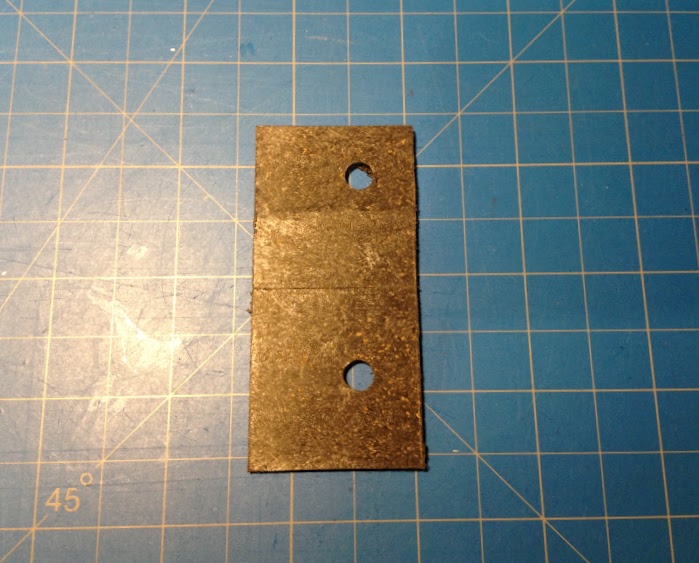
Here they are super glued together and holes drilled out for the bolts...
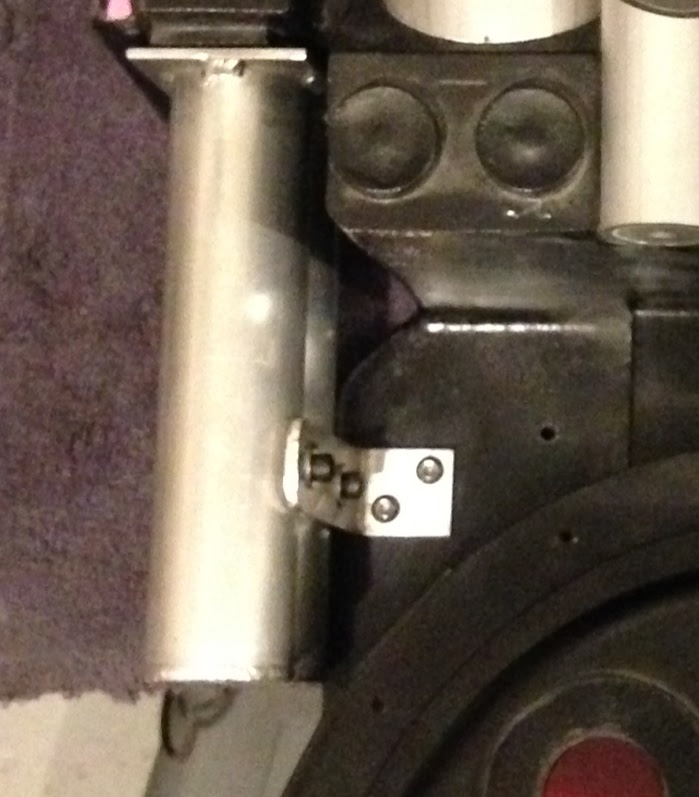
A shot of the shim installed between the shell and the injector tubes...
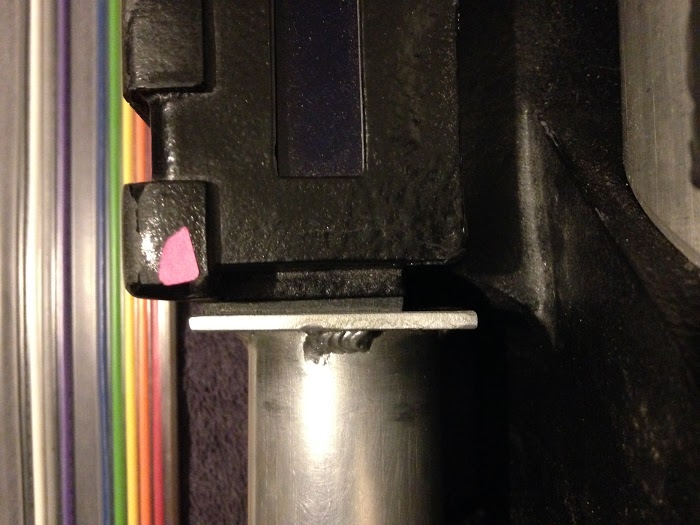
The shim added a little less than an 1/8 inch to the height, but it's not noticeable...
The injector tube bracket obviously moved a bit, so I also patched up the holes in the shell, redrilled and reattached...
After all that, nice and straight...
Next, I will be avoiding the paint process by upgrading to Sephiroth's stunningly beautiful GB1 ribbon cable.
Re: GohstTarp's Proton Pack Build
Posted: June 10th, 2017, 1:17 pm
by barison82
Another job well done! I've upgraded to a Fincher cable as well, they're the best.
Re: GohstTarp's Proton Pack Build
Posted: June 10th, 2017, 2:17 pm
by bishopdonmiguel
Lack the skills? Man, you don't get a build this epic without having the skills. But your shim solution works just as good as the Milliput and is definitely easier. Nice job.
Re: GohstTarp's Proton Pack Build
Posted: June 20th, 2017, 10:46 pm
by GohstTarp
barison82 wrote:Another job well done! I've upgraded to a Fincher cable as well, they're the best.
Thank you, Barison!
Re: GohstTarp's Proton Pack Build
Posted: June 20th, 2017, 10:47 pm
by GohstTarp
bishopdonmiguel wrote:Lack the skills? Man, you don't get a build this epic without having the skills. But your shim solution works just as good as the Milliput and is definitely easier. Nice job.
Thanks, Bishop! Ha ha ha... I'm just glad it all worked out in the end
Re: GohstTarp's Proton Pack Build
Posted: June 20th, 2017, 10:47 pm
by GohstTarp
Got my Sephiroth GB1 cable installed! I used the same process as my last cable, minus the heat gun, and it turned out great...
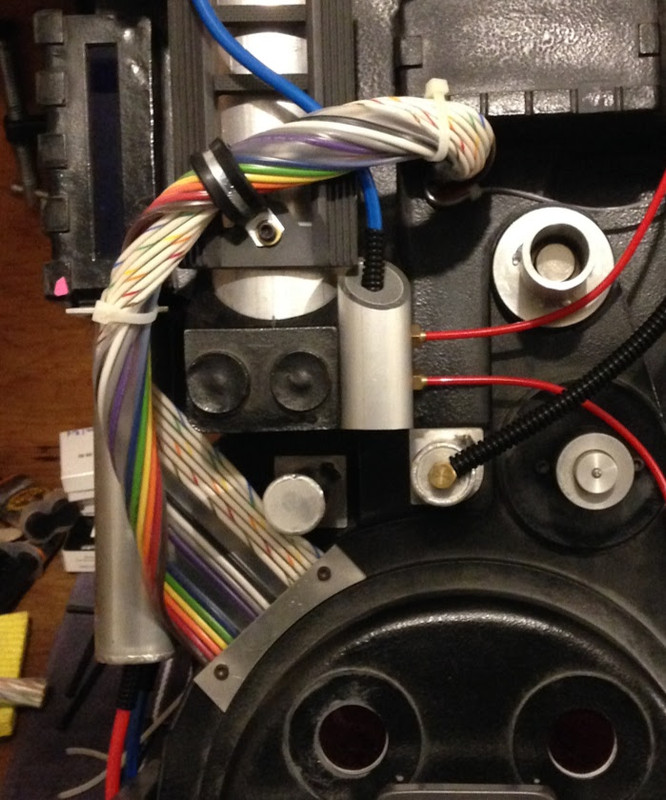
I cut off the excess cable and inserted some carbon fiber tubing to add some resistance. Then I secured it with a very tight zip tie...
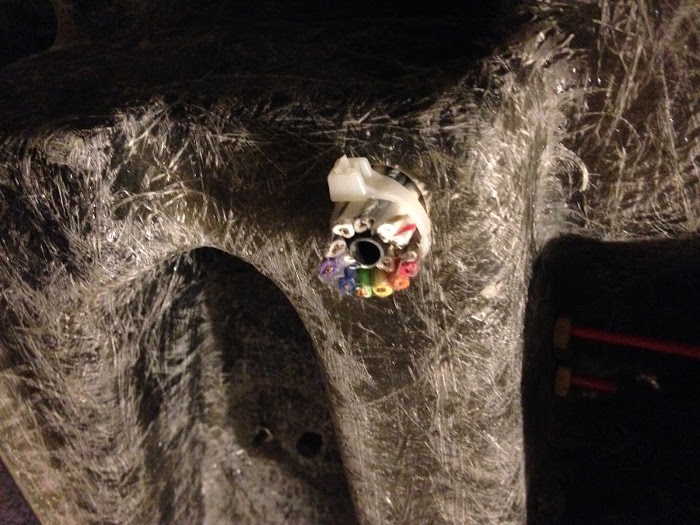
The clarity, color and width of this cable are perfect! Very glad I was able to get my hands on one.
This was the last item I wanted to check off my list before I tear everything down and FINALLY start prepping to paint. Starting to see the light at the end of a tunnel!
Re: GohstTarp's Proton Pack Build
Posted: September 12th, 2017, 10:03 am
by canpara
GohstTarp wrote:One thing I forgot to mention in my last update was that I made a new "flash bulb" setup using one of Spongeface's Strobe LEDs, a piece of 5/8" acrylic rod, a clear bulb and some silicone wire. Part of me always felt that my current bulb setup was a bit too "bold", so I made a more subtle one...
Everything but the wire and diode are transparent, so it should blend in nicely with the clear acrylic tip. Will probably wait until final assembly to install.
This is such a great idea. How did you safely remove the magnesium from inside the flash bulb? I'm hoping to do the same with my wand build.
Re: GohstTarp's Proton Pack Build
Posted: September 15th, 2017, 2:57 pm
by GohstTarp
canpara wrote:This is such a great idea. How did you safely remove the magnesium from inside the flash bulb? I'm hoping to do the same with my wand build.
Thanks, canpara! Here is the post where I describe how I opened up the flashbuild. Obviously, the pictures are broken, but the text description about half-way down should help a lot.
viewtopic.php?f=2&t=38111&hilit=bulb+dr ... 0#p4892053
Re: GohstTarp's Proton Pack Build
Posted: October 7th, 2017, 4:20 pm
by GohstTarp
Happy to report that I've purged all photobucket links from this thread and replaced/fixed.
I'm in the middle of moving, but will be able to get back to this project by the end of the year or possibly early 2018. Really looking forward to making some progress again and updating this thread.
Re: GohstTarp's Proton Pack Build
Posted: October 7th, 2017, 4:22 pm
by canpara
Thanks so much! You have an amazing build thread and it is really quite useful. The pictures are invaluable!
Re: GohstTarp's Proton Pack Build
Posted: March 24th, 2018, 2:50 pm
by GohstTarp
After moving twice and various other life adventures, I've finished setting up my new workspace in California...
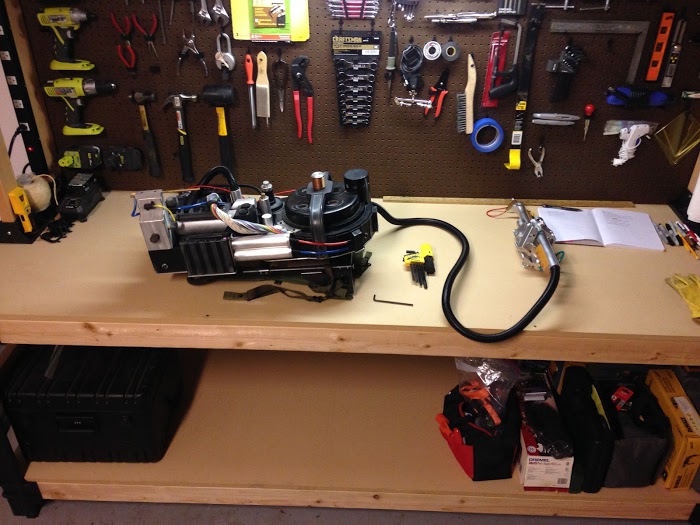
I'm really looking forward to finishing this pack up. More updates coming soon!
Re: GohstTarp's Proton Pack Build
Posted: March 25th, 2018, 9:08 am
by canpara
Woo! What a workspace! I'm looking forward to the updates.
Re: GohstTarp's Proton Pack Build
Posted: March 25th, 2018, 9:42 am
by thebigone2087
YESSS!!!!!!