bishopdonmiguel wrote:Great solution! This is why I've not yet installed a vent kit... but now you've got me thinking I need to get one in my pack.
Thanks, Bishop! Fingers crossed that everything works out
Re: GohstTarp's Proton Pack Build
Posted: February 15th, 2017, 9:25 pm
by GohstTarp
One thing I forgot to include in my last update was a demo video of jimfin's awesome vent mech kit. So without further delay, here is a demo...
Re: GohstTarp's Proton Pack Build
Posted: February 15th, 2017, 11:14 pm
by GohstTarp
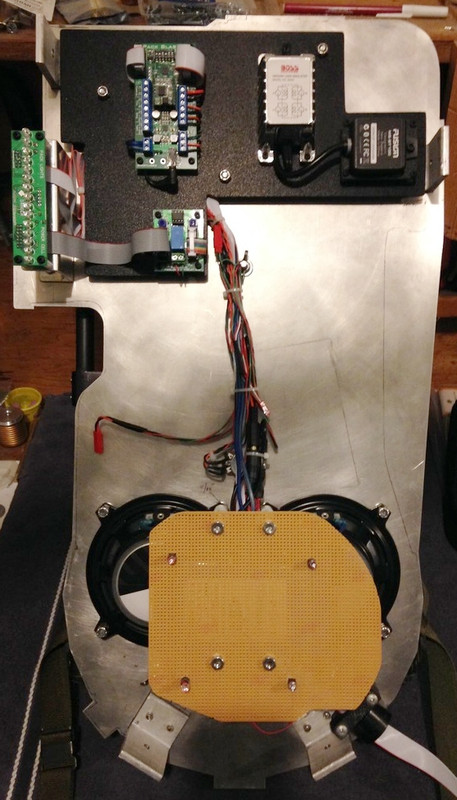
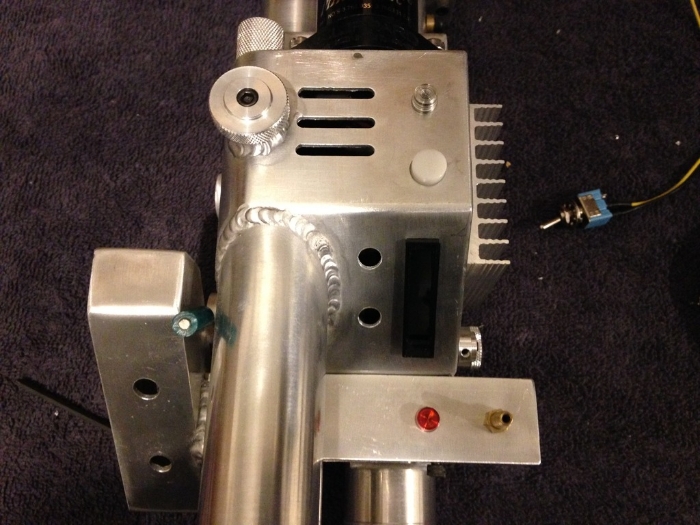
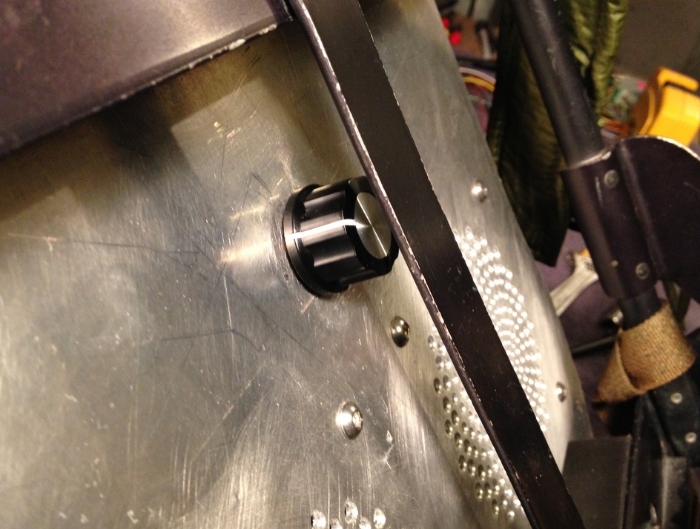
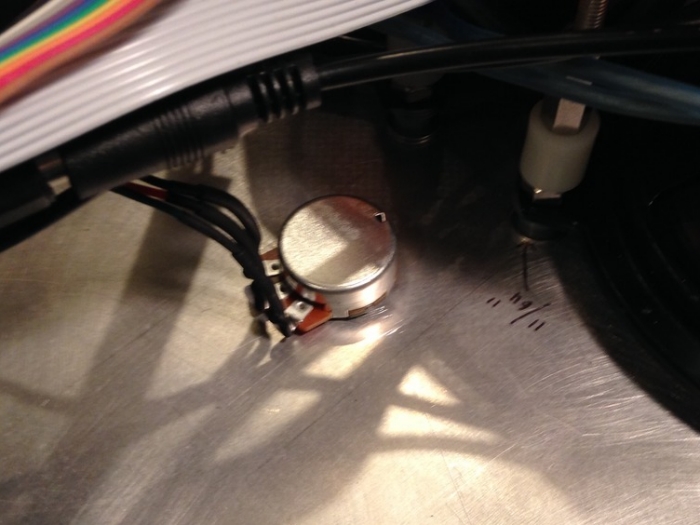
More updates! Before I tackle the vent mech connector bracket, I wanted to get my volume control knob and nstevic01's nifty XLR Spengler plate squared away.
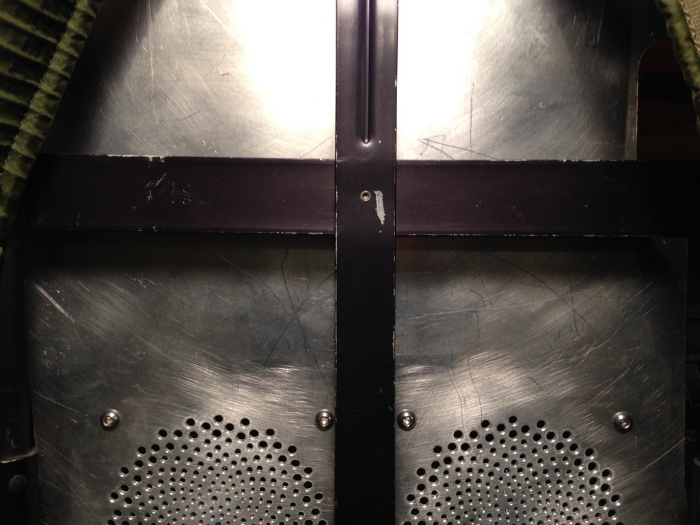
As usual, I took a page from Bishop's build and placed my volume control knob a bit above the speaker grilles and centered along the vertical ALICE frame bar. It's a great install location... easy to reach, protected and subtle!
Now you see it... ...and now you don't!
And a shot of the POT from the other side...
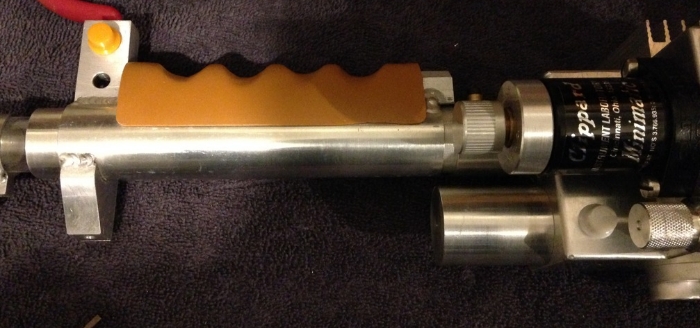
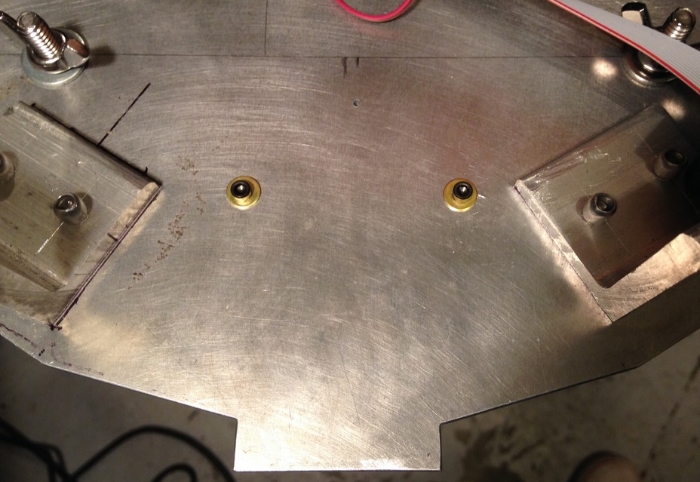
Moving on to the Spengler plate, I mounted it 2" from the very bottom of the motherboard, just like... you guessed it... Bishop. Here is the bare plate installed using some spare #4 bolts, nuts and washers...
From the other side...
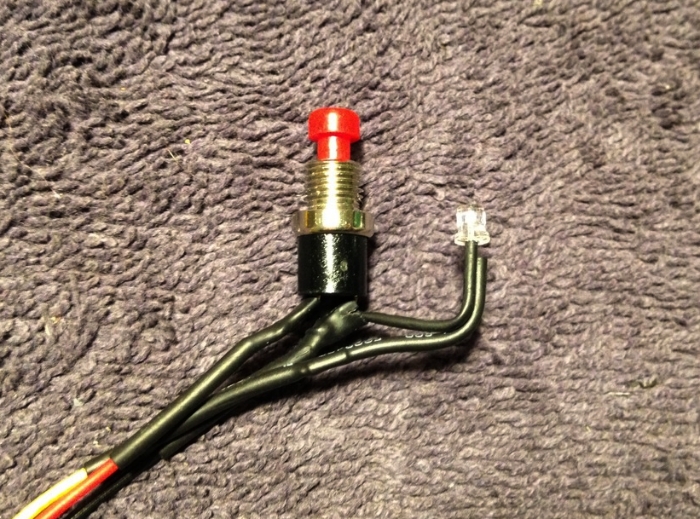
I had also picked up nstevic01's Blue Brick Wiring Set, so I got that installed and also wired up an additional switch so I could independently control the power to my bluetooth module. Here it is all wired up... From Left to Right: Bluetooth Module power switch, Main System power switch, Battery Charging port, and completely decorative Switchcraft plate.
With all of the electronics installed and wired up, I cleaned up my cabling and ended up with this...
Now I feel I can really concentrate on that vent mech power bracket/plate
Re: GohstTarp's Proton Pack Build
Posted: February 16th, 2017, 1:24 am
by Venkman's Swagger
So clean and tidy in there GT. Immense work.
Re: GohstTarp's Proton Pack Build
Posted: February 16th, 2017, 4:06 am
by bishopdonmiguel
Master craftsmanship. Awesome.
Re: GohstTarp's Proton Pack Build
Posted: February 16th, 2017, 4:14 pm
by GohstTarp
Venkman's Swagger wrote:So clean and tidy in there GT. Immense work.
Always appreciate the kinds words, VS. Thank you!
Are you working on any packs at the moment? Would love to see more of your updates and talent!
Venkman's Swagger wrote:So clean and tidy in there GT. Immense work.
Always appreciate the kinds words, VS. Thank you!
Are you working on any packs at the moment? Would love to see more of your updates and talent!
You're welcome man. They are well deserved.
My hero has taken a backseat at the moment whilst I have all my time taken up by work. Hopefully get back to it before the end of the year
Re: GohstTarp's Proton Pack Build
Posted: February 26th, 2017, 2:47 pm
by GohstTarp
This post may contain an affiliate link that helps support GBFans.com when you make a purchase at no additional cost to you.
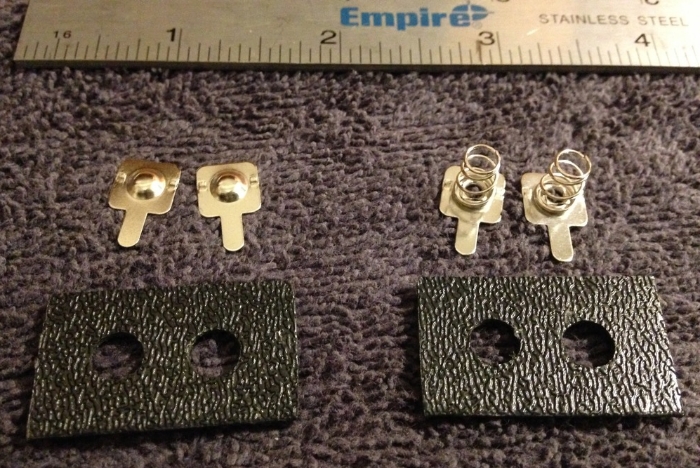
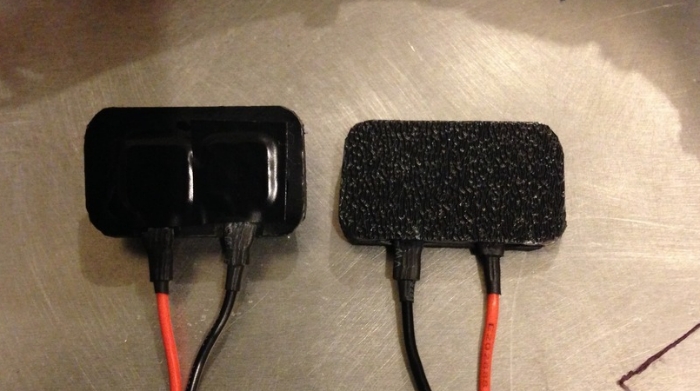
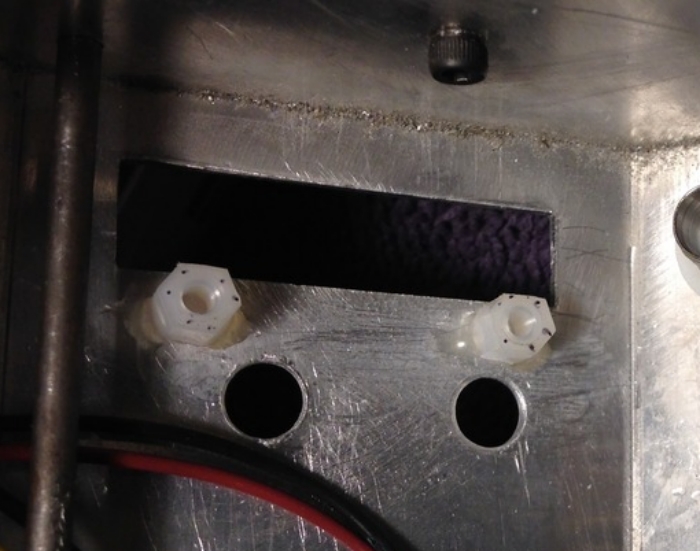
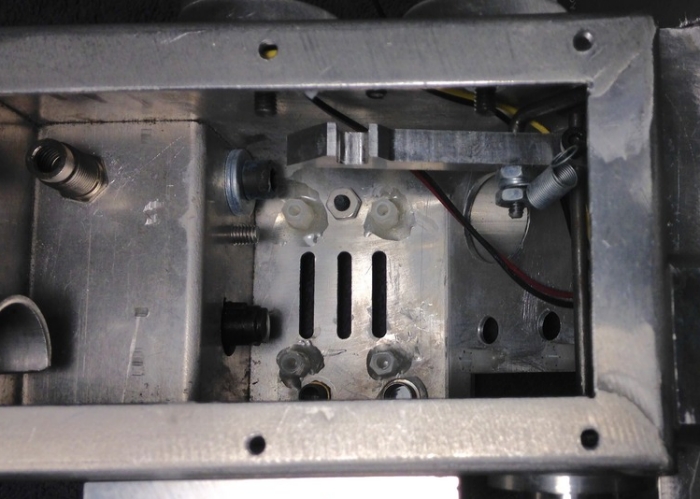
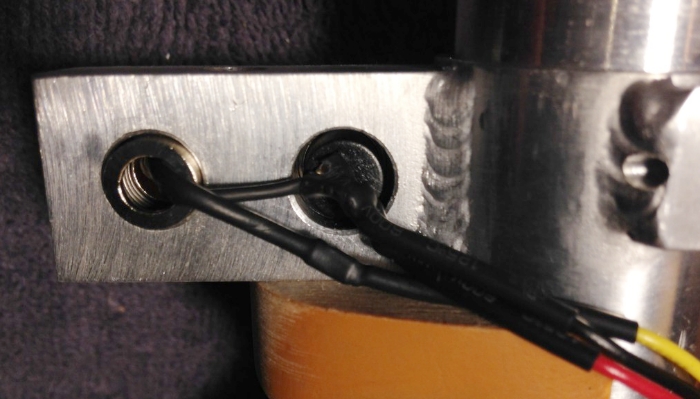
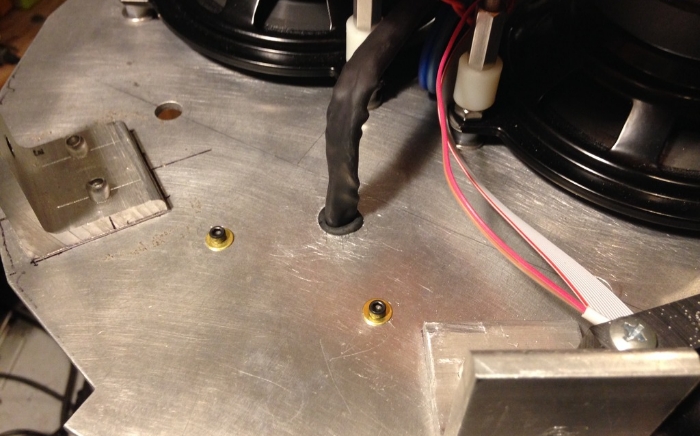
Back again with an update to my Vent Mech "Power Plate Connector" project. I'm happy to report that it all worked out really well and I should no longer need that unruly jumper cable between the shell and motherboard!
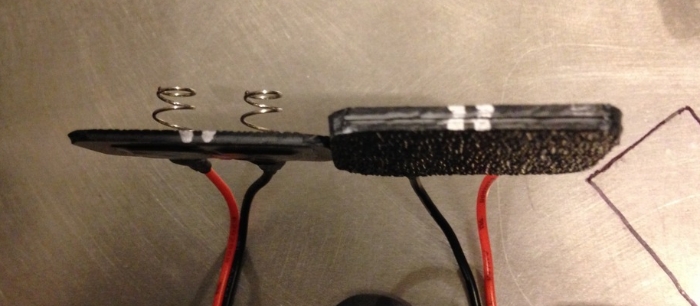
Then I soldered my lead wires to the terminals, super-glued it all together and trimmed the corners. I also used a countersink bit on the "female" plate...
The "male" plate is just one sheet thick, while the "female" plate is two sheets thick. I did this mainly to ensure the terminals were REALLY insulated from the motherboard...
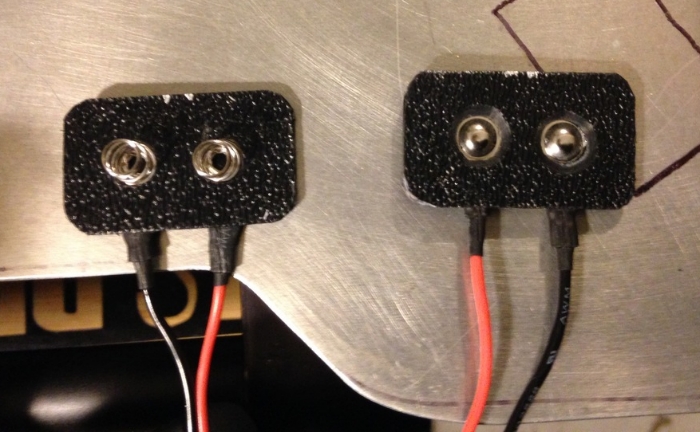
A back view of the plates. I did use some electrical tape on the "male" plate to tidy it up a bit...
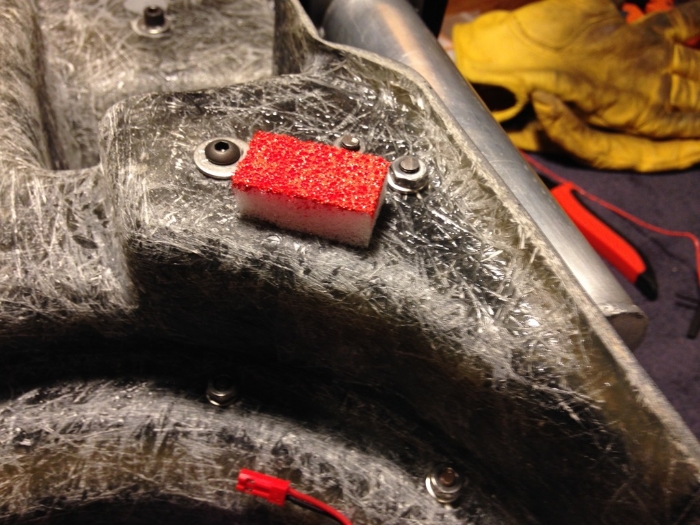
With that out of the way, I needed to get the plates mounted to the shell and motherboard just right, so they line up and complete the power circuit. To do that, I marked the location for the "male" plate on the shell, then cut out a thick, plate-shaped piece of foam from the stuff I used to mount the Vent Mech fan/light assembly in the N-filter and tacked it to the marked location. After that, I brushed on a healthy amount of red acrylic paint to the top...
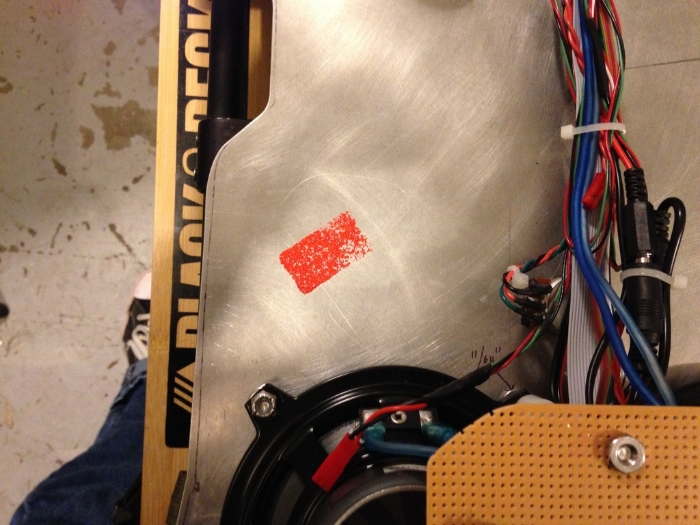
Then I installed the shell on the motherboard, removed it again and the correct spot was marked. Happy day!
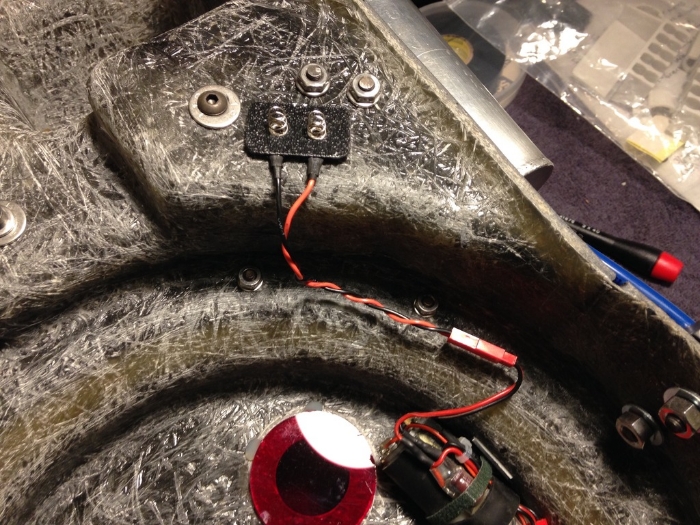
Finally, I crimped on some JST connectors to the plate wire leads, and installed with some double-sided tape...
After I installed the shell again, I fired up the pack and it vented perfectly! I'll continue to stress test this as I install/re-install the shell over time, but it's looking really solid so I hope it holds up well.
Next, I'm going to attempt to dry fit the screen material in the N-Filter and hopefully not affect my Vent Mech install
Re: GohstTarp's Proton Pack Build
Posted: February 26th, 2017, 3:08 pm
by bishopdonmiguel
Love the ingenuity! Inspiring!
Re: GohstTarp's Proton Pack Build
Posted: February 27th, 2017, 3:03 am
by Venkman's Swagger
Very very clever
Re: GohstTarp's Proton Pack Build
Posted: February 28th, 2017, 2:10 pm
by GohstTarp
bishopdonmiguel wrote:Love the ingenuity! Inspiring!
Thank you, Bishop! I hope to see a Vent Mech installed in your pack soon
Re: GohstTarp's Proton Pack Build
Posted: February 28th, 2017, 2:12 pm
by GohstTarp
Venkman's Swagger wrote:Very very clever
That's really nice of you to say, VS. I hope the post will help others get their Vent Mechs installed.
Re: RE: Re: GohstTarp's Proton Pack Build
Posted: March 1st, 2017, 2:14 am
by Venkman's Swagger
GohstTarp wrote:
Venkman's Swagger wrote:Very very clever
That's really nice of you to say, VS. I hope the post will help others get their Vent Mechs installed.
I'm sure it will buddy. Very original
Re: GohstTarp's Proton Pack Build
Posted: March 16th, 2017, 5:25 pm
by barison82
Absolutely stunning work in these latest updates. Such a clever innovation with your power plate connector, really great to see that it worked out Looking forward to seeing further progress...
Re: GohstTarp's Proton Pack Build
Posted: March 28th, 2017, 1:48 pm
by GohstTarp
barison82 wrote:Absolutely stunning work in these latest updates. Such a clever innovation with your power plate connector, really great to see that it worked out Looking forward to seeing further progress...
Thank you, Barison... I really appreciate the support!
Re: GohstTarp's Proton Pack Build
Posted: March 28th, 2017, 2:20 pm
by ecto85
Your pack is coming along nicely. The group hasn't heard from you in awhile. Hope your doing well.
Re: GohstTarp's Proton Pack Build
Posted: March 28th, 2017, 2:39 pm
by GohstTarp
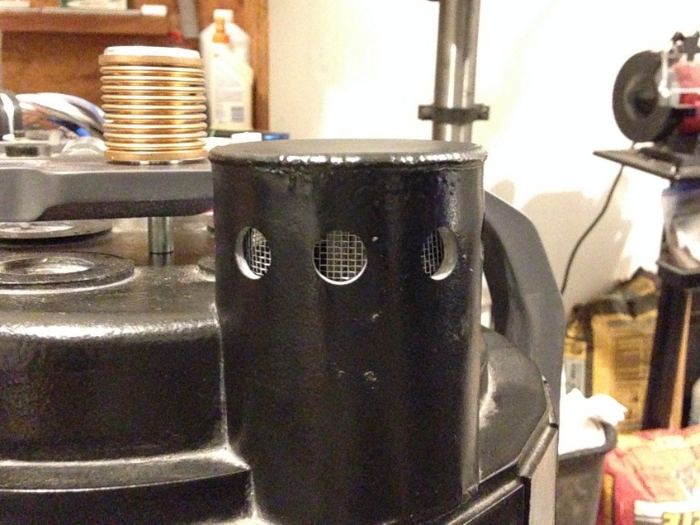
For the N-filter mesh, I used the same screen repair kit used by BishopDonMiguel and it worked out pretty well. I created three identical "strips", super-glued the edges for durability and just taped them inside the shell. After painting, I'll attach them using super-glue and epoxy. Here is how the look for now...
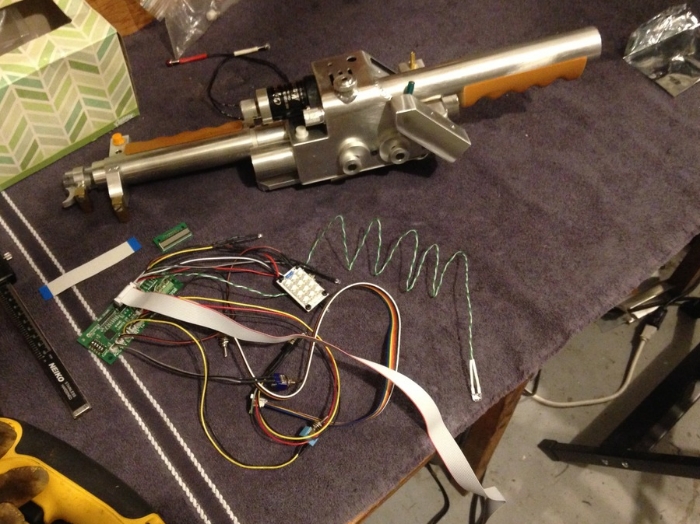
Now that the pack is more-or-less ready to prep for painting, I moved on to dry-fitting the electronics in the wand...
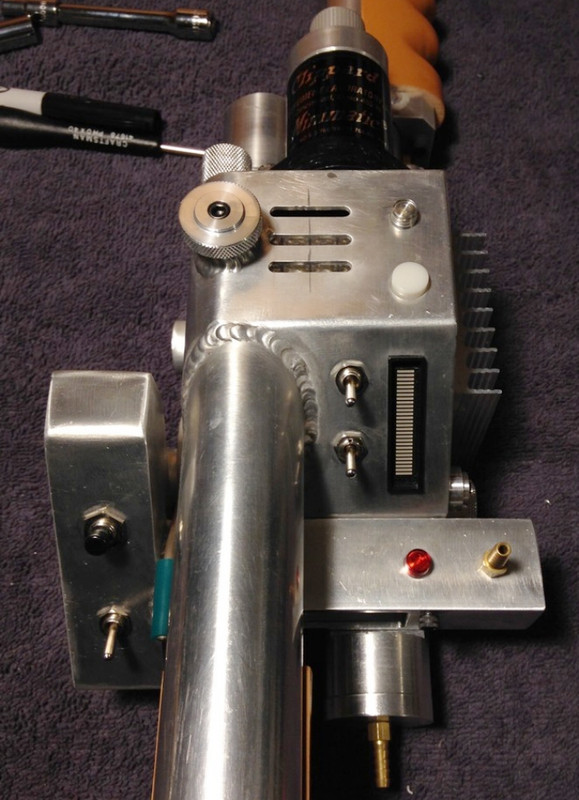
So far, I've just been following the general instructions for installing the GBfans wand lights kit. I started out by mounting all the lights. Here, I'm installing the Arcolectric Red Incandescent Indicator using a 9/32 ignition wrench I just happened to have handy...
Getting ready to install the "fire" button...
Here, the arcolectric red and white lamps and white hat light have been installed...
For the white hat light that gets pushed up from the inside, I just fit it in the hole and give it a good tap with a wooden dowel and hammer. It's a bit higher than some of the reference pics, but it's in there solid, but can easily be removed
Here are the installed second white hat light and orange hat light on the front handle ear...
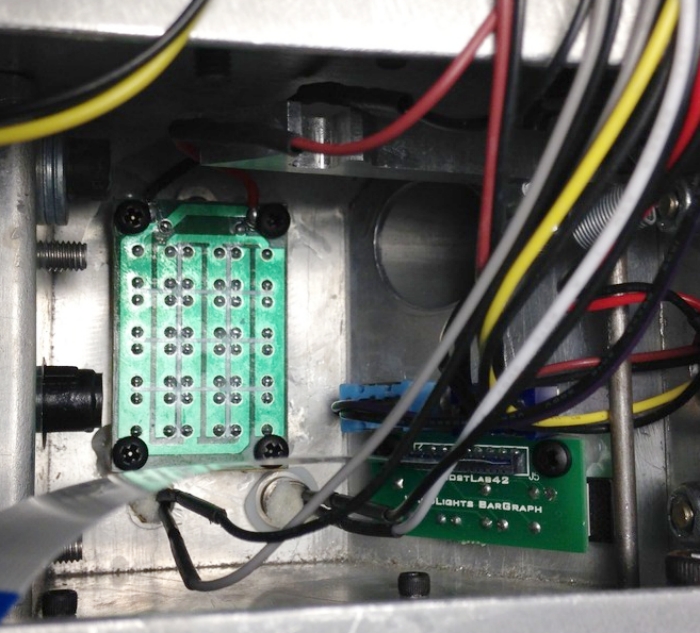
I also started installing some posts for the yellow bar graph. As you can see below, there is *just enough* room for the bar graph bezel and switches on either side...
And posts for ovwthrillseekr's “Super Bright Proton Gun Vent Light” were installed. Again, a very nice and close fit... If you look closely, you can see I needed to trim the hidden edge of the pushed up white hat light to get the fit I wanted. I also got some epoxy disturbingly close to the white arcolectric lamp nut, but it's all good.
For installing the posts, I took some advice from Bishop's build and initially placed the posts using super-glue with the boards attached, for a perfect fit. After drying, I removed the boards and re-enforced the posts with the epoxy.
Now I'm ready to install and route all the LEDs and switches, followed by mounting the wand light board on the same side as the side adjustment knobs.
Re: GohstTarp's Proton Pack Build
Posted: March 28th, 2017, 2:47 pm
by GohstTarp
ecto85 wrote:Your pack is coming along nicely. The group hasn't heard from you in awhile. Hope your doing well.
Thanks for reaching out, Dr.Frisby. I'm doing well, but have been very busy with work and home projects lately. I hope to attend a bust or meeting soon!
Re: GohstTarp's Proton Pack Build
Posted: March 28th, 2017, 2:51 pm
by ecto85
We should be having a meeting soon Dr.Benton hope to see you there.
Re: GohstTarp's Proton Pack Build
Posted: March 31st, 2017, 12:00 am
by GohstTarp
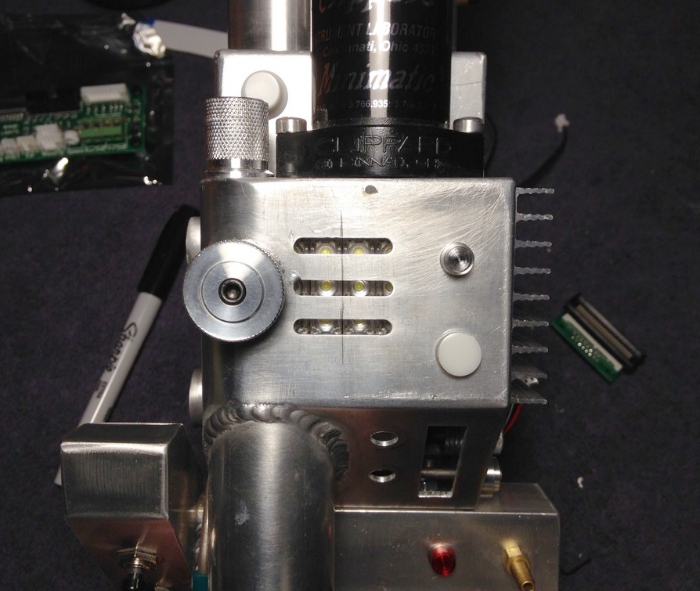
After letting the epoxy cure, I installed the vent light and bar graph using the usual nylon screws. I also installed all the LEDs and switches in the main body. To secure the LEDs in place, I used some of the same craft foam I used for the N-filter vent mech; easy to install and remove.
A view of the outside...
A view of the vent light from above...
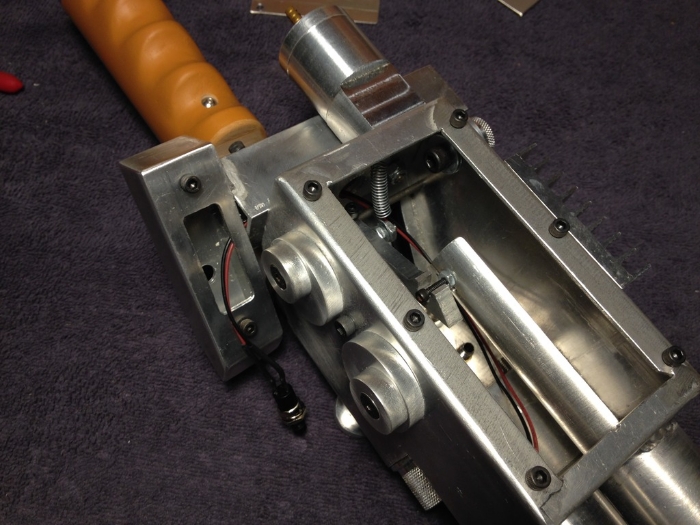
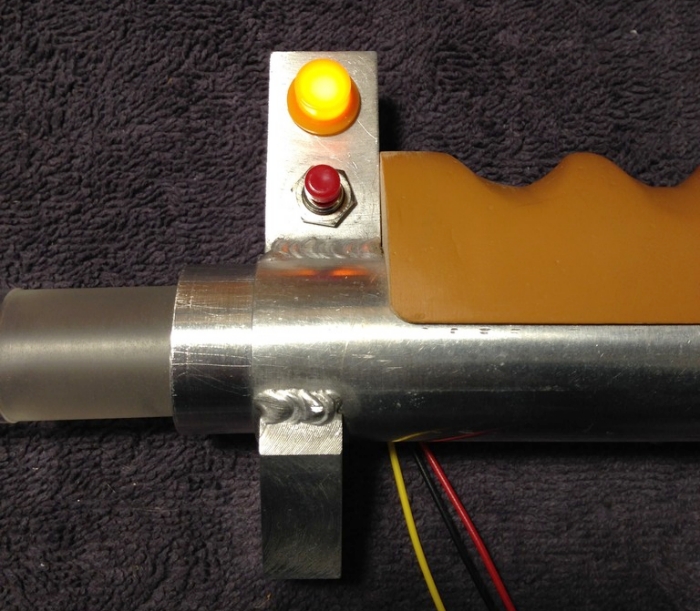
Before I mount the light board, I thought it would be a good idea to wire up and install the ear and tip stuff, so I started with the switch and hat light LED installation...
Getting the wiring in back of the ear ready for a test installation of some 1" heat shrink was pretty easy. I just didn't force anything and it went smoothly...
Here is how the ear light/switch assembly looked after it was bent to fit nicely...
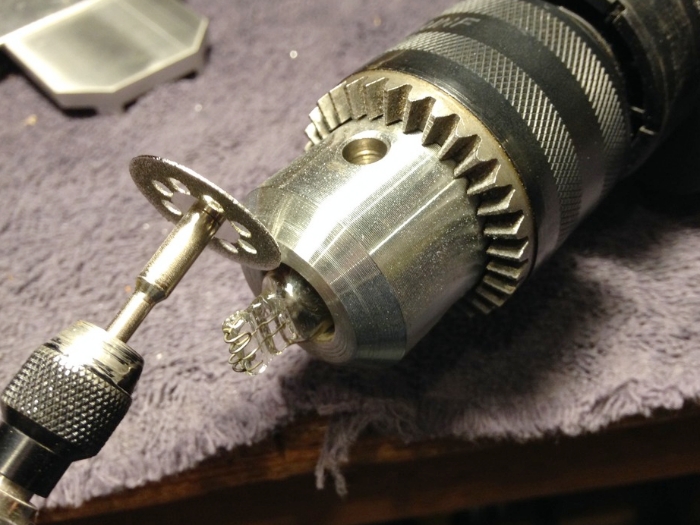
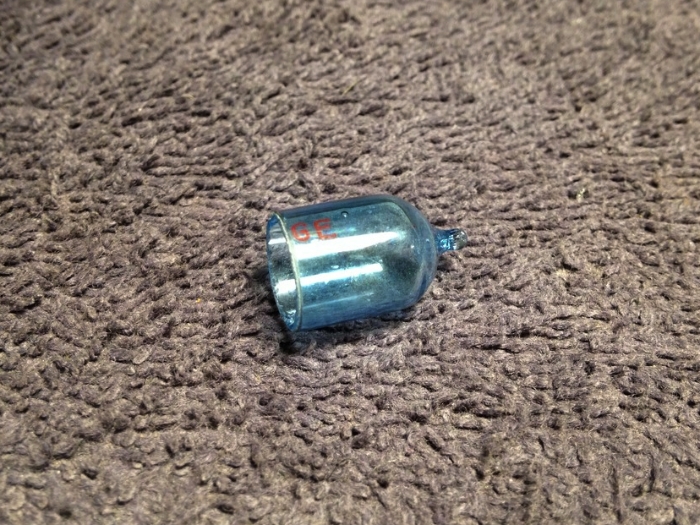
Next, I switched gears a bit and started working on the wand tip and finally came back to something I mentioned a while ago, so it was satifying to finally get to spongeface's white strobe LED and the vintage GE AG-1B bulbs. I followed julz lead here and it worked out great. First, I placed the bulb tip-first into my hand drill and tightened it as much as I could dare. Then I held a glass-cutting wheel in my Dremel (with the spindle lock button pressed) up against the bulb and fired up the drill. After about a minute I got the "POP" and the back flew off just like julz said it would!
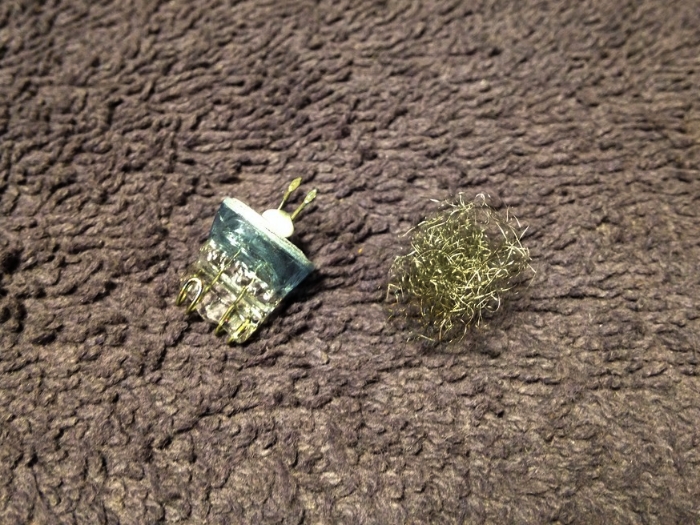
I was able to find the "filament" and base...
And here is how the bulb looks after a very light sanding on the edge. Nice and clean...
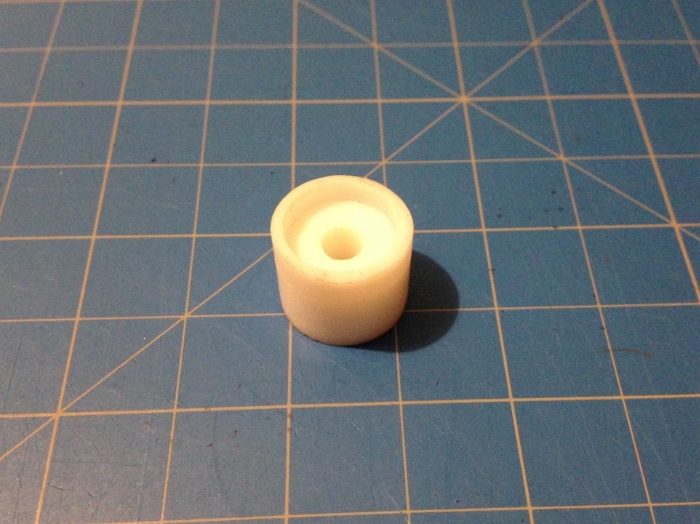
Starting with this 5/8" diameter white plastic rod, I cut off a 1/2" piece, cut out a 1/8" deep, 1/2" diameter hole and a center thru-hole and got this...
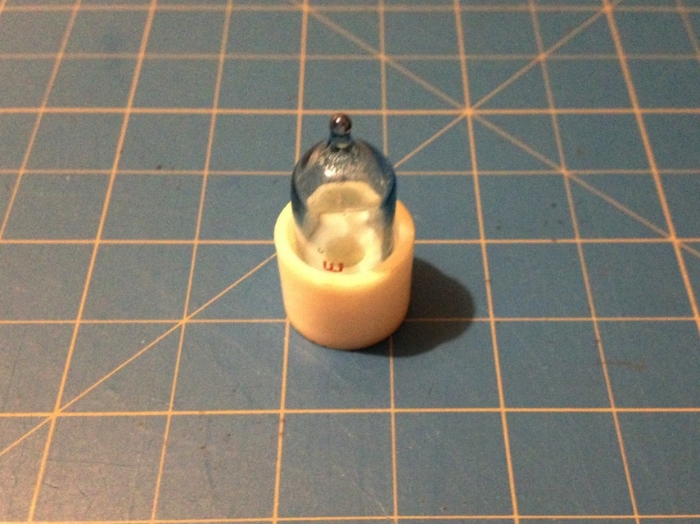
The bulb "base" with the bulb placed...
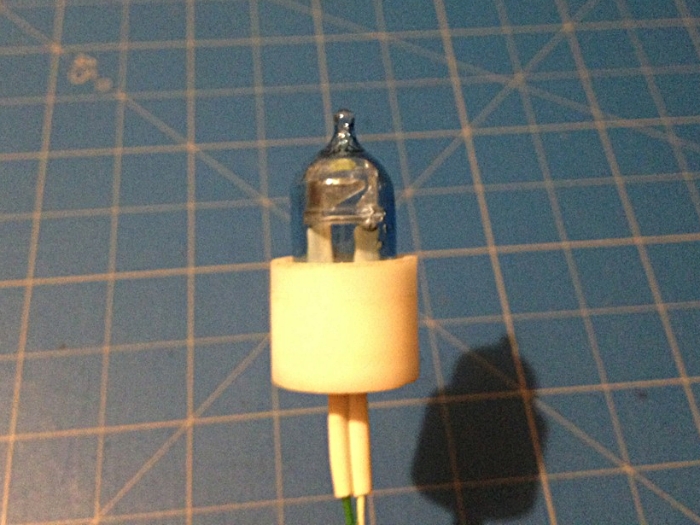
And here it is with the white strobe LED inside...
That's all I have for now. I plan to epoxy the base and bulb together before installing in the tip. Which reminds me... time to take apart the front handle!
Re: GohstTarp's Proton Pack Build
Posted: March 31st, 2017, 1:38 am
by Venkman's Swagger
Amazing yet again GT. You could seriously go pro at this
Re: GohstTarp's Proton Pack Build
Posted: March 31st, 2017, 4:43 am
by bishopdonmiguel
Too legit to quit!
Re: GohstTarp's Proton Pack Build
Posted: April 1st, 2017, 5:57 am
by barison82
GohstTarp wrote:Thank you, Barison... I really appreciate the support!
Always man, I've enjoyed seeing every stage of this superb build, and look forward to further progress. It's been an inspiration with your original ideas thrown into it along the way
Re: GohstTarp's Proton Pack Build
Posted: April 1st, 2017, 6:29 am
by barison82
Also, really superb work with the GE AG-1B flashbulb - I'm going to pass this on to Benofkent Props for their reference as they are at this stage with my build at the moment as well, this will help big time, thank you
Re: GohstTarp's Proton Pack Build
Posted: April 3rd, 2017, 2:37 am
by askernas
Whenever I log in to the board, your thread is the first I check for updates.
Thank you for putting up such a detailed thread. It inspires me to work harder on my pack, and I have more than one idea that I've borrowed from your thread
Re: GohstTarp's Proton Pack Build
Posted: April 4th, 2017, 11:10 am
by GohstTarp
Venkman's Swagger wrote:Amazing yet again GT. You could seriously go pro at this
Thanks, VS! Very, very nice of you to say. I just try to take my time and focus on one thing at a time.
Re: GohstTarp's Proton Pack Build
Posted: April 4th, 2017, 11:14 am
by GohstTarp
bishopdonmiguel wrote:Too legit to quit!
Ha ha ha! Thanks, Bishop!
Re: GohstTarp's Proton Pack Build
Posted: April 4th, 2017, 11:18 am
by GohstTarp
barison82 wrote:Also, really superb work with the GE AG-1B flashbulb - I'm going to pass this on to Benofkent Props for their reference as they are at this stage with my build at the moment as well, this will help big time, thank you
Thank you, Barison... and you're welcome! It's great to hear the bulb pics will help you out. Hope to see more of your updates soon.
Re: GohstTarp's Proton Pack Build
Posted: April 4th, 2017, 11:25 am
by GohstTarp
askernas wrote:Whenever I log in to the board, your thread is the first I check for updates.
Thank you for putting up such a detailed thread. It inspires me to work harder on my pack, and I have more than one idea that I've borrowed from your thread
Thank YOU for letting me know that, askernas! So glad to hear this thread helps and inspires you. I wish my thread could be *more* detailed, but I try to concentrate on detailing areas that weren't obvious or were mysterious to me before I tackled them.

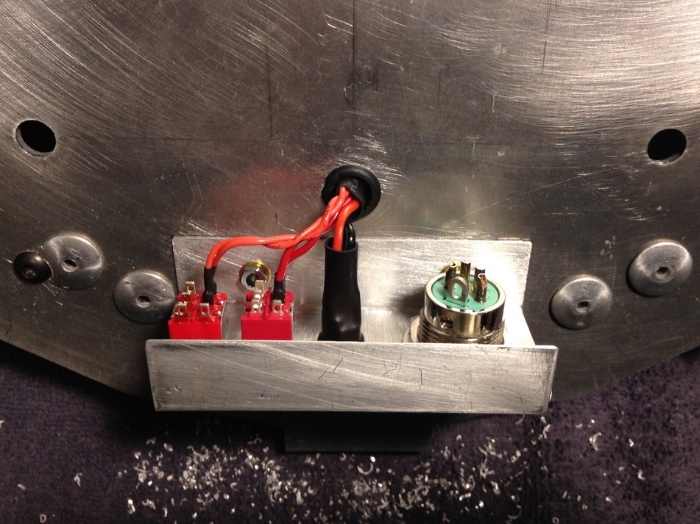
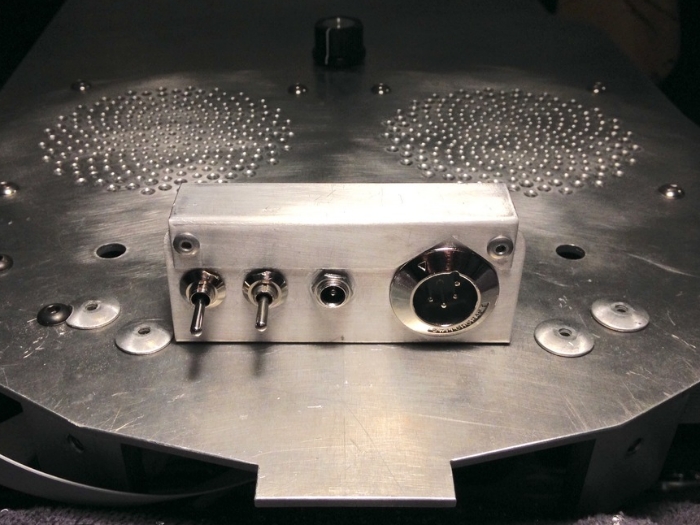 From Left to Right: Bluetooth Module power switch, Main System power switch, Battery Charging port, and completely decorative Switchcraft plate.