
- April 25th, 2015, 1:46 pm#4831916
Hello, fellow jabronis. I was originally goign to post this in my other thread about 3D Reprap printing, but I made that one with the intent of showing Ghostbusters related prints. Since this one is not related, I decided on the general forum. Please, correct it if necessary.
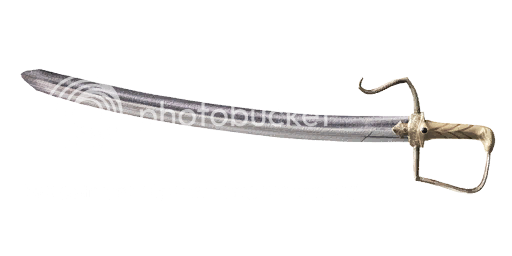
My nephew commissioned me (for no pay) to make him a sword for his Assassin's Creed Arno cosplay for Anime Boston. He secured a very nice outfit from a cosplay website, but had no weapon. So he gave me a picture of a typical cutlass of the era and asked if I could make it. I decided to use this opportunity as my first project to create a full scale prop with my mini Kossel printer. See other thread for details on that.
It was a challenging project, to say the least, and I thought I'd post it here for your entertainment. Without further ado, here is the journey to create a 3D printed sword...
The reference image for the sword.
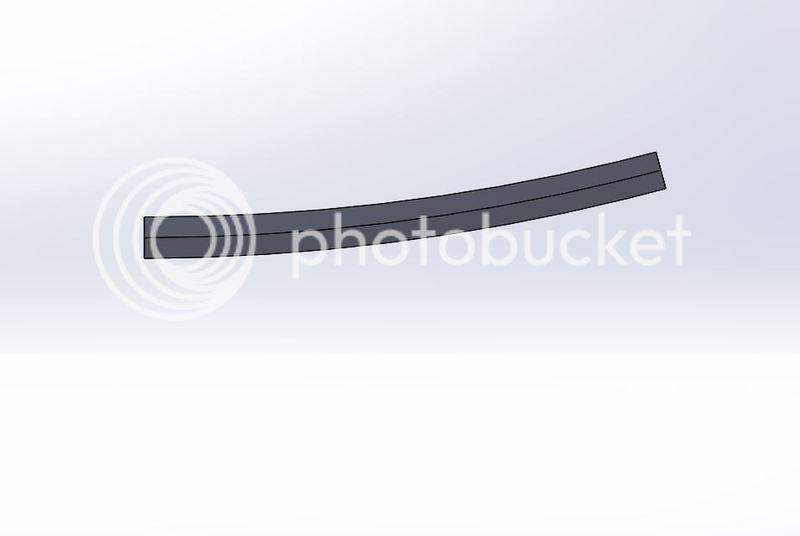
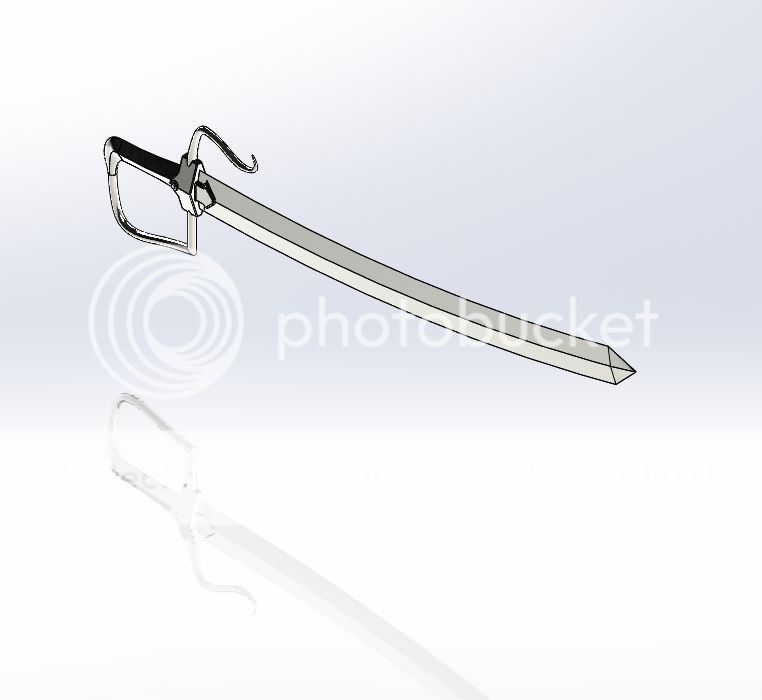
Now through the magic of technology, a 3D model is made instantly (it really took several hours in SolidWorks).
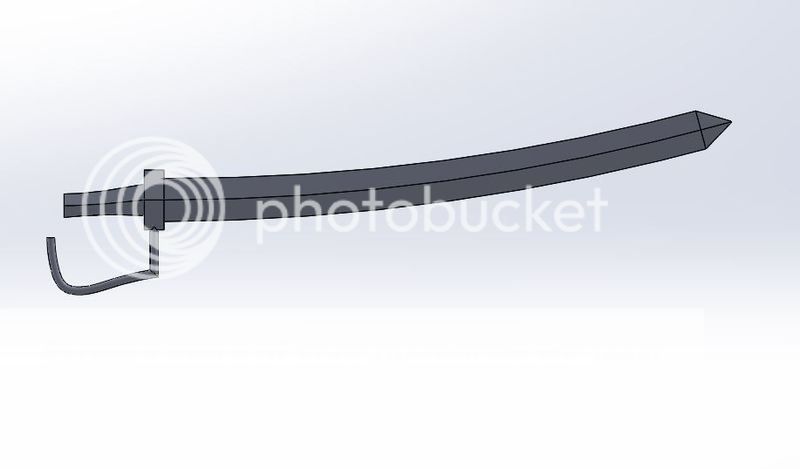
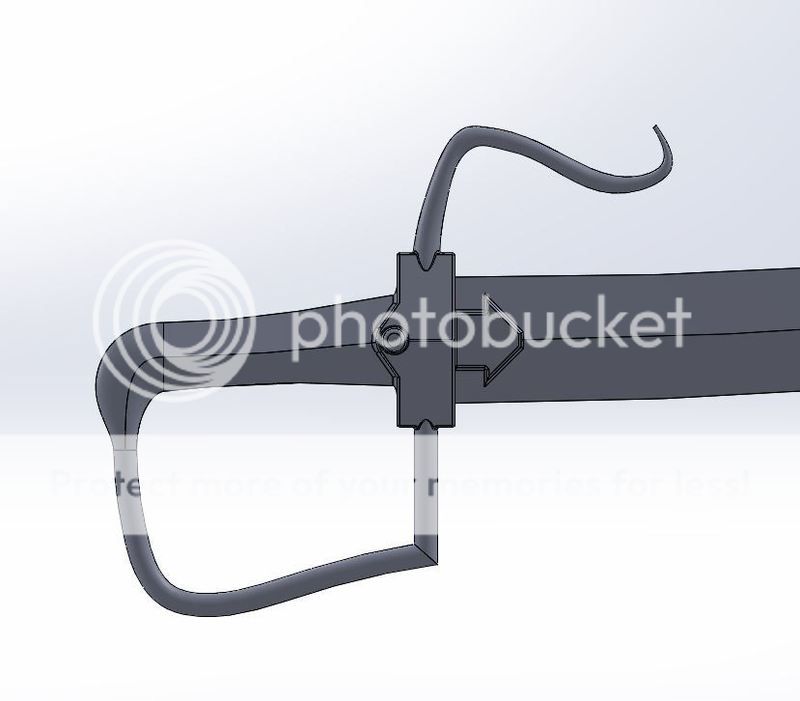
The finished model:
My print's bed is 195 cm circular x 220 cm tall, so a model of this size has to be divided up. I made a couple configurations in SolidWorks that deleted bodies so they were all smaller than 200 cm, and then the printing begins...
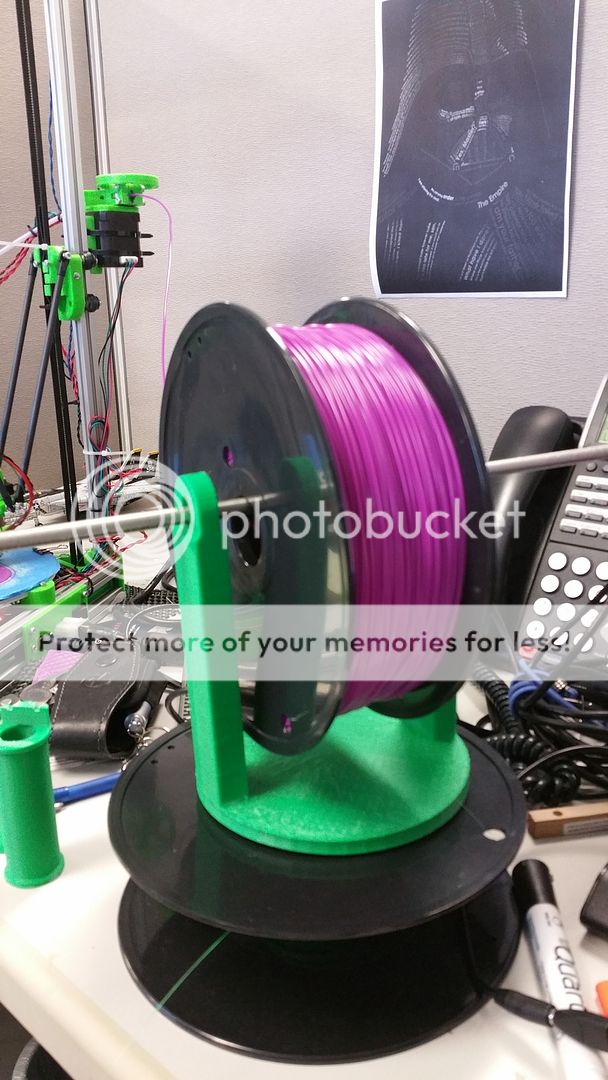
First thing I had to do was fix my reel, which broke so I had to improvise.
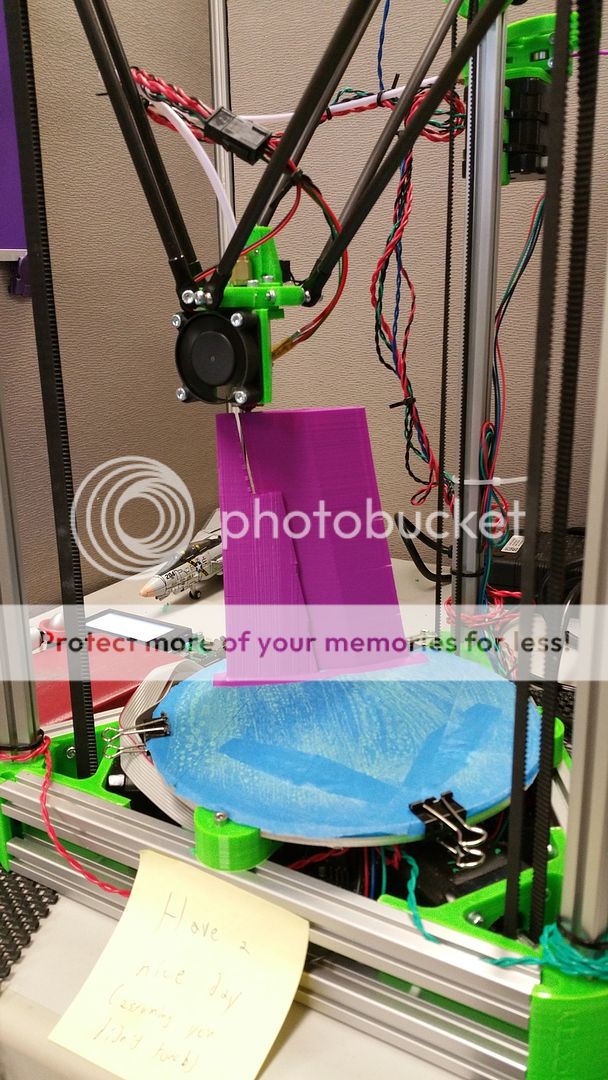
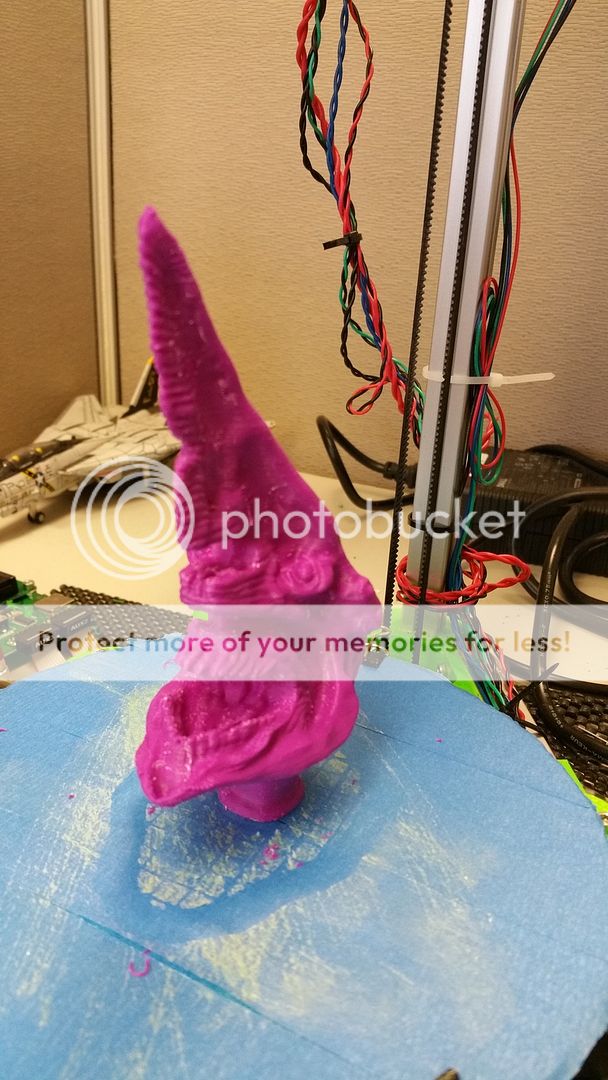
Printing a blade. This picture is cool because it looks like a future building. The small bit on the left is the support so the print doesn't sag.
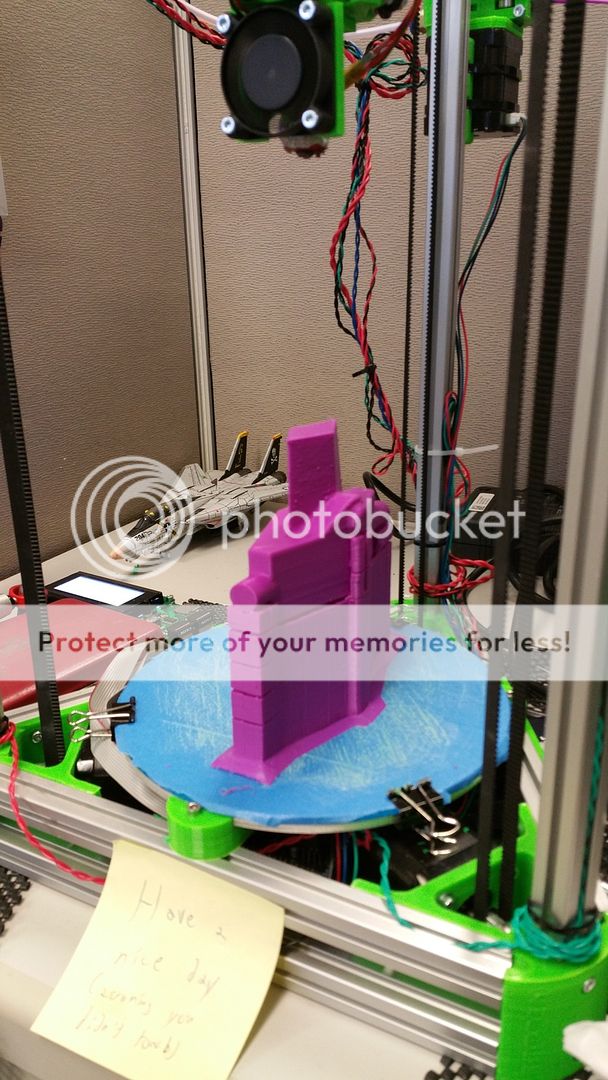
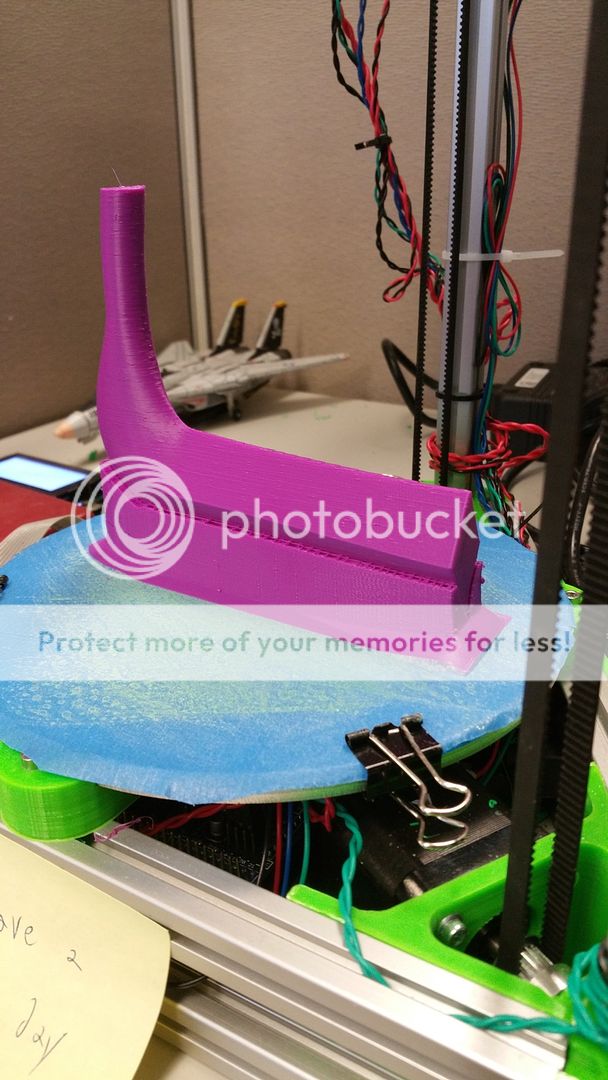
Printing the guard.
Printing the handle. I think this one looks like a Viking Longboat. To keep my sanity I imagine what the prints look like with support, like clouds.
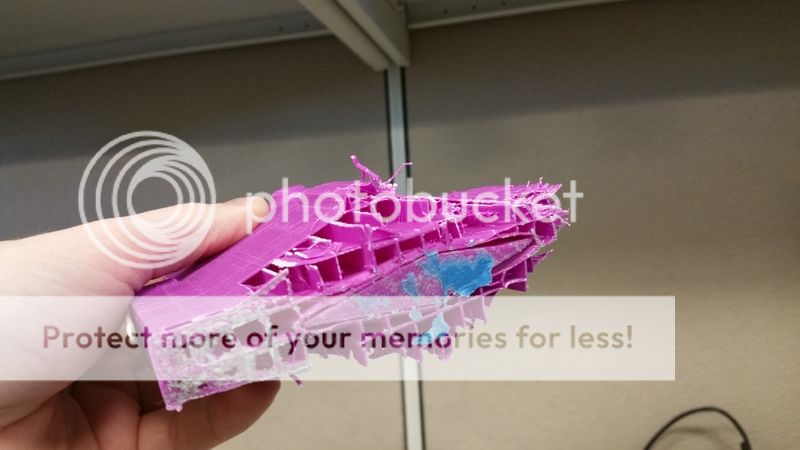
The disadvantage of printing large bodies is that you generally need lots of support, which has to be broken off.
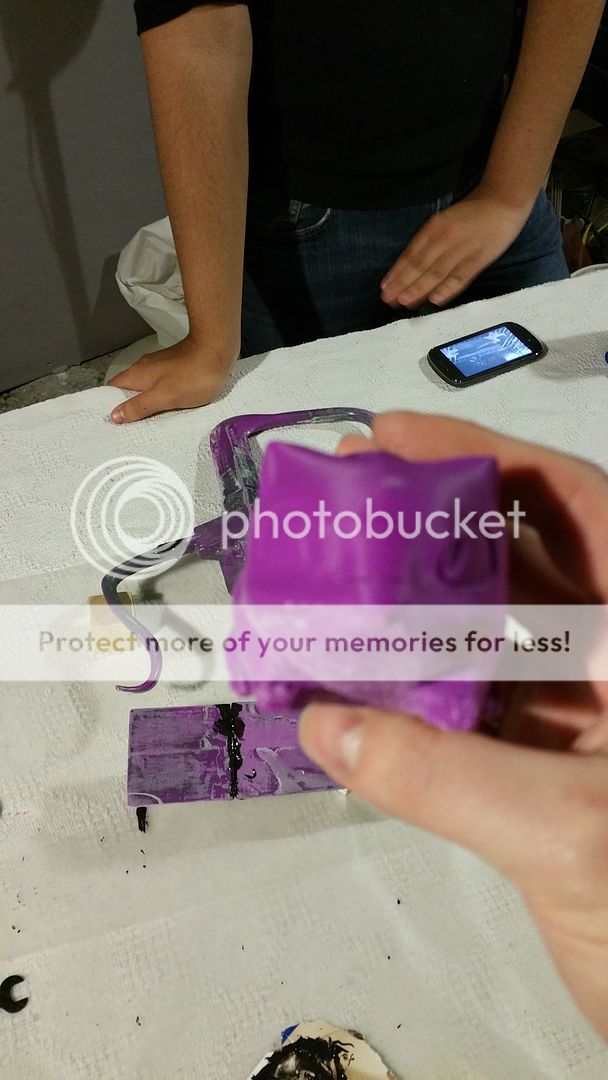
The prints have to be glued together. To do that I use what is called ABS slurry; it's a mixture of scrap ABS and acetone; the acetone melts the print and then solidifies it back, similar to modeling glue. Note the clever use of junk mail to protect my cube desk.
The complete glued model.
I also 3D printed a bulbasaur, because reasons.
...and a Kaiju.
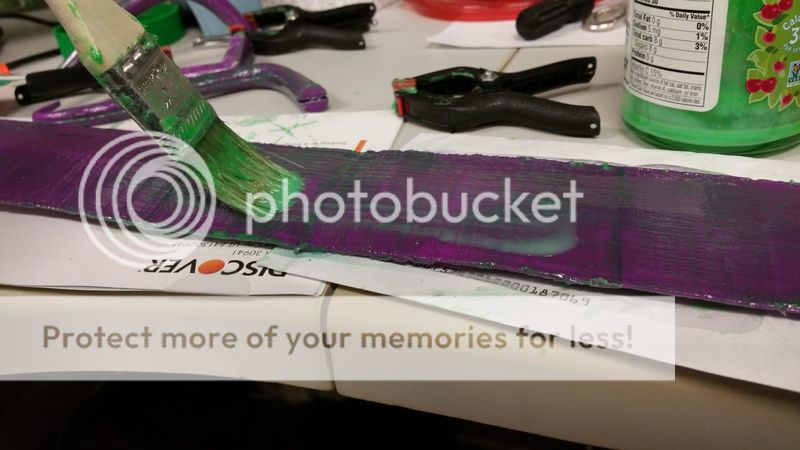
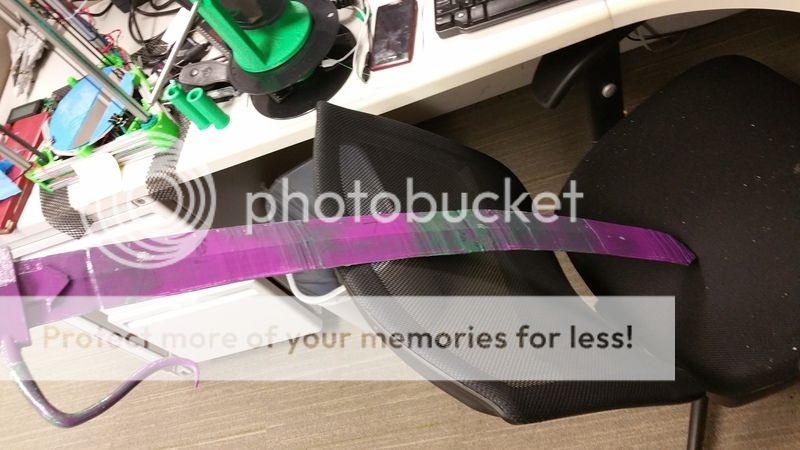
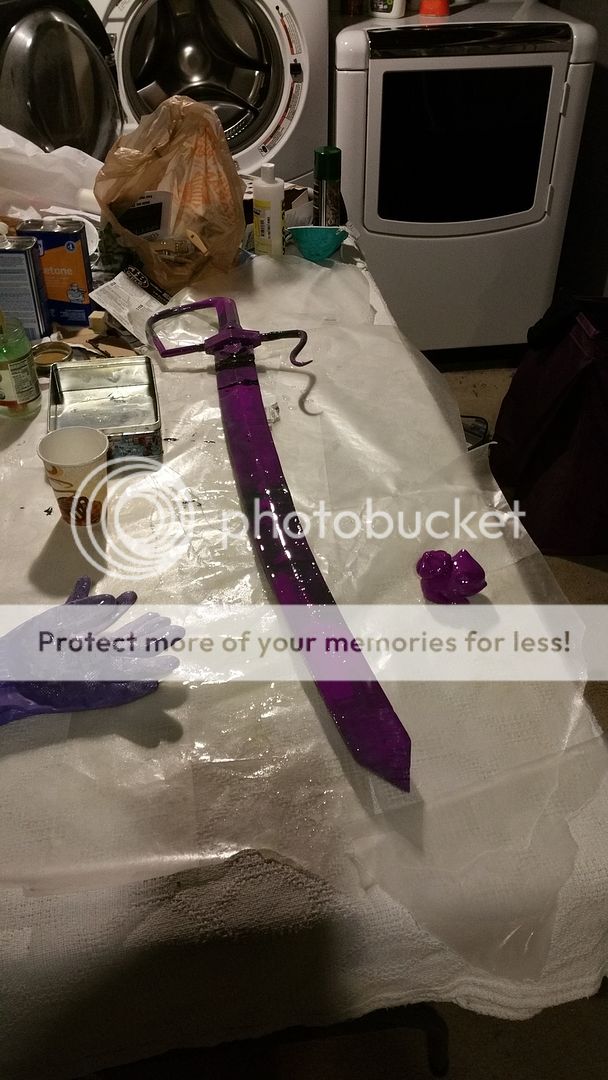
To seal up the seams and correct the striations, I use a layer of two part synthetic resin.
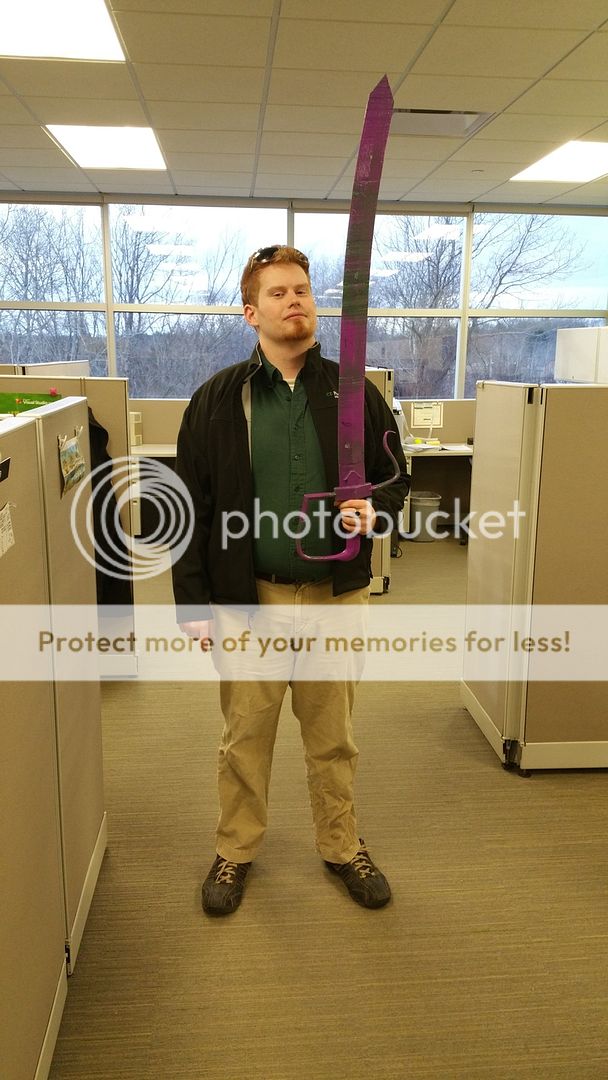
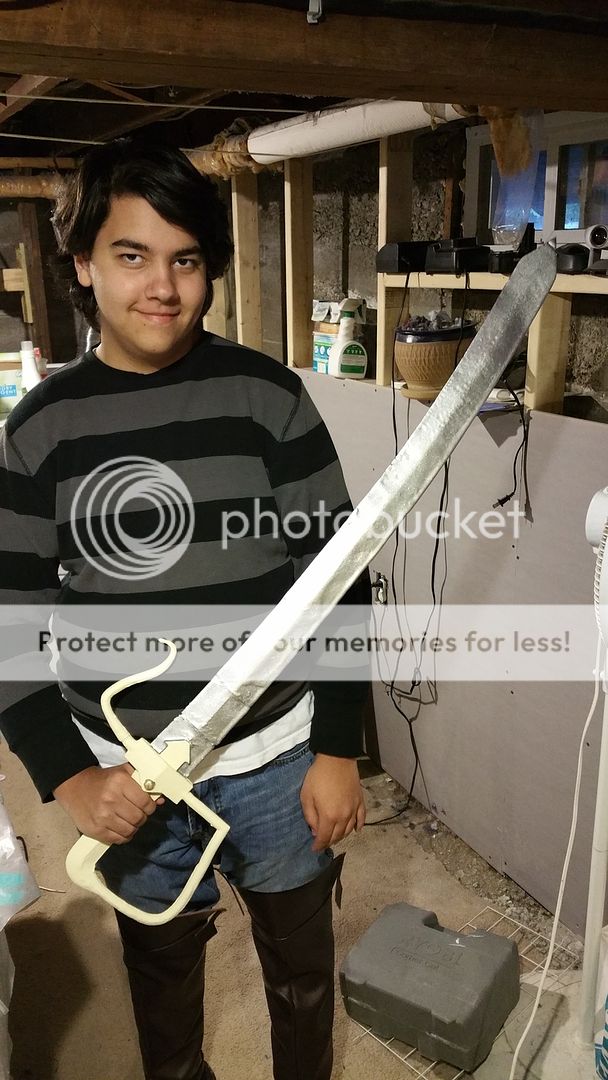
Once the resin dries in about two hours, it's ready for paint. Here is my nephew showing off the finished prop. I'd prefer a more airbrushed metalic look, but he elected to spray paint it.
I also painted the Bulbasaur and Kaiju and used them as my mascots. You can barely see my Ghostbusters overcoat in this picture.

Not sure what my next big project will be. Maybe print some proton pack components and finish a full model. I may start with a trap or PKE meter, first.
My nephew commissioned me (for no pay) to make him a sword for his Assassin's Creed Arno cosplay for Anime Boston. He secured a very nice outfit from a cosplay website, but had no weapon. So he gave me a picture of a typical cutlass of the era and asked if I could make it. I decided to use this opportunity as my first project to create a full scale prop with my mini Kossel printer. See other thread for details on that.
It was a challenging project, to say the least, and I thought I'd post it here for your entertainment. Without further ado, here is the journey to create a 3D printed sword...
The reference image for the sword.
Now through the magic of technology, a 3D model is made instantly (it really took several hours in SolidWorks).
The finished model:
My print's bed is 195 cm circular x 220 cm tall, so a model of this size has to be divided up. I made a couple configurations in SolidWorks that deleted bodies so they were all smaller than 200 cm, and then the printing begins...
First thing I had to do was fix my reel, which broke so I had to improvise.
Printing a blade. This picture is cool because it looks like a future building. The small bit on the left is the support so the print doesn't sag.
Printing the guard.
Printing the handle. I think this one looks like a Viking Longboat. To keep my sanity I imagine what the prints look like with support, like clouds.
The disadvantage of printing large bodies is that you generally need lots of support, which has to be broken off.
The prints have to be glued together. To do that I use what is called ABS slurry; it's a mixture of scrap ABS and acetone; the acetone melts the print and then solidifies it back, similar to modeling glue. Note the clever use of junk mail to protect my cube desk.
The complete glued model.
I also 3D printed a bulbasaur, because reasons.
...and a Kaiju.
To seal up the seams and correct the striations, I use a layer of two part synthetic resin.
Once the resin dries in about two hours, it's ready for paint. Here is my nephew showing off the finished prop. I'd prefer a more airbrushed metalic look, but he elected to spray paint it.
I also painted the Bulbasaur and Kaiju and used them as my mascots. You can barely see my Ghostbusters overcoat in this picture.
Not sure what my next big project will be. Maybe print some proton pack components and finish a full model. I may start with a trap or PKE meter, first.

 - By prodestrian
 - By mrmichaelt
 - By RiverofSlime