
- October 2nd, 2017, 8:17 pm#4899077
Hello, I'm Brandon and I've been long overdue with throwing myself into the construction side of the community. For a time about 5 years or so ago, I went on a buying rampage and got myself virtually every prop imaginable. Some of great quality since most were from people on this site, some not so good like the repulsive costumes and slime blowers found on Ebay.
My pack was bought on Ebay and it contains a mix of Resin and Nick-a-Tron parts. Nick-a-Tron also supplied me with a foam stunt trap which was quite heavy and did not exactly fit the purposes that I want. That being a cheap, realitively durable, and lightweight prop to fit on my belt. It was all those things, minus it being light weight. It was sadly lost one drunken Halloween and I miss it dearly...
So dearly, that I decided that I would build my own. A hollow one, to make it light on weight. Realitively cheap, I mean it shouldn't cost me more than 5 bucks to make the main board. Other bells and whistles might cost it extra but I doubt it'll be more than 20$... And since I intend to make a similar light weight proton pack one day, I thought a trap would be a nice starting to point to sort of learn the ropes in making props.
I once held the ambition to make such props and sell them but I think the first thing I ought to do is see if I'm any good at making them first. Well, without further ado...
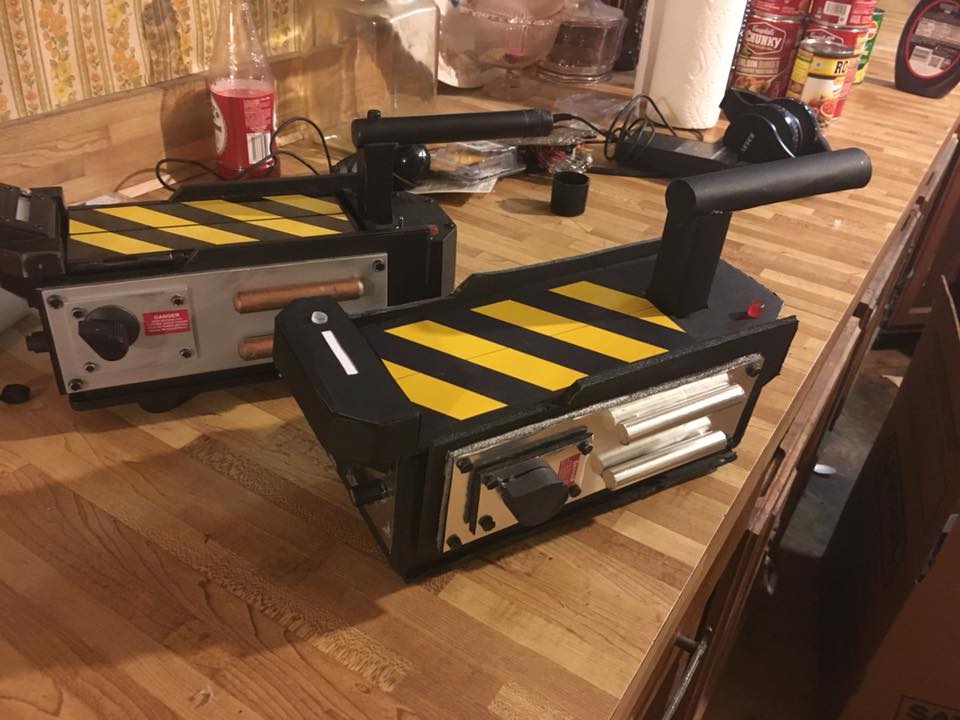
I should mention this was built within 4 hours and was hastily done. I'm calling it a prototype as I am not quite happy with the dimensions yet. The trap is loosely based on a wooden one I bought on Ebay. Not entirely accurate itself but I quite liked some ideas it incorporated to sort of make the design more simple.
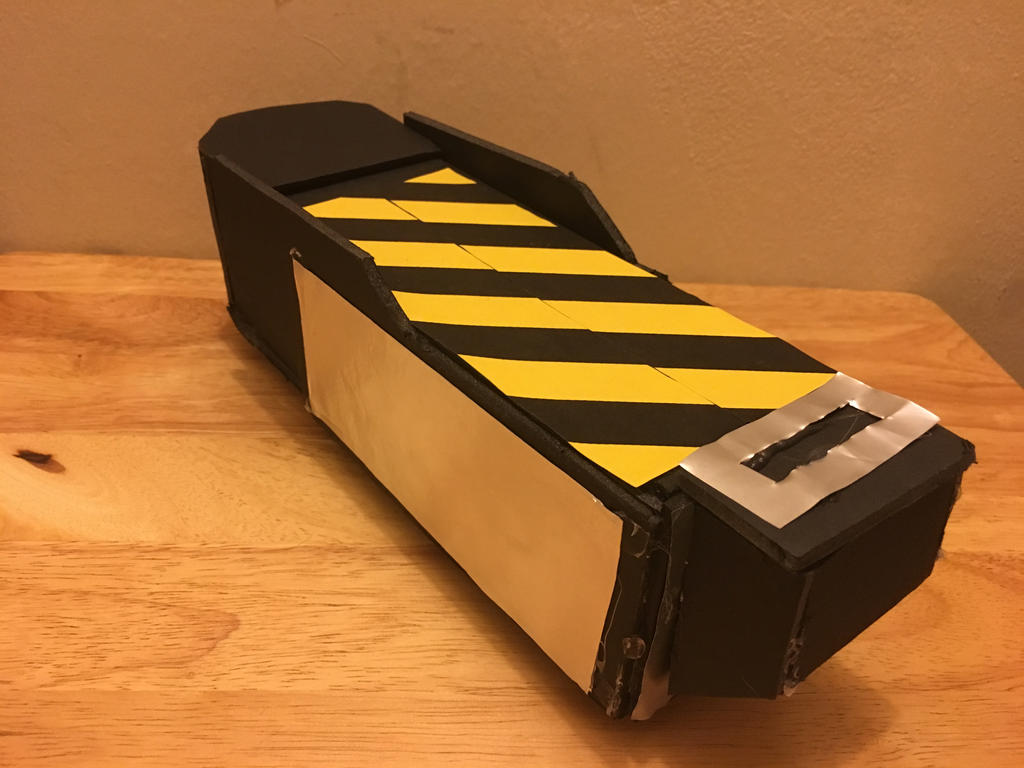
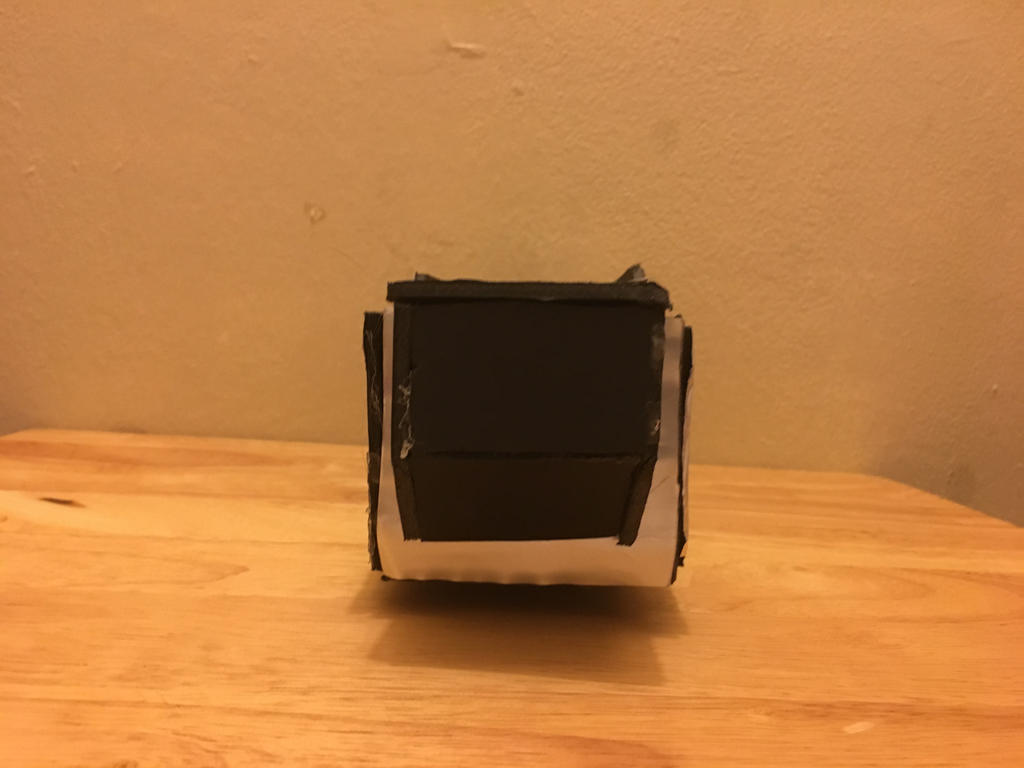
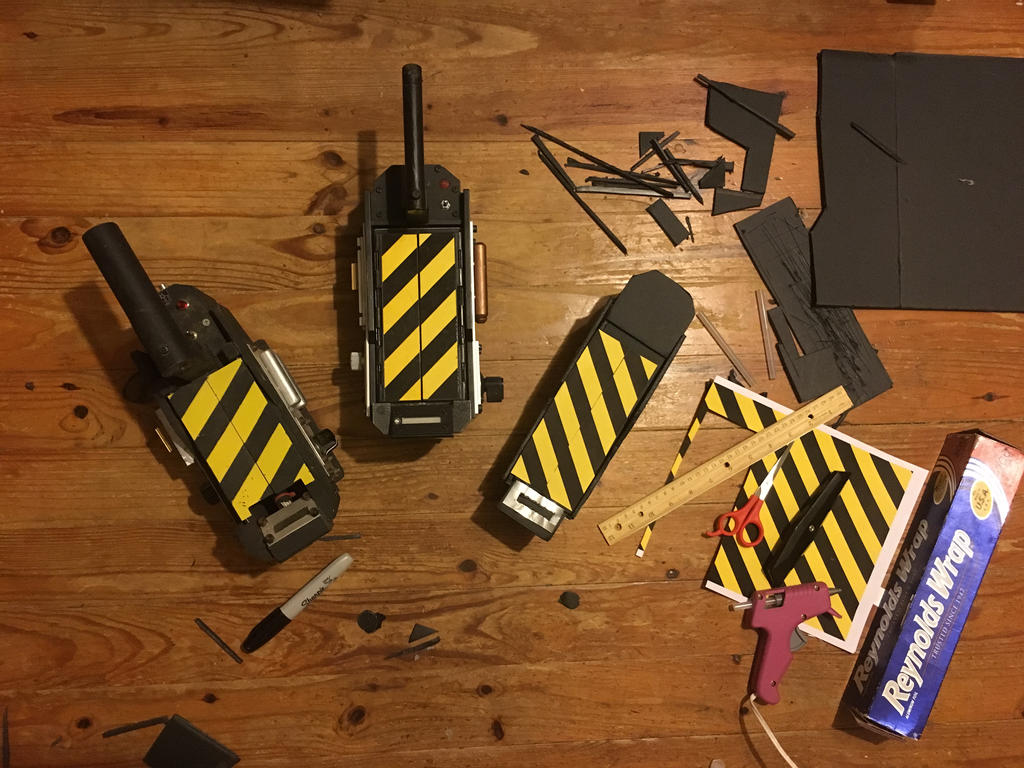
Now first things first, I experimented with cutting up an aluminum can and using aluminum foil. The front part of the trap is the can and the side is the aluminum foil. I dub both these experiments failures. Neither were very cooperative in staying straight.
I did however have a lot of luck with the caution doors, which was done by printing out the design on sticker paper. It is not very straight cut nor positioned but I intend to improve on that. Next time I will spray paint sticker paper silver and use this for the metallic parts.
Another shot of the front. As you can see it's very hastily done. Feel free to call it shit, but I am experimenting with the proportions. The trap looks quite skinny and maybe a little too long so I'll probably shorten and fatten it a bit.
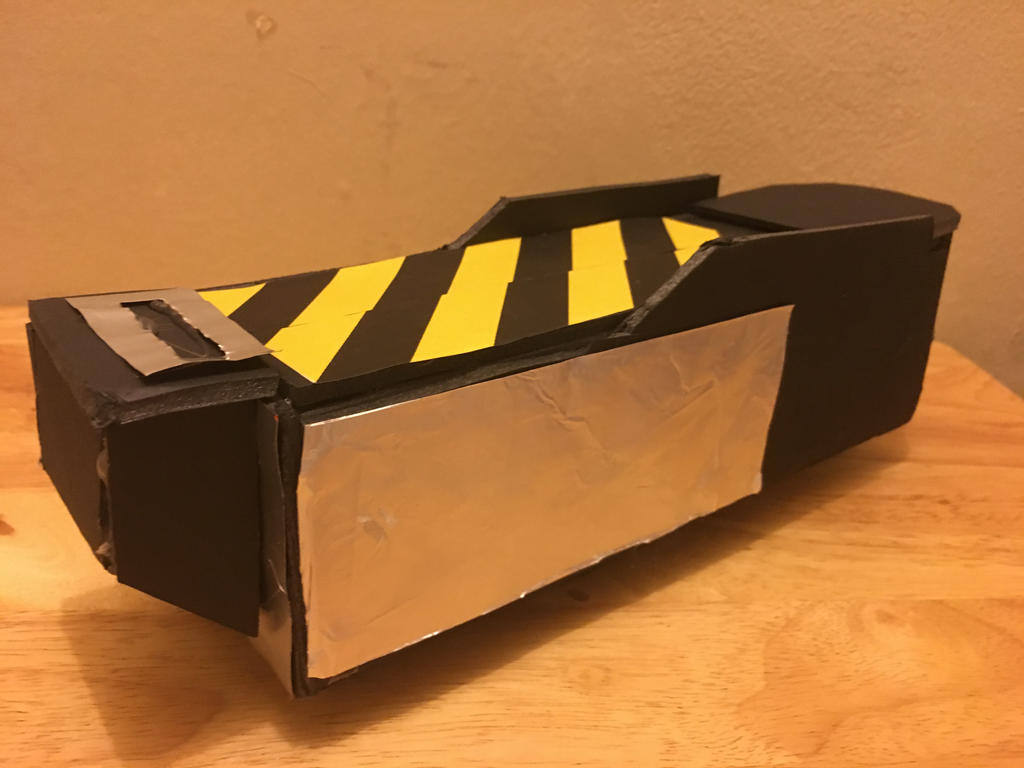
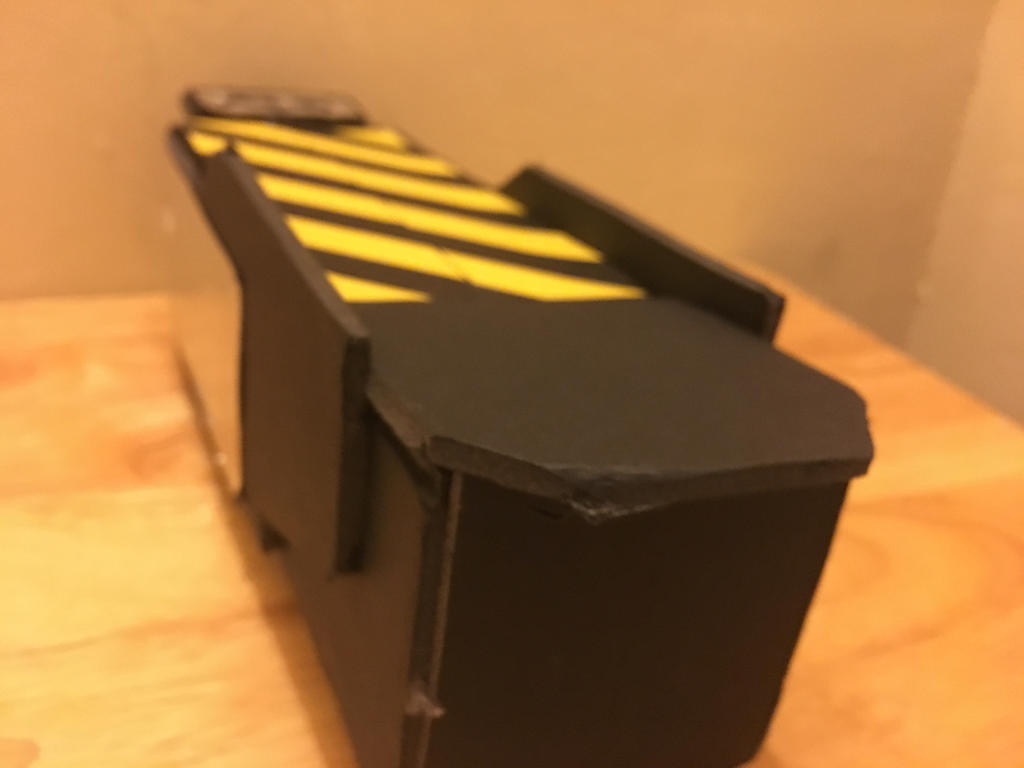
The edges are not cut pretty either. I did attempt to bevel the edges but the foam board is basically foam trapped between two construction paper pieces. I have two ideas to try out next since beveling proved quite difficult (but not impossible)
I can either cut the board intricately and fold it together to hide the corners or take strips of construction paper and glue them to the edges to sort of coat them I also need to cut better... maybe a sharper crafting knife.
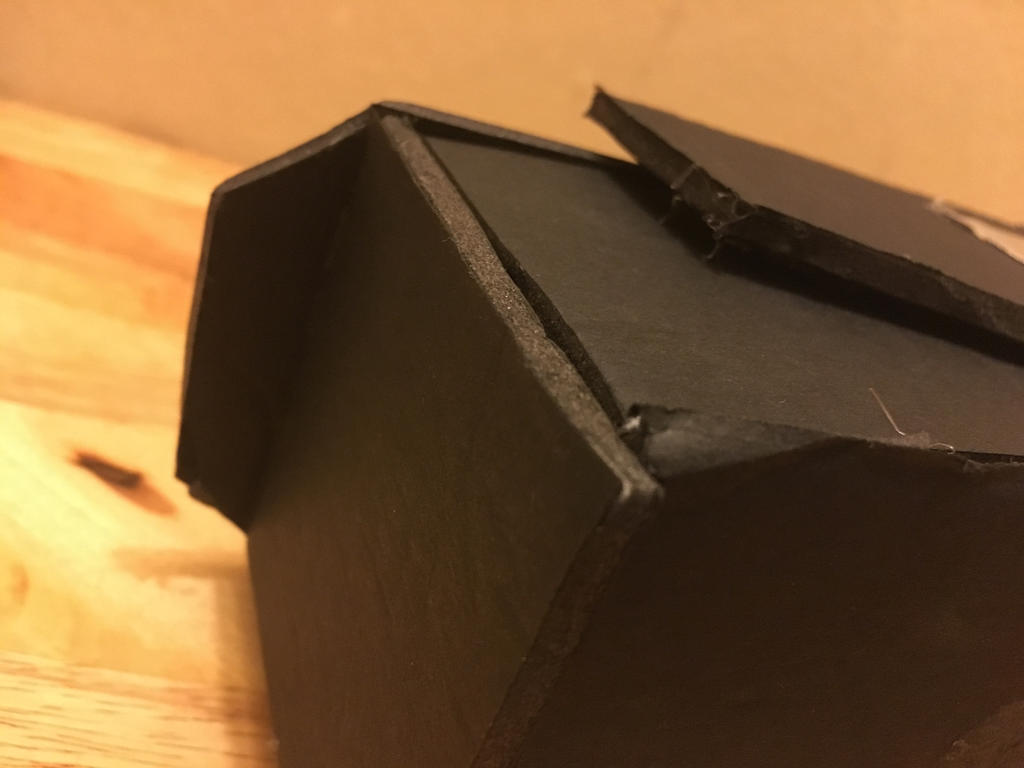
I'm thinking the longer sides should dominate the front, it looks better that way... failing any attempt future to hide the foam sides.
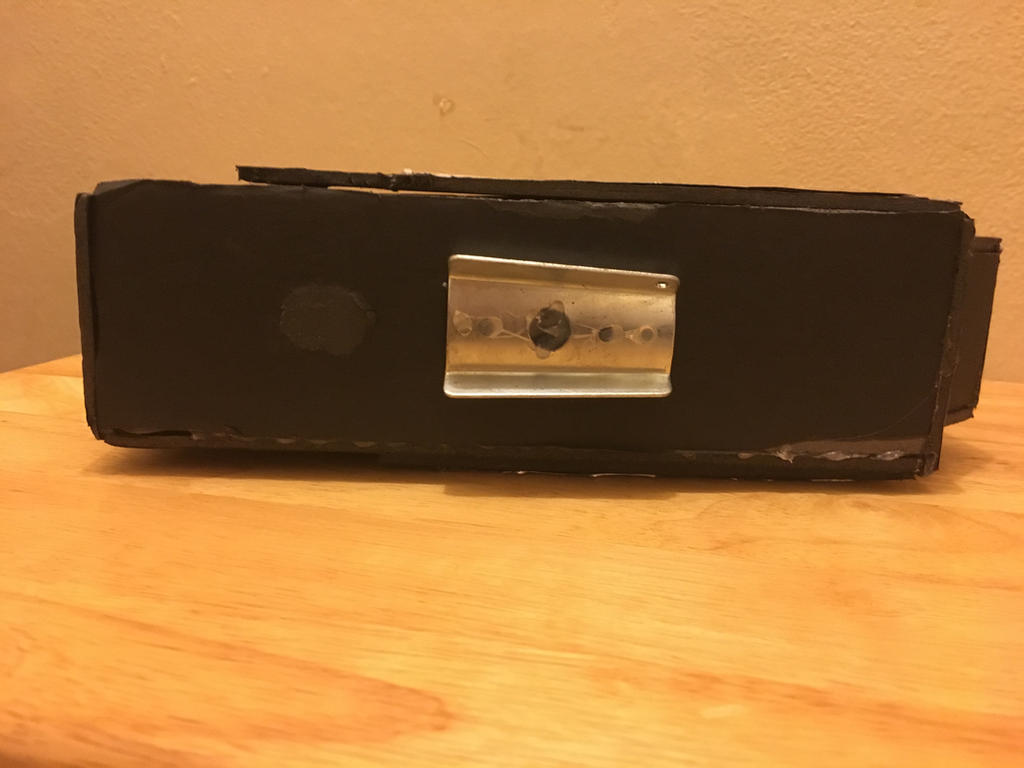
I glued a dixie cup bracket to fit into my trap holster which has been quit lonely without a trap to go into it.
It's very light and easy to make but I'd still like to go at it again. Again, the trap is quite skinny and maybe too long. But I intend to update this thread and show my progress. Might even go step by step.
I think it's a nice start but I still got a long way to go.
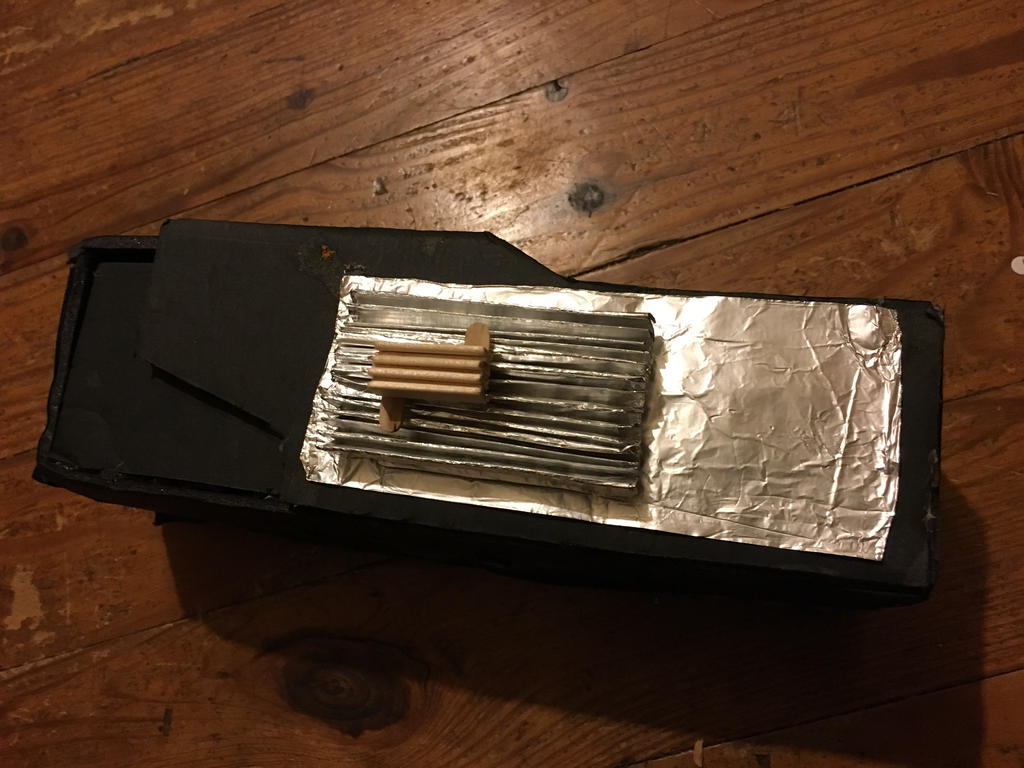
I intend to make a heat sink out of popsickle sticks... because that's worked for some members before.
The two silver/red bars I think will be just two hot glue sticks glued down. Knobs may also be shaped glue sticks...
I have ordered a glossy sticker printer paper for the labels and may or may not do the same for the caution doors. Not sure if I like the matte or glossy look for them. I know the Matty Trap has them glossy.
I do no know what the handle will be or how it'll be fastened. I have the idea of either glue sticks (too skinny), dowel rods (most likely), or some kind of foam tube.
Comparison of a wooden trap, the Matty, and mine. Definitely a little too skinny but not as bad as I thought. Also just noticed the caution stripping is going the wrong direction. Oops. Adjustments to the measurements and improving the cutting skills and v2 should look much much better...
More to come.
My pack was bought on Ebay and it contains a mix of Resin and Nick-a-Tron parts. Nick-a-Tron also supplied me with a foam stunt trap which was quite heavy and did not exactly fit the purposes that I want. That being a cheap, realitively durable, and lightweight prop to fit on my belt. It was all those things, minus it being light weight. It was sadly lost one drunken Halloween and I miss it dearly...
So dearly, that I decided that I would build my own. A hollow one, to make it light on weight. Realitively cheap, I mean it shouldn't cost me more than 5 bucks to make the main board. Other bells and whistles might cost it extra but I doubt it'll be more than 20$... And since I intend to make a similar light weight proton pack one day, I thought a trap would be a nice starting to point to sort of learn the ropes in making props.
I once held the ambition to make such props and sell them but I think the first thing I ought to do is see if I'm any good at making them first. Well, without further ado...
I should mention this was built within 4 hours and was hastily done. I'm calling it a prototype as I am not quite happy with the dimensions yet. The trap is loosely based on a wooden one I bought on Ebay. Not entirely accurate itself but I quite liked some ideas it incorporated to sort of make the design more simple.
Now first things first, I experimented with cutting up an aluminum can and using aluminum foil. The front part of the trap is the can and the side is the aluminum foil. I dub both these experiments failures. Neither were very cooperative in staying straight.
I did however have a lot of luck with the caution doors, which was done by printing out the design on sticker paper. It is not very straight cut nor positioned but I intend to improve on that. Next time I will spray paint sticker paper silver and use this for the metallic parts.
Another shot of the front. As you can see it's very hastily done. Feel free to call it shit, but I am experimenting with the proportions. The trap looks quite skinny and maybe a little too long so I'll probably shorten and fatten it a bit.
The edges are not cut pretty either. I did attempt to bevel the edges but the foam board is basically foam trapped between two construction paper pieces. I have two ideas to try out next since beveling proved quite difficult (but not impossible)
I can either cut the board intricately and fold it together to hide the corners or take strips of construction paper and glue them to the edges to sort of coat them I also need to cut better... maybe a sharper crafting knife.
I'm thinking the longer sides should dominate the front, it looks better that way... failing any attempt future to hide the foam sides.
I glued a dixie cup bracket to fit into my trap holster which has been quit lonely without a trap to go into it.
It's very light and easy to make but I'd still like to go at it again. Again, the trap is quite skinny and maybe too long. But I intend to update this thread and show my progress. Might even go step by step.
I think it's a nice start but I still got a long way to go.
I intend to make a heat sink out of popsickle sticks... because that's worked for some members before.
The two silver/red bars I think will be just two hot glue sticks glued down. Knobs may also be shaped glue sticks...
I have ordered a glossy sticker printer paper for the labels and may or may not do the same for the caution doors. Not sure if I like the matte or glossy look for them. I know the Matty Trap has them glossy.
I do no know what the handle will be or how it'll be fastened. I have the idea of either glue sticks (too skinny), dowel rods (most likely), or some kind of foam tube.
Comparison of a wooden trap, the Matty, and mine. Definitely a little too skinny but not as bad as I thought. Also just noticed the caution stripping is going the wrong direction. Oops. Adjustments to the measurements and improving the cutting skills and v2 should look much much better...
More to come.


 - By edspengler
 - By Fritz