- September 12th, 2015, 7:28 am#4843467
I never know what to say at the start of a new thread, so I'll just get straight to it.
I'd always wanted to build a second trap to go with my first build, and after a bit of 'research' (watching GB2 on a loop for a few days) I had a good idea of what look I was going for. This also had the side-effect of making me appreciate GB2 a lot more, but...anyway...
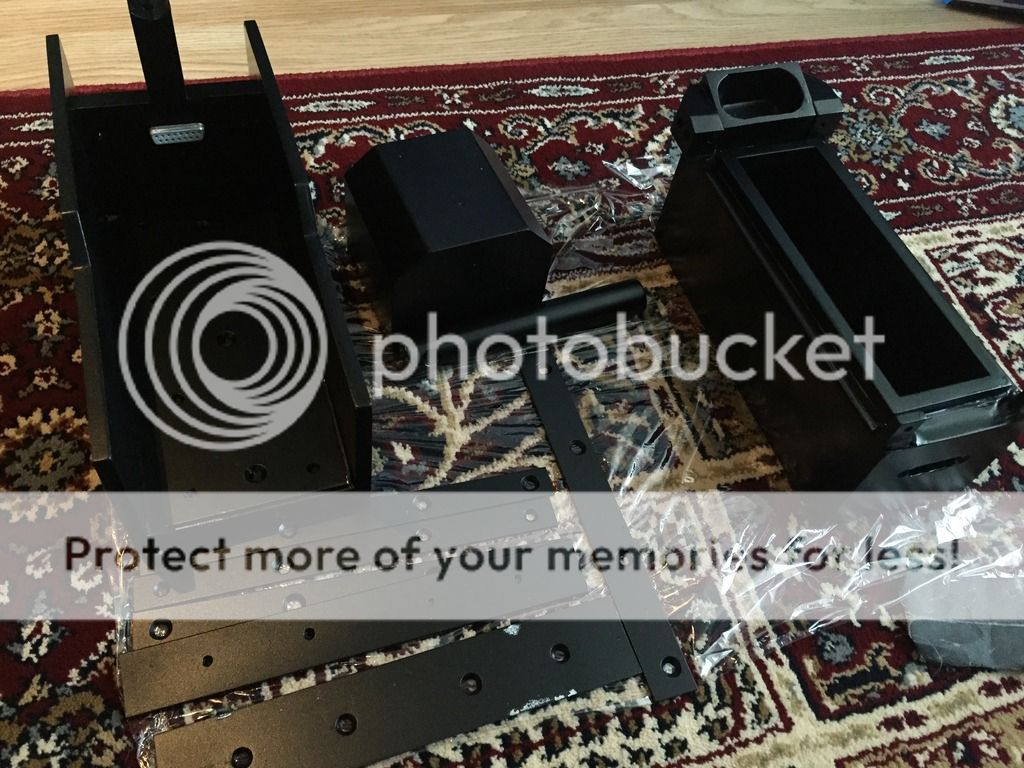
So, obviously I was going to use Nick-a-Tron's kit again:
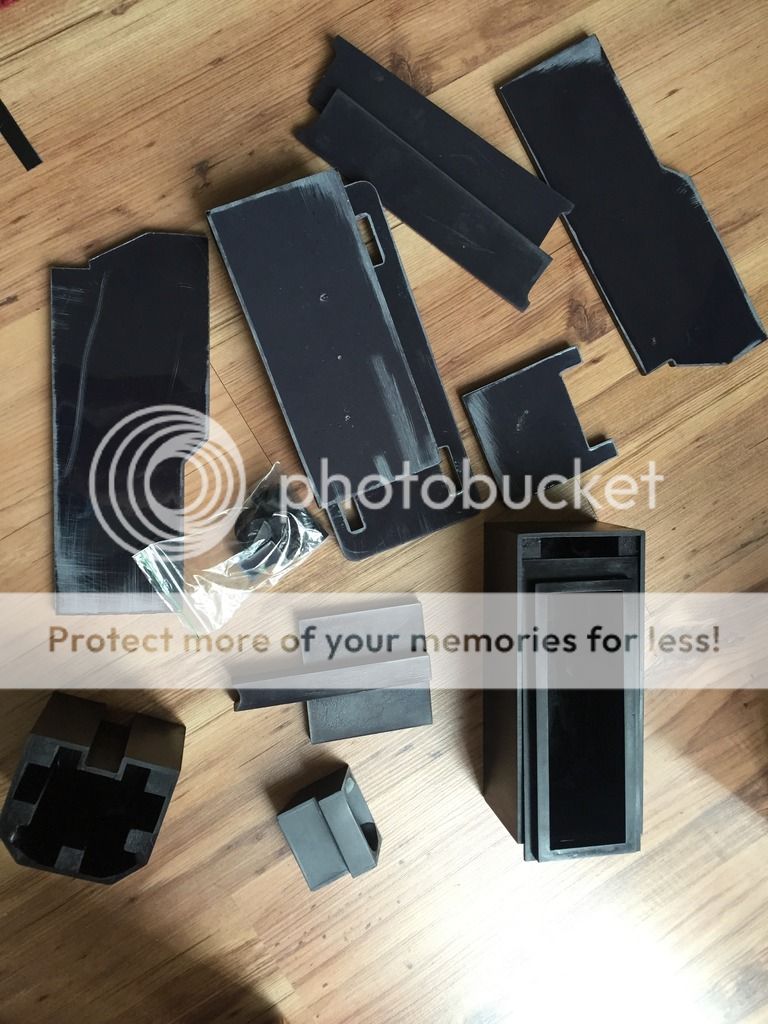
One of the things I like about his kit, other than the fact that the casts are virtually perfect, is that everything fits like a jigsaw. I did do some sanding and filling anyway, but that was more for me than anything else.
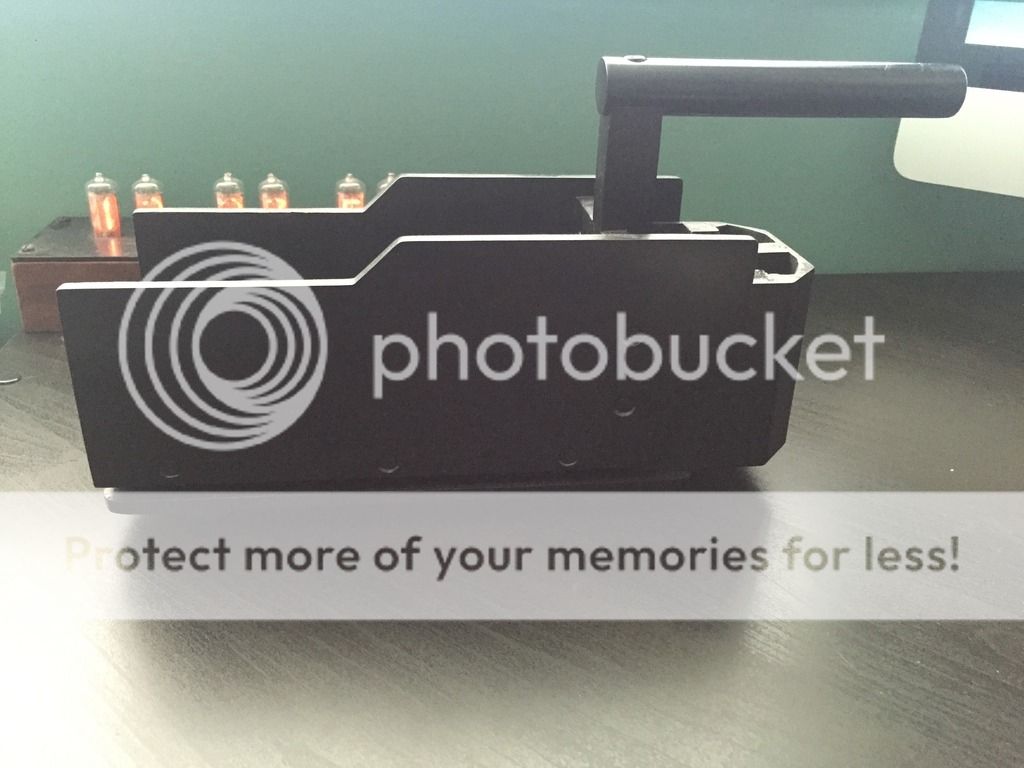
I'd decided that I was going to do a proper rail like the GB1 hero, but in order to do that I had to modify the trap body. The GB2 hero seems to be a new build rather than a refit of the previous film's stuff, so it had some small differences to the GB1 version.
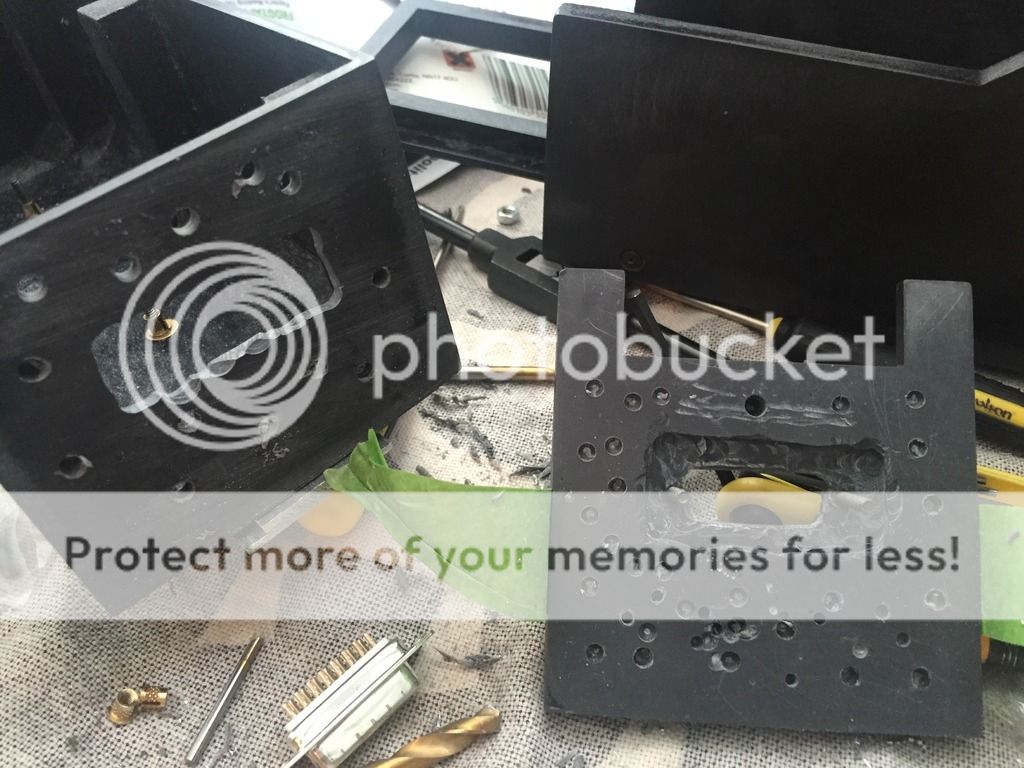
Firstly, I had to widen the trap body to accommodate the cassette, because straight from the box it's a fairly tight fit against the sides. To do this i used a couple of pieces of styrene (1 mm thick), cut to fit the back wall and base of the trap body:
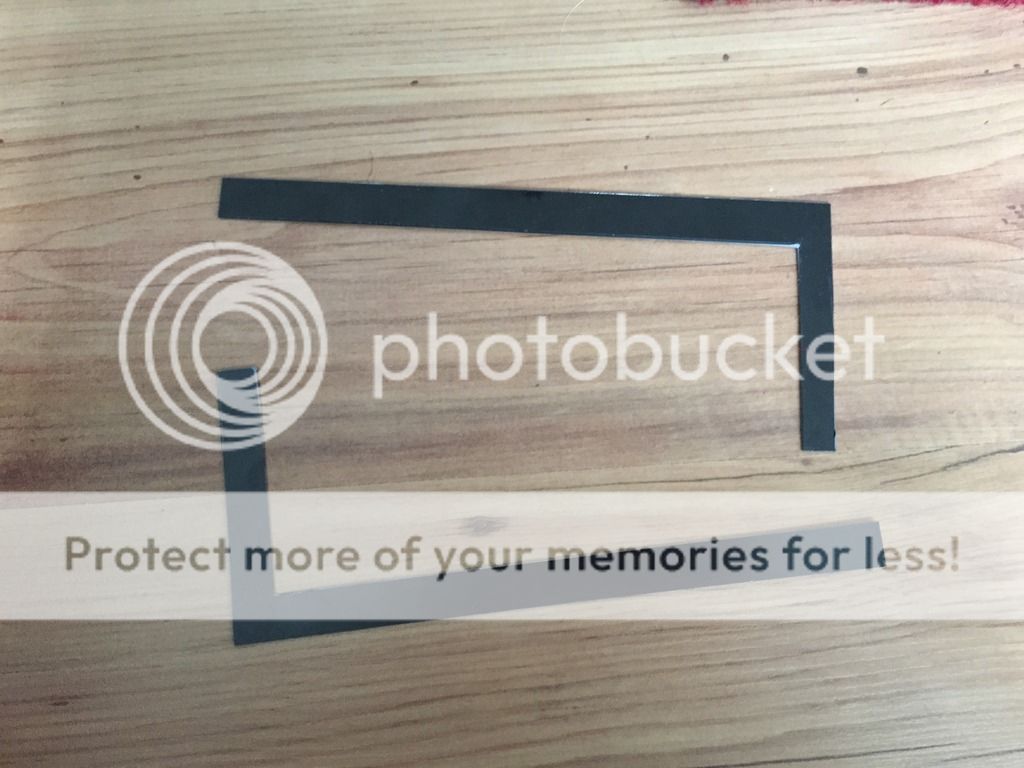
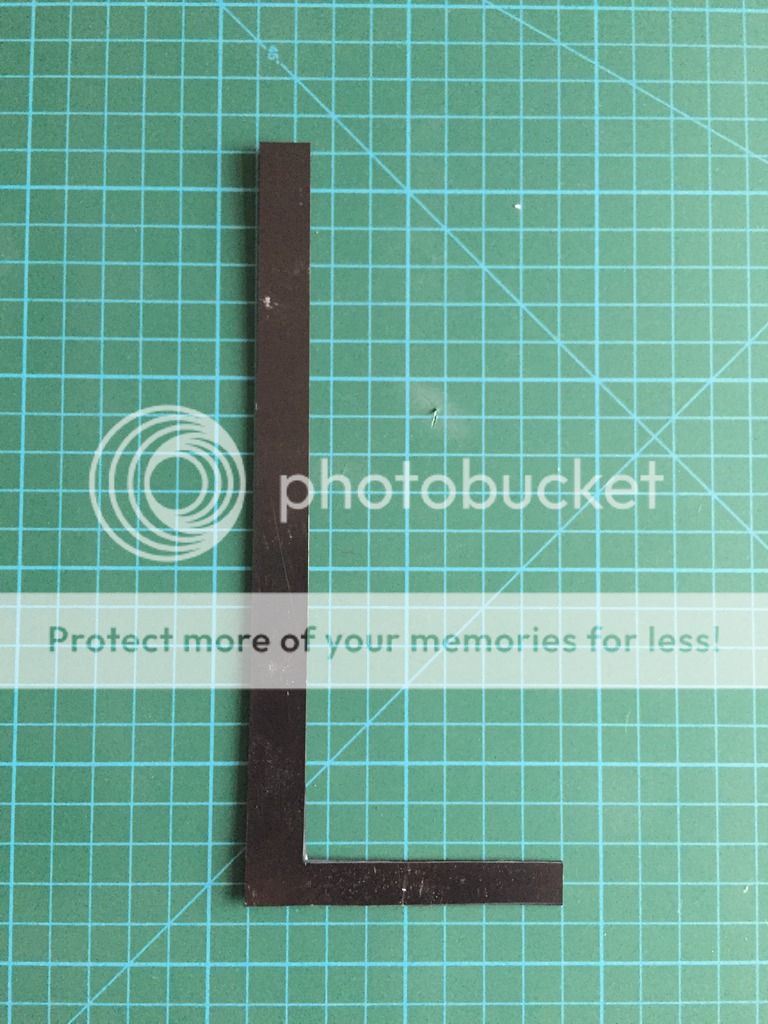
On the second pic you can just about see the screw holes I'd put through the side wall of the trap.
This time around I used countersunk screws (4-40), screwed straight into the resin without inserts. I'd found the inserts less secure than I'd liked on the last build, and as I knew these screws weren't coming out again they were very secure.
I didn't take any pictures of this part of the assembly, but I just screwed the side pieces to the base with long countersunk screws, and attached the back part of the trap in the same way.
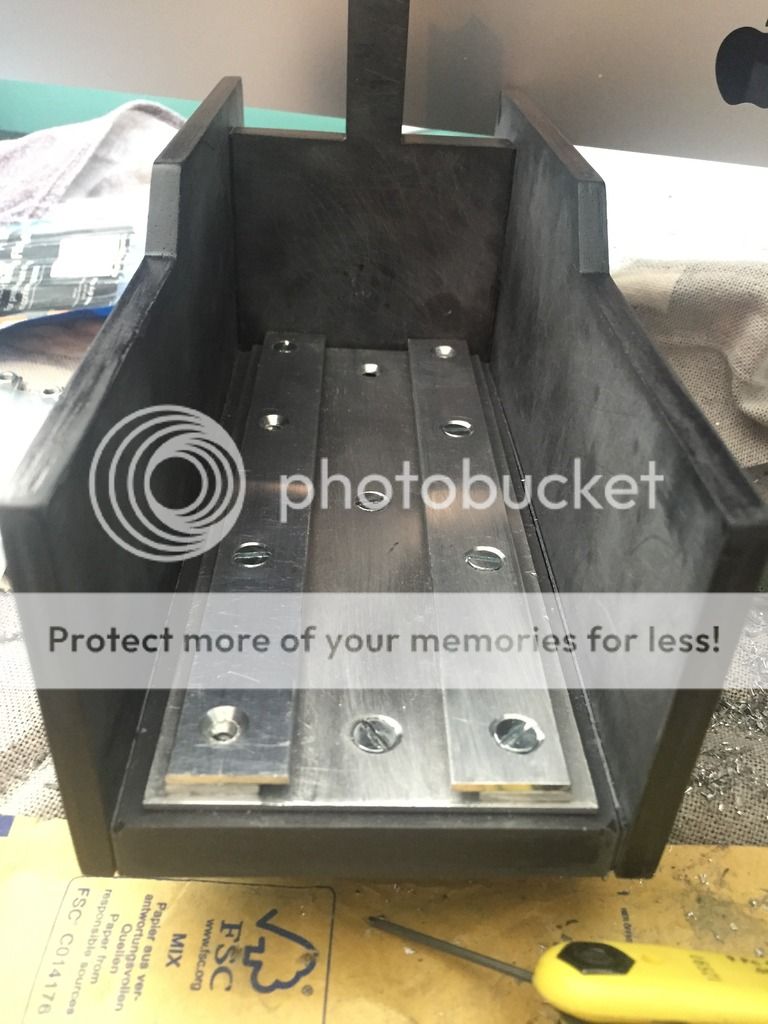
(You can kind of see the styrene pieces between the side walls of the trap)
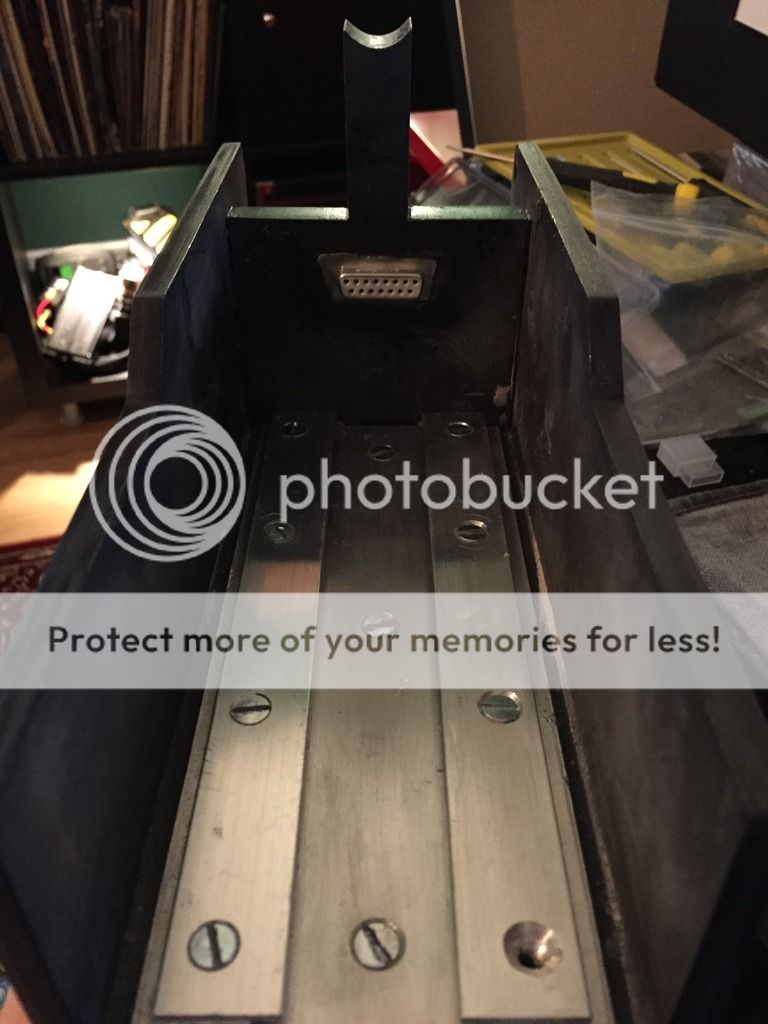
Due to the lack of reference pics for the GB2 hero I had to assume the cartridge track was the same as the GB1 hero, so based my build off those reference photos.
I looked at noslliT's build for reference (http://www.gbfans.com/community/viewtop ... 819#p92558) to see what thickness of metal was used for the track. I can't remember the exact size without looking, but in order to get the clean look I wanted I compromised and used 2 mm plates.
I did plenty of measuring, and in the end settled for these widths:
75 mm (base)
15 mm (lower rail piece)
20 mm (upper rail piece)
25 mm and 35 mm (bottom of cartridge)
These were all 180 mm long, and when fitted up against the back wall gave me the look I wanted similar to the reference photos. The reason I went for these sizes is that I don't have the tools to cut a length of metal with a completely straight edge. Even with filing, etc., I'd never have been completely happy, so I picked these sizes as they were easily found at an online metal shop (may have been eBay).
As you can see I used slightly bigger countersunk screws ('CNTRSK HEAD SLOTTED, ZINC PLATED, 4 mm - two different lengths, from B&Q) as I wanted extra strength.
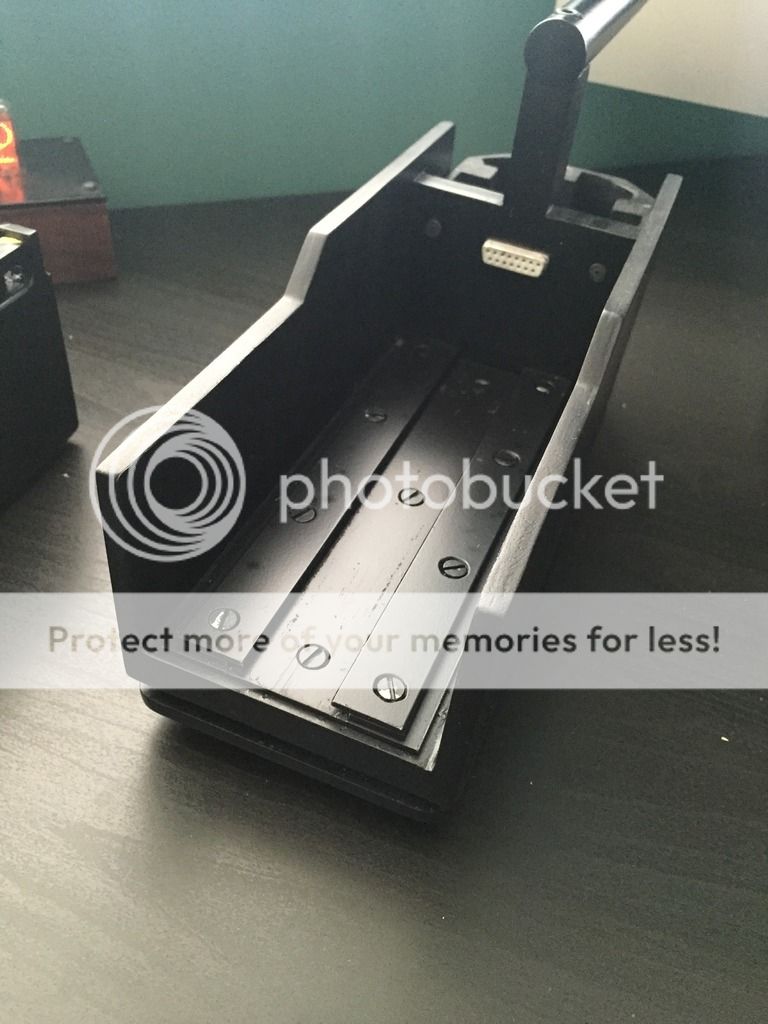
Here I'd started work on the cartridge. You can see the track is partially finished, and is attached from the inside with nuts and washers (well, I didn't have any 4-40 nuts, so used the last of the inserts I had left).
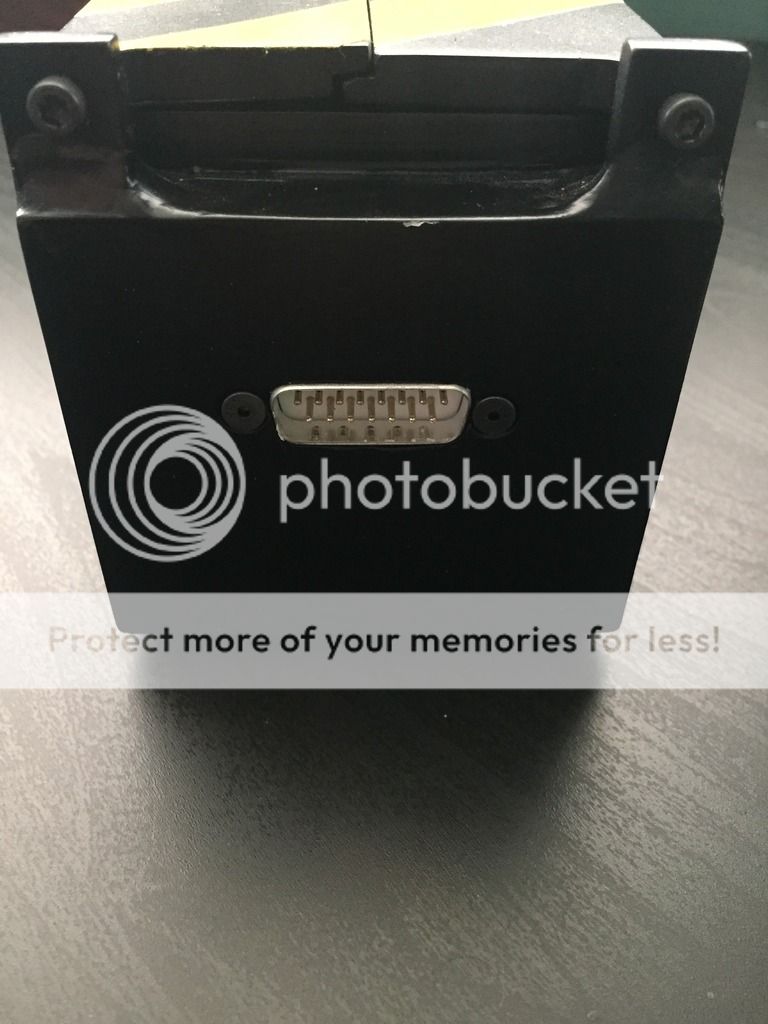
As I was going for full hero looks I needed to attach the 15 pin connector, so I dremelled out the rear of that plate so that the connecter was flush with the outside face of the cartridge. It's not pretty, but the outside is perfect.
Those screw holes are for strength. I epoxied the rear plate to the cartridge, so the more surface area an adhesive has to bond to the stronger the bond. It's the same method I used on my hero thrower's rear handle. Probably overkill but I like to know that everything is SOLID.
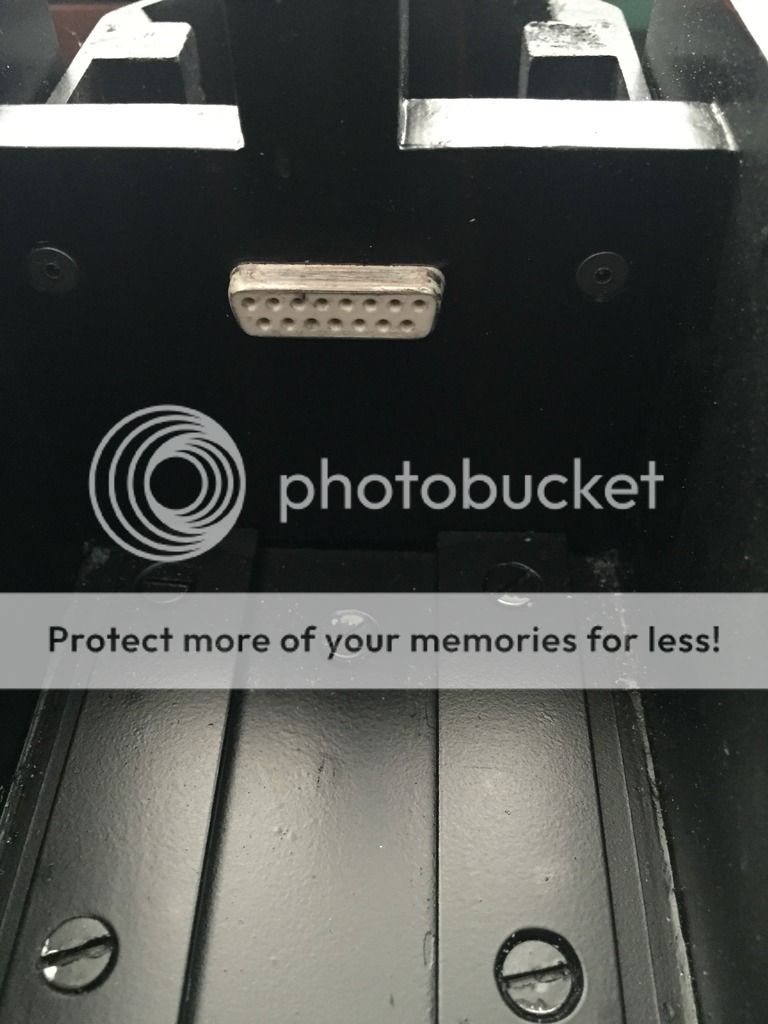
And the matching connector in the trap body. This required a bit more work - I had to dremel out a section of the back panel so that the connector could fit flush, yet still line up with the cartridge properly.
I cut the side 'wings' off this part of the connector, as they would have affected the way I was attaching it. I used Apoxie Sculpt and pressed the connector in place. After lining the cartridge's connector up properly I made sure that that everything was perfect, and left it to set. When cured, I sat the trap upright and poured two part epoxy into the remaining holes. As it was fairly liquid it flowed into the irregular shape and settled smoothly.
Again this was also for strength - as the epoxy was able to run in and around irregular shapes it gave it an increased strength over something like a perfect square, for example. It gave it resistance to being dislodged along its axis as well rotationally (again, similar to my repair of the front handle of my hero thrower).
Once this was dry I used more Apoxie Sculpt and smoothed off this section, as well as all the seams and front section of the trap (followed by plenty of sanding).
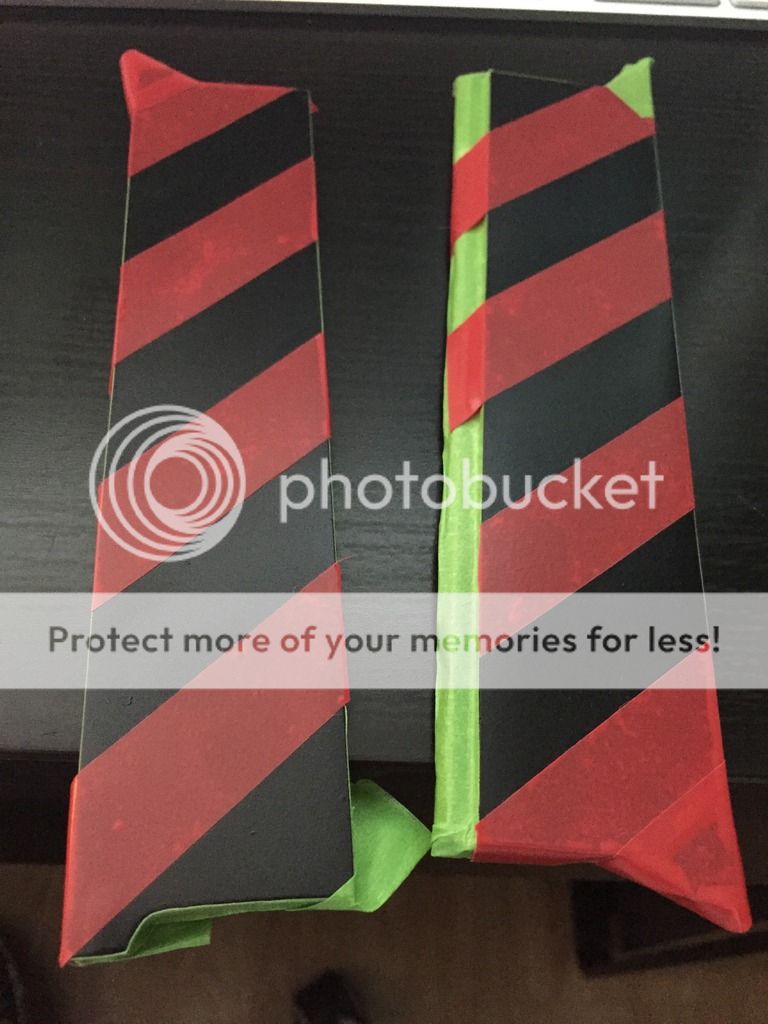
This next bit was a NIGHTMARE! I spent so much time looked at the court room scene and the jogger scene (I believe these are the same trap) to decide on the correct stripe placement. So, after plenty of masking tape and shouting, I finally got everything the way I wanted.
My preferred method is to paint the doors in black first, then mask up and spray the yellow. I make sure the masking tape is secure along the edges and haven't had a problem yet with paint bleeding through.
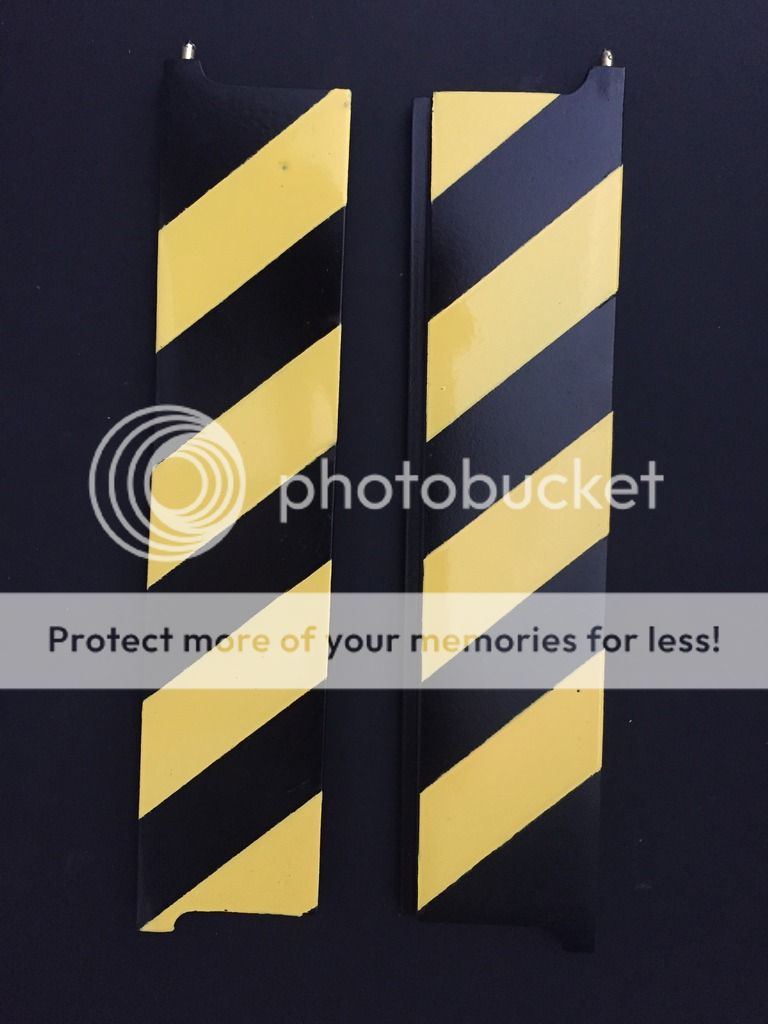
There's nothing I love more than seeing the yellow and black stripes finally painted They're a little bit untidy here but I always go over them anyway. I just use a craft knife and a Sharpie to touch up any edges that need 'sharpening.' Also, I'm eventually going to weather the trap, so there's no need for absolute perfection.
Oh, you can also see the brass rod I used again to attach the doors. This is simply cut into a couple of small pieces and placed into drilled holes (my drill was slightly off so you can see the slight bulge where the rod is a bit too close to the surface of the resin).
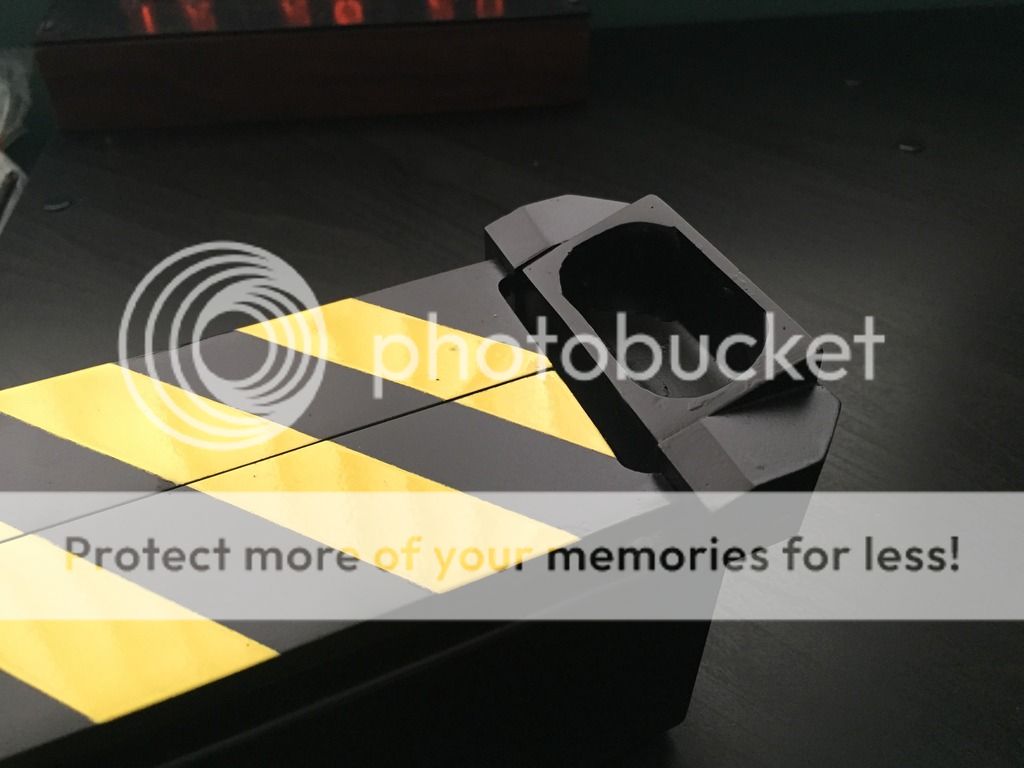
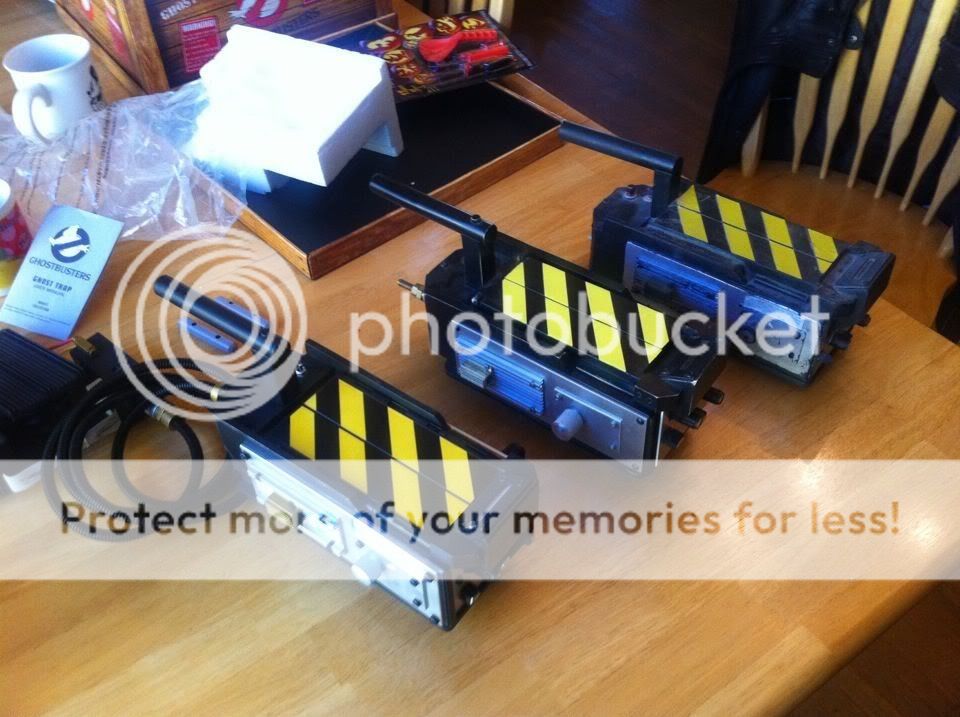
And here is everything finally painted. I'll show some more pics in a sec but you can see what I did to the cartridge here. Like the GB2 trap, I rounded the top edges, and used some Apoxie Sculpt on the rear posts to give a welded look. Not perfect, but I'm very pleased with how it turned out.
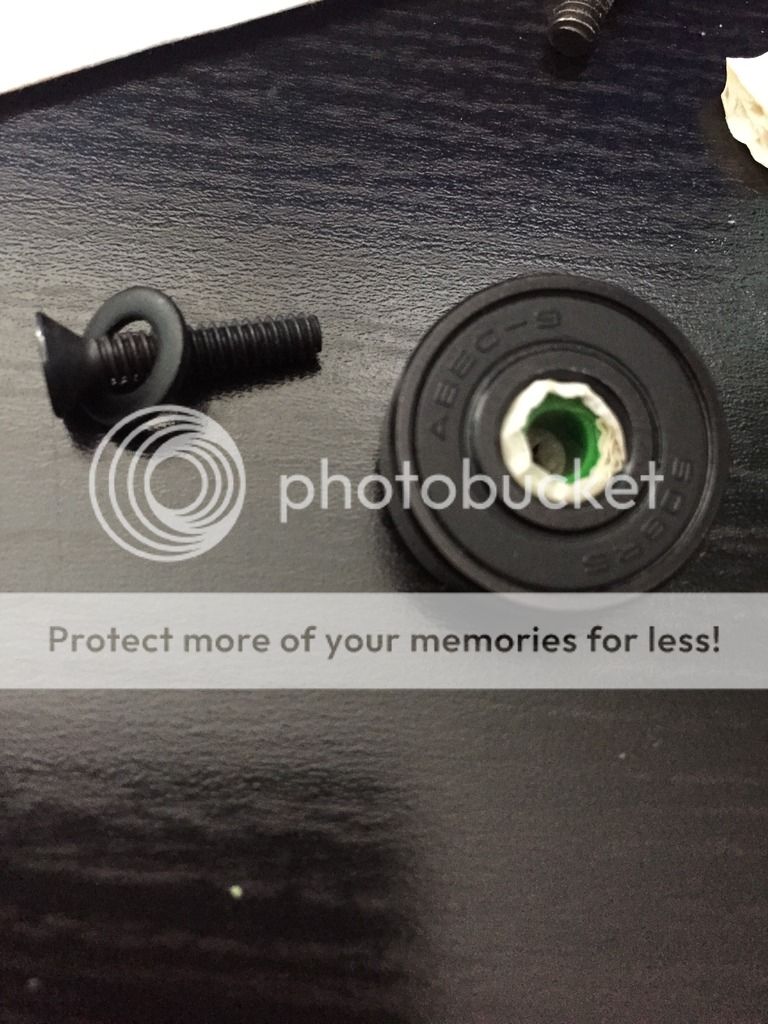
The reference pics showed black-looking wheels on the courtroom trap, so I sourced some black skate bearings rather than the usual stainless steel. I really like the look of them, and think it gives the trap a meaner look.
I used (#6-32 I think) countersunk screws and black painted washer to attach the wheels. As there was a bit of 'give,' I used some left over thrower tubing and masking tape to fill the gap. The inside diameter of the tubing is a perfect fit for the screw, so it's all nice and secure.
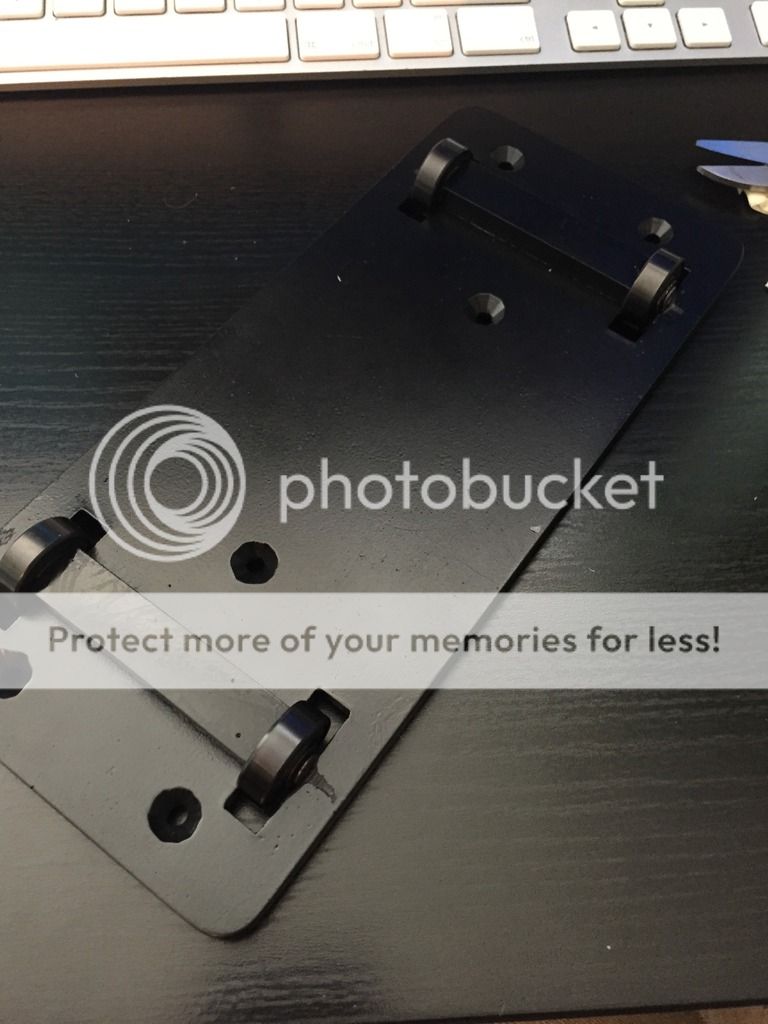
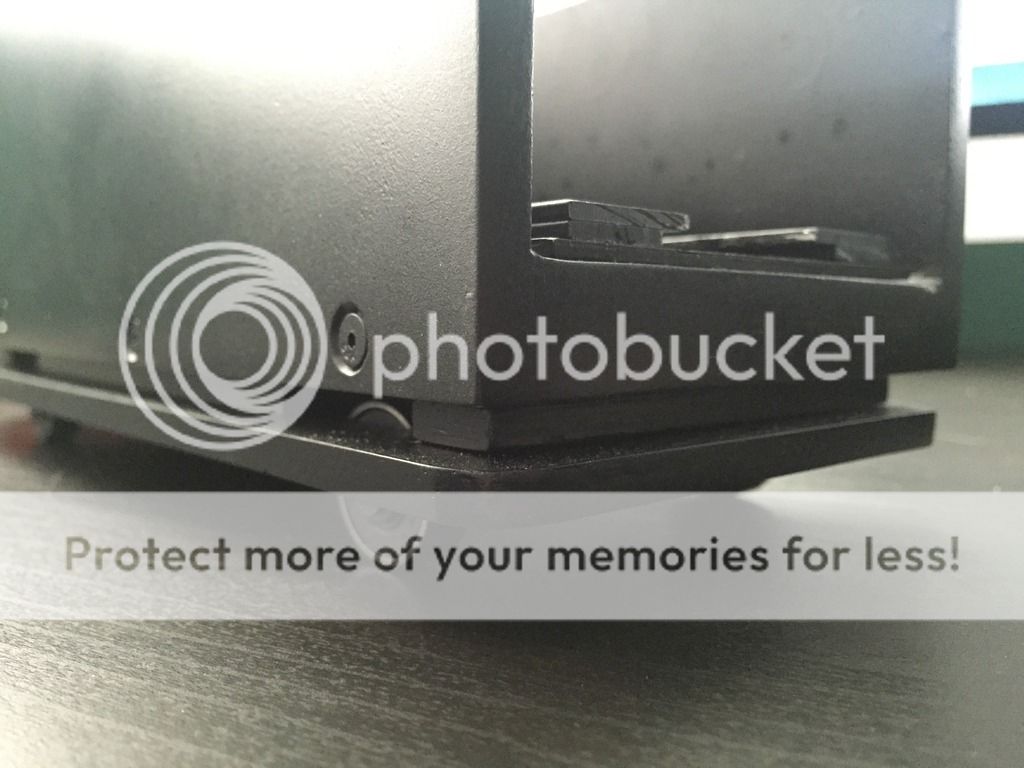
The only downside with Nick's kit, I think, is with the wheels. It's impossible to get the wheels sat at the right height without digging into the resin like you see here. Otherwise the wheels are sat too high and don't look right. It's nothing major, and it can always be filled if required. It's going to spend it's life on a shelf anyway, so as long as the side profile's OK I'm not too bothered about it at the minute.
Also I seem to have messed up the countersinking - there's a little bit of 'chatter' on the holes underneath. Again, could maybe be hidden with weathering but it's on the bottom anyway.
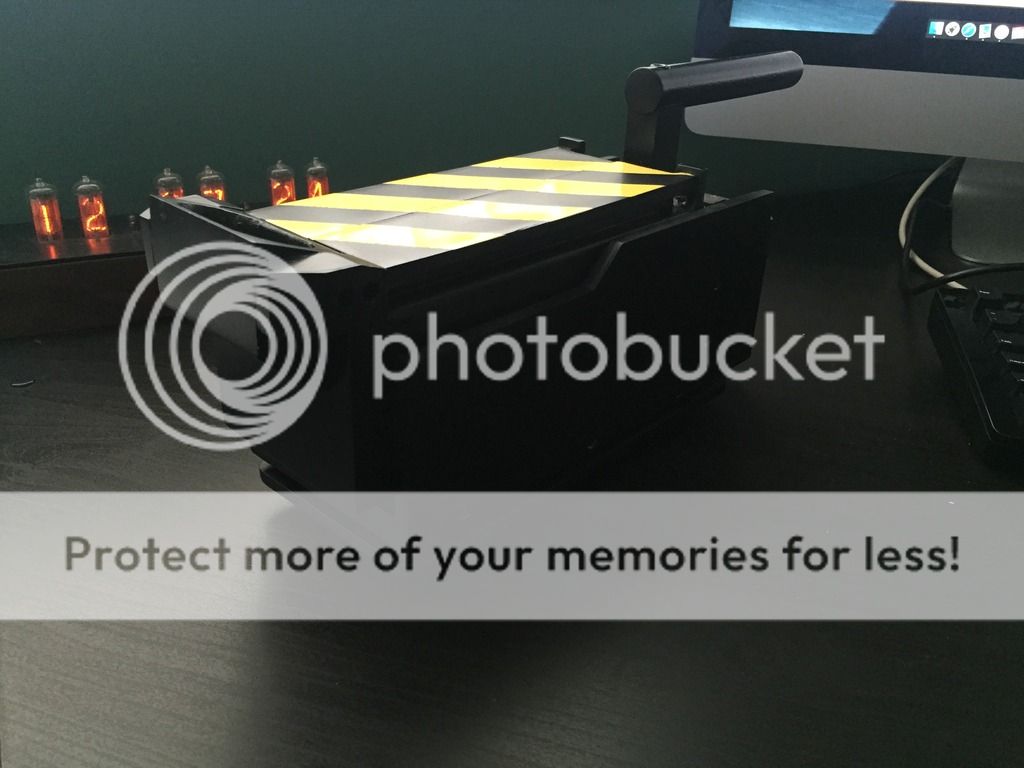
The finished pics. Here the track has been fitted for it's final time, so everything has been lined up and worn in. The bare metal track was as smooth as butter, but once it's painted everything gets a little tight for space. A bit of 'use' gets everything worn in, although I wonder if a bit of Fullers Earth or talc would smooth things out?
Sorry for the quality of some of these pics but it was a bit bright through the window.
The battery box is secured with the two screws in the base and two screws by the 15-pin connector. Once I source some metal plating I'll use a dab of epoxy on the screw threads inside the battery box to permanently attach it. The top handle has a (#10-24) screw, screwed straight into the handle post. The top hole is drilled to allow the screw to sink part-way into the handle, and some epoxy inside the screw hole before tightening secures everything.
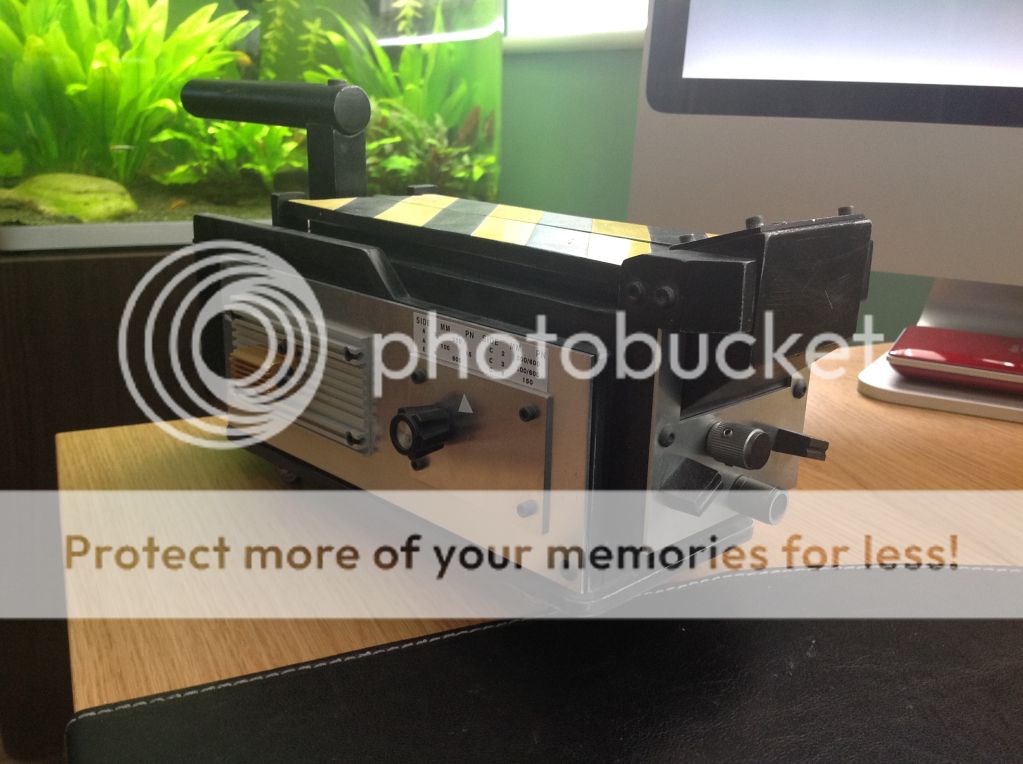
See what I mean about the wheels sitting 'right'? I just like this look a lot more for some reason. You can also see where I've smoothed out the seams at the front, as the courtroom trap seemed to have a 'one-piece' construction.
I'm quite pleased with how this turned out. My sanding before painting gave the connector a weathered look I quite like, and for painting I just masked a straight line before touching up the back panel. Came out nice and neat.
And the cartridge. This shows the 'weld' a bit better, and although it's not perfect I'm happy with how it came out.

Like the trap rails, I tried to emulate the screw locations seen on the GB1 hero. It's not perfect, but it looks the part, and is nice and secure.
Just waiting for plating! The holes are drilled for the ear screws but I haven't fitted them yet. The front indicator is attached with a screw, inserted at an angle and secured through a thick part of resin at the front of the cartridge. The ears themselves are each secured with two screws into the indicator.
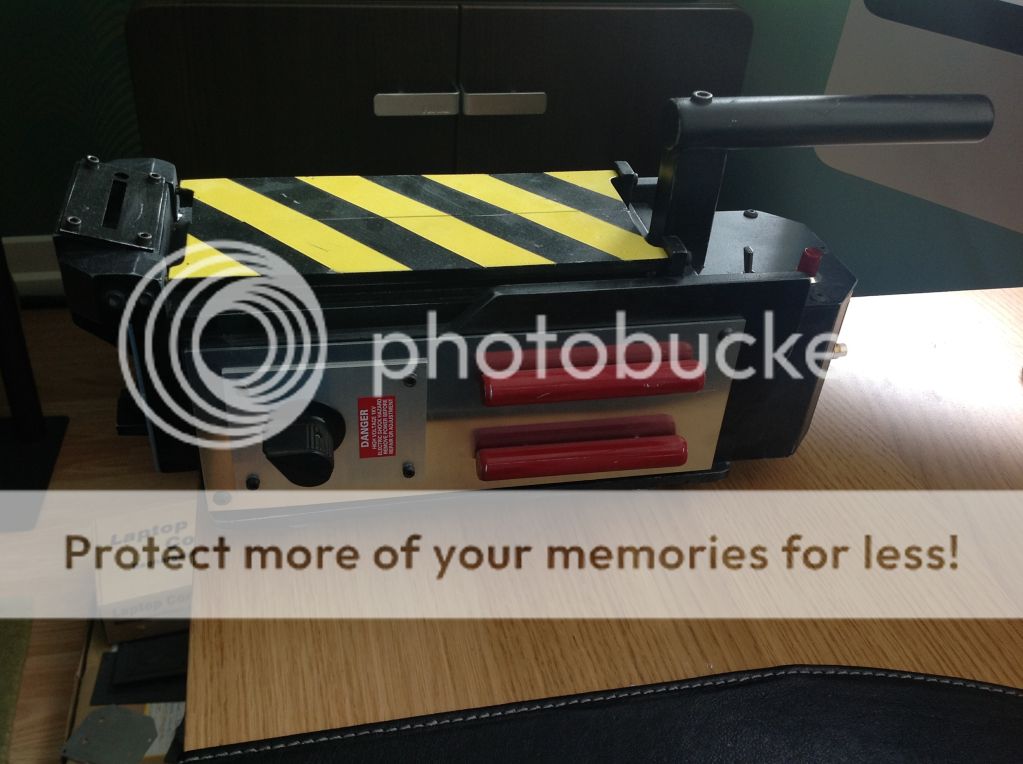
The final picture for now...
It doesn't show much detail due to the light, but you can just make out the height of the cartridge in comparison to the trap body. The 2 mm plating I used for the rails gives it the raised look the courtroom trap has, so I'm kind of glad I decided to compromise!
All I'm waiting for now is some proper-sized GB2 plating, and once I have that I can finish attaching all the final bits. For now I have painted the front knobs black, but will finish them off when I attach the plates. Then I'll hopefully take some better pictures!
Thanks again for reading!
Dan.
I'd always wanted to build a second trap to go with my first build, and after a bit of 'research' (watching GB2 on a loop for a few days) I had a good idea of what look I was going for. This also had the side-effect of making me appreciate GB2 a lot more, but...anyway...
So, obviously I was going to use Nick-a-Tron's kit again:
One of the things I like about his kit, other than the fact that the casts are virtually perfect, is that everything fits like a jigsaw. I did do some sanding and filling anyway, but that was more for me than anything else.
I'd decided that I was going to do a proper rail like the GB1 hero, but in order to do that I had to modify the trap body. The GB2 hero seems to be a new build rather than a refit of the previous film's stuff, so it had some small differences to the GB1 version.
Firstly, I had to widen the trap body to accommodate the cassette, because straight from the box it's a fairly tight fit against the sides. To do this i used a couple of pieces of styrene (1 mm thick), cut to fit the back wall and base of the trap body:
On the second pic you can just about see the screw holes I'd put through the side wall of the trap.
This time around I used countersunk screws (4-40), screwed straight into the resin without inserts. I'd found the inserts less secure than I'd liked on the last build, and as I knew these screws weren't coming out again they were very secure.
I didn't take any pictures of this part of the assembly, but I just screwed the side pieces to the base with long countersunk screws, and attached the back part of the trap in the same way.
(You can kind of see the styrene pieces between the side walls of the trap)
Due to the lack of reference pics for the GB2 hero I had to assume the cartridge track was the same as the GB1 hero, so based my build off those reference photos.
I looked at noslliT's build for reference (http://www.gbfans.com/community/viewtop ... 819#p92558) to see what thickness of metal was used for the track. I can't remember the exact size without looking, but in order to get the clean look I wanted I compromised and used 2 mm plates.
I did plenty of measuring, and in the end settled for these widths:
75 mm (base)
15 mm (lower rail piece)
20 mm (upper rail piece)
25 mm and 35 mm (bottom of cartridge)
These were all 180 mm long, and when fitted up against the back wall gave me the look I wanted similar to the reference photos. The reason I went for these sizes is that I don't have the tools to cut a length of metal with a completely straight edge. Even with filing, etc., I'd never have been completely happy, so I picked these sizes as they were easily found at an online metal shop (may have been eBay).
As you can see I used slightly bigger countersunk screws ('CNTRSK HEAD SLOTTED, ZINC PLATED, 4 mm - two different lengths, from B&Q) as I wanted extra strength.
Here I'd started work on the cartridge. You can see the track is partially finished, and is attached from the inside with nuts and washers (well, I didn't have any 4-40 nuts, so used the last of the inserts I had left).
As I was going for full hero looks I needed to attach the 15 pin connector, so I dremelled out the rear of that plate so that the connecter was flush with the outside face of the cartridge. It's not pretty, but the outside is perfect.
Those screw holes are for strength. I epoxied the rear plate to the cartridge, so the more surface area an adhesive has to bond to the stronger the bond. It's the same method I used on my hero thrower's rear handle. Probably overkill but I like to know that everything is SOLID.
And the matching connector in the trap body. This required a bit more work - I had to dremel out a section of the back panel so that the connector could fit flush, yet still line up with the cartridge properly.
I cut the side 'wings' off this part of the connector, as they would have affected the way I was attaching it. I used Apoxie Sculpt and pressed the connector in place. After lining the cartridge's connector up properly I made sure that that everything was perfect, and left it to set. When cured, I sat the trap upright and poured two part epoxy into the remaining holes. As it was fairly liquid it flowed into the irregular shape and settled smoothly.
Again this was also for strength - as the epoxy was able to run in and around irregular shapes it gave it an increased strength over something like a perfect square, for example. It gave it resistance to being dislodged along its axis as well rotationally (again, similar to my repair of the front handle of my hero thrower).
Once this was dry I used more Apoxie Sculpt and smoothed off this section, as well as all the seams and front section of the trap (followed by plenty of sanding).
This next bit was a NIGHTMARE! I spent so much time looked at the court room scene and the jogger scene (I believe these are the same trap) to decide on the correct stripe placement. So, after plenty of masking tape and shouting, I finally got everything the way I wanted.
My preferred method is to paint the doors in black first, then mask up and spray the yellow. I make sure the masking tape is secure along the edges and haven't had a problem yet with paint bleeding through.
There's nothing I love more than seeing the yellow and black stripes finally painted
Oh, you can also see the brass rod I used again to attach the doors. This is simply cut into a couple of small pieces and placed into drilled holes (my drill was slightly off so you can see the slight bulge where the rod is a bit too close to the surface of the resin).
And here is everything finally painted. I'll show some more pics in a sec but you can see what I did to the cartridge here. Like the GB2 trap, I rounded the top edges, and used some Apoxie Sculpt on the rear posts to give a welded look. Not perfect, but I'm very pleased with how it turned out.
The reference pics showed black-looking wheels on the courtroom trap, so I sourced some black skate bearings rather than the usual stainless steel. I really like the look of them, and think it gives the trap a meaner look.
I used (#6-32 I think) countersunk screws and black painted washer to attach the wheels. As there was a bit of 'give,' I used some left over thrower tubing and masking tape to fill the gap. The inside diameter of the tubing is a perfect fit for the screw, so it's all nice and secure.
The only downside with Nick's kit, I think, is with the wheels. It's impossible to get the wheels sat at the right height without digging into the resin like you see here. Otherwise the wheels are sat too high and don't look right. It's nothing major, and it can always be filled if required. It's going to spend it's life on a shelf anyway, so as long as the side profile's OK I'm not too bothered about it at the minute.
Also I seem to have messed up the countersinking - there's a little bit of 'chatter' on the holes underneath. Again, could maybe be hidden with weathering but it's on the bottom anyway.
The finished pics. Here the track has been fitted for it's final time, so everything has been lined up and worn in. The bare metal track was as smooth as butter, but once it's painted everything gets a little tight for space. A bit of 'use' gets everything worn in, although I wonder if a bit of Fullers Earth or talc would smooth things out?
Sorry for the quality of some of these pics but it was a bit bright through the window.
The battery box is secured with the two screws in the base and two screws by the 15-pin connector. Once I source some metal plating I'll use a dab of epoxy on the screw threads inside the battery box to permanently attach it. The top handle has a (#10-24) screw, screwed straight into the handle post. The top hole is drilled to allow the screw to sink part-way into the handle, and some epoxy inside the screw hole before tightening secures everything.
See what I mean about the wheels sitting 'right'? I just like this look a lot more for some reason. You can also see where I've smoothed out the seams at the front, as the courtroom trap seemed to have a 'one-piece' construction.
I'm quite pleased with how this turned out. My sanding before painting gave the connector a weathered look I quite like, and for painting I just masked a straight line before touching up the back panel. Came out nice and neat.
And the cartridge. This shows the 'weld' a bit better, and although it's not perfect I'm happy with how it came out.
Like the trap rails, I tried to emulate the screw locations seen on the GB1 hero. It's not perfect, but it looks the part, and is nice and secure.
Just waiting for plating! The holes are drilled for the ear screws but I haven't fitted them yet. The front indicator is attached with a screw, inserted at an angle and secured through a thick part of resin at the front of the cartridge. The ears themselves are each secured with two screws into the indicator.
The final picture for now...
It doesn't show much detail due to the light, but you can just make out the height of the cartridge in comparison to the trap body. The 2 mm plating I used for the rails gives it the raised look the courtroom trap has, so I'm kind of glad I decided to compromise!
All I'm waiting for now is some proper-sized GB2 plating, and once I have that I can finish attaching all the final bits. For now I have painted the front knobs black, but will finish them off when I attach the plates. Then I'll hopefully take some better pictures!
Thanks again for reading!
Dan.
alphabeta001, Glenn Frederick liked this


 - By mrmichaelt
 - By pda4ever
 - By UncannyGirl
 - By Kingpin